Granny clusters give this crochet stocking a classic holiday feel, while the shaped heel and playful bubble cuff make it especially fun to personalize.
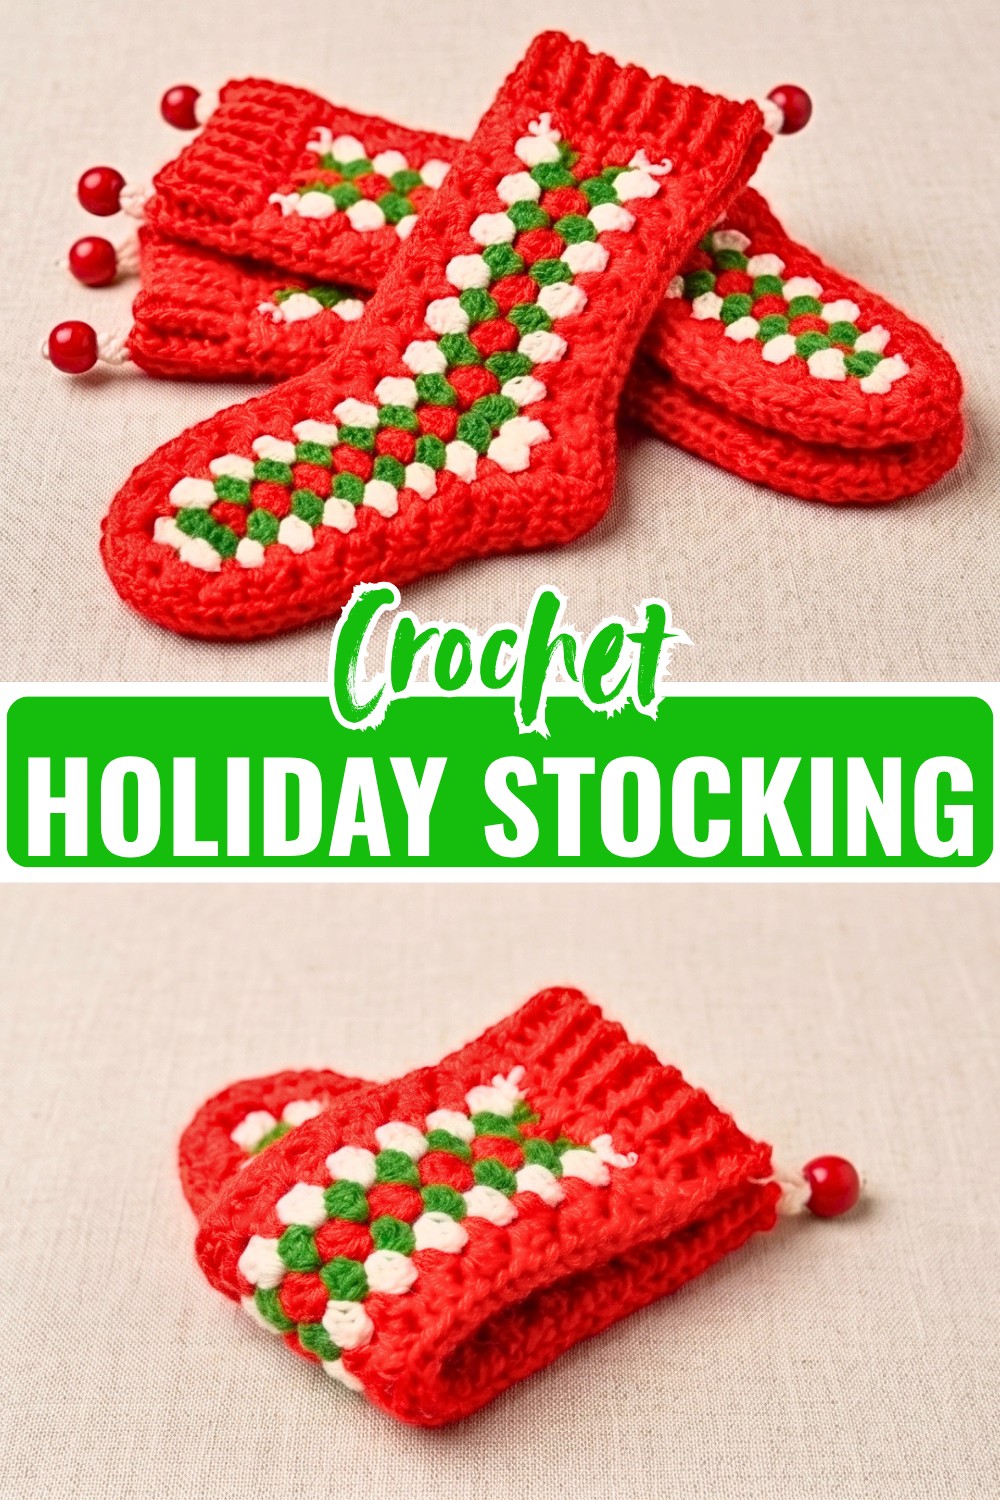
Crochet Holiday Stocking
Christmas crochet stockings are the kind of handmade decoration that can become part of a family’s holiday traditions year after year. This version combines familiar red, green, and white shades with granny-cluster texture, giving the stocking a cozy look while keeping the construction approachable for a confident beginner.
The shaping is what makes this stocking especially satisfying to crochet. The body begins with a simple foundation and gradually develops the heel and toe curves, while the ribbed cuff gives the finished crochet stocking a more polished edge. If you are making one to hold treats or small gifts, the sturdy medium-weight yarn also makes it practical enough to use throughout the season.
Credit My Yarn Loft by Tansy
Materials & Tools Needed
- Yarn:
- Main Stays Acrylic Yarn in red – approximately 14 oz / 400 g
- Red Heart Super Saver in white – approximately 8 oz / 225 g
- Red Heart Super Saver in green – approximately 8 oz / 225 g
- All yarns are 4-weight medium, 100% acrylic.
- Crochet Hook: 5 mm (H) crochet hook
- Tapestry Needle: For joining, securing color changes, and weaving in ends
- Scissors
- Optional: Fabric lining if you want extra support when filling the stocking with heavier items
Finished Size & Customization Ideas
- Finished Size: Approximately standard holiday-stocking size, suitable for small gifts, treats, and seasonal display.
- Color Options: Keep the classic red, green, and white combination, or replace the green with gold, cream, or another accent shade.
- Yarn Choice: Cotton can give the stocking a firmer feel, while acrylic provides more stretch and softness.
- Lining: A fabric lining is useful if the stocking will regularly hold heavier treats or gifts.
A Helpful Note Before You Start
The heel and toe are the parts to watch most closely. When the instructions call for 2 granny clusters in the same space separated by ch 2, those increases are intentional—they create the curve rather than simply adding extra fullness. Keep your cluster placement consistent from row to row so the stocking develops a recognizable shape.
Pattern Abbreviations & Terminology
- ch: chain
- dc: double crochet
- hdc: half double crochet
- sl st: slip stitch
- fpdc: front post double crochet
- bpdc: back post double crochet
- st/sts: stitch/stitches
- Granny cluster: 3 dc worked into the same space

Step-by-Step Crochet Instructions
Step 1: Foundation Chain and First Row
Foundation: Make a slip knot and chain 42 sts.
Row 1: Work 1 dc into the 3rd ch from hook, then 1 dc in each ch across; before completing the final dc, change to green by pulling green through the last 2 loops. (40 dc)
Tip: The starting chain is 42, but the first two chains are skipped for the dc height, leaving 40 actual dc. Keeping this count correct will make the later granny-cluster placement much easier.

Step 2: Begin the Granny-Cluster Body
Row 2: Ch 2, then work the first 3-dc granny cluster into the space between stitches; skip 3 sts and repeat the 3-dc cluster across, ending with 1 dc in the final stitch. (7 granny clusters)
Rather than working each cluster into the top loops of a stitch, place the clusters between the stitches as described. This creates the open spaces that the next rows use for their clusters.

Step 3: Shape the Heel
Row 3: Ch 2, work 1 dc into the space of the last stitch, then continue with 3 granny clusters; at the heel section, work 2 granny clusters into the same space with ch 2 between them, then continue the granny-cluster pattern across.
The doubled cluster is the important shaping point here. It should not be mistaken for a normal repeat—this extra cluster widens the heel area and helps create the stocking’s curved profile.
Step 4: Continue the Stocking Body
Continue working the granny-cluster pattern across the following rows, using the same shaping principle where the heel and toe curves require additional width.
When changing colors, make the switch before completing the final pull-through of the last stitch in the current color. This gives the new shade a cleaner transition at the edge.
As you work, check the overall silhouette occasionally. The stocking should gradually develop a curved heel and toe rather than remaining a straight rectangular tube.
Step 5: Create the Ribbed Cuff
Cuff Base: Work a round of hdc around the upper edge of the stocking, placing 2 hdc around each post/stitch along the edge. Ch 2 and turn.
Ribbing Row: Alternate fpdc and bpdc across the row to create the raised ribbed texture.
Following Rows: Continue working fpdc into fpdc and bpdc into bpdc, maintaining the same alternating pattern.
Reader check: Once the first ribbing row is complete, the raised stitches should begin forming vertical ribs. If the texture looks flat, check that each fpdc is being worked around the front post and each bpdc around the back post rather than into the stitch top.

Step 6: Add the Bubble-Stitch Edge
a
Using white yarn, work the decorative bubble stitches across the cuff.
For each bubble, work 2 extended double crochets, keeping the loops on the hook, then pull through all accumulated loops and follow with 1 sc. Alternate the bubble sections with single crochets across the top.
The bubbles are meant to stand out from the ribbed cuff, so avoid pulling them excessively tight as you close the stitch. A slightly relaxed pull helps the texture remain visible after the stocking is finished.
Assembly
Place the two completed stocking panels together with the wrong sides facing outward.
Using the matching yarn, join the edges with a slip-stitch seam or whipstitch, working around the sides and bottom while keeping the top opening unstitched.
Once the seam is secure, turn the stocking right side out and gently smooth the heel and toe curves with your fingers.

Add the Hanging Loop
Chain approximately 12–15 sts, then attach the chain securely to the upper side of the stocking. Reinforce the attachment with several stitches so the loop can support the stocking when it is filled.
Optional Fabric Lining
If you plan to fill the stocking with heavier gifts, a simple fabric lining can help reduce stretching. This is optional—the crocheted stocking can be used without one for lightweight treats and decorative purposes.

Final Finishing
Weave in every remaining yarn end, paying particular attention to the color-change points. Trim the tails only after they are securely woven through several stitches.
Your finished stocking now has three distinct details working together: the colorful granny-cluster body, the structured ribbed cuff, and the raised bubble-stitch trim. That combination gives a traditional stocking shape a little extra texture without making the entire design complicated.