Here’s how to crochet a tiny acorn keychain with a rounded beige body, textured brown cap, and hanging loop using just a little yarn.
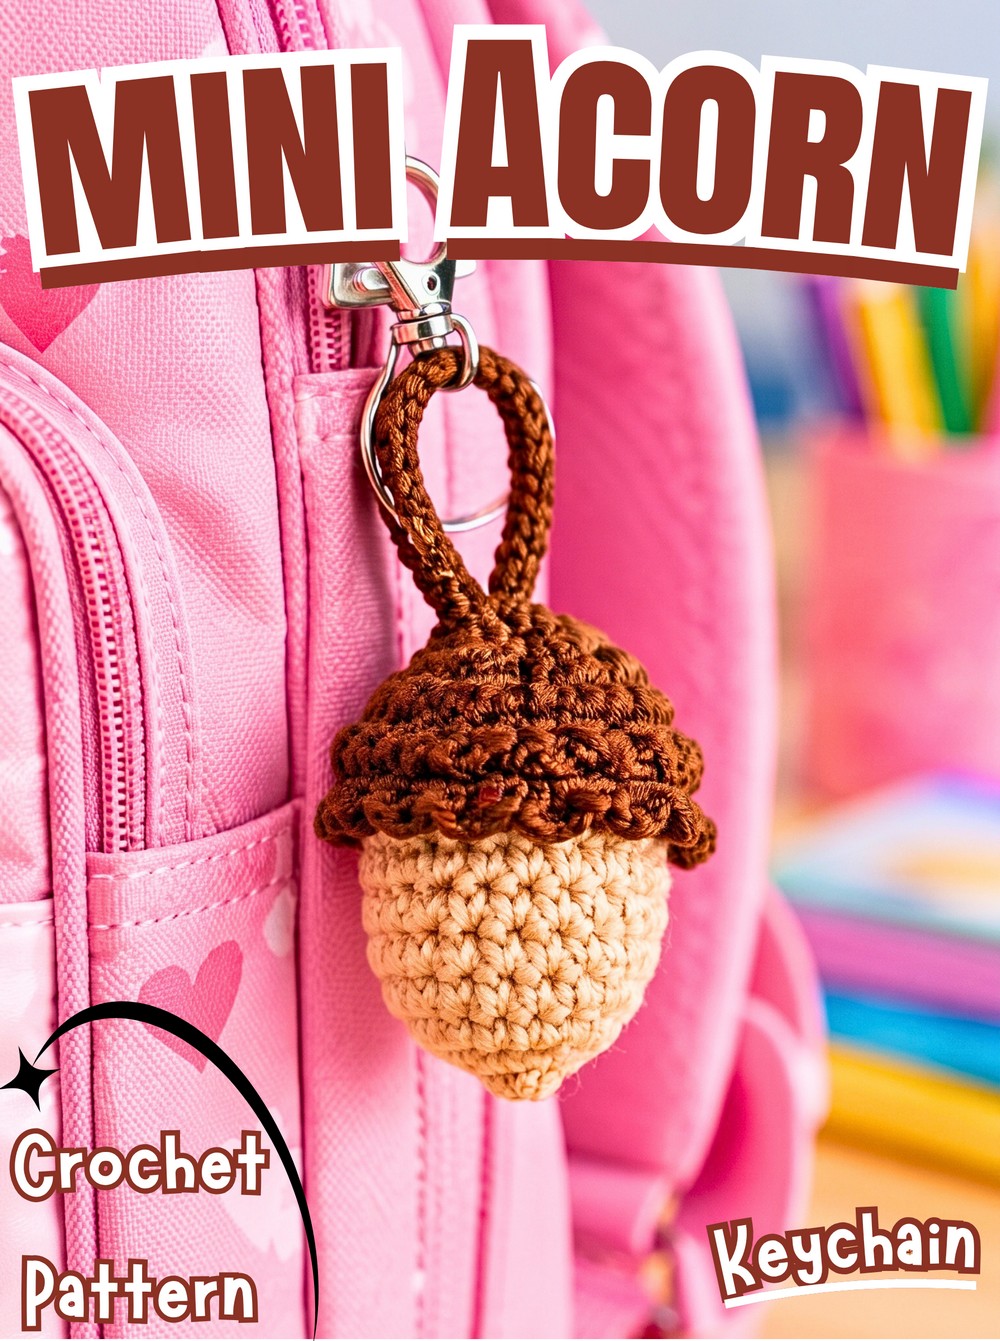
Small autumn accessories can make an everyday bag feel more personal, and this crochet acorn adds a sweet, natural touch. Its warm beige body and brown textured cap create the familiar look of a real crochet acorn, while the little charm looks especially cute hanging from a pink backpack, purse, or zipper.
With just two yarn colors and a small amount of stuffing, you can make this crochet acorn in around 20 minutes once you are comfortable with the stitches. It is a useful way to use leftover yarn, and its beginner-friendly amigurumi shape offers a gentle introduction to crocheting small stuffed items. Follow the body, cap, and hanging-loop instructions below to finish your own woodland-inspired accessory.
Credit: Magic rings crochet
Why This Acorn Is So Special
This little acorn combines a recognizable autumn shape with a practical hanging loop, making it more than just a seasonal decoration.
- A cute keychain: Attach it to your keys for a small, easy-to-spot handmade accessory.
- A charming bag decoration: Hang it from a backpack, purse, or zipper for a playful woodland detail.
- A leftover-yarn idea: The body and cap use two colors, so small yarn remnants are often enough.
- A beginner-friendly amigurumi shape: The rounded body introduces increases, straight rounds, decreases, and stuffing without requiring a complicated design.
- Easy to personalize: Keep the traditional beige-and-brown combination, or experiment with pastel and bright colors.
The textured cap gives this acorn its character. Small chain loops attach around the cap to create a raised, layered surface that contrasts with the smoother body.
Supplies You’ll Need
Gather these materials before starting.
- Main-color yarn: Beige, tan, or another light brown shade for the acorn body.
- Contrast-color yarn: Brown yarn for the textured cap.
- Crochet hook: Choose a hook suitable for your yarn. The source tutorial does not specify an exact hook size, so use a size that produces a firm fabric with small gaps.
- Fiberfill or cotton stuffing: To fill the acorn body.
- Yarn needle or tapestry needle: To hide yarn ends and finish the piece.
- Scissors: For cutting the yarn.
- Keychain hardware: A keyring or suitable clip to attach the finished acorn to keys or a bag.
For a small stuffed charm, firm crochet fabric helps keep the stuffing in and lets the acorn hold its shape. If you can see large gaps between stitches, try a smaller hook.
Finished Size & Gauge
The finished acorn is a small, beginner-friendly amigurumi charm designed to hang from keys, bags, or zippers. The source tutorial does not give exact finished measurements or a formal gauge, so the final size will depend on your yarn, hook, and tension.
To keep the shape neat:
- Use the same yarn weight for both colors unless you intentionally want a different texture.
- Keep your single crochet stitches consistent throughout the body.
- Avoid loose stitches that expose the stuffing.
- Make the hanging loop long enough for your intended use without making the acorn swing excessively.
The source suggests chaining 25-30 for the hanging strap. Choose the shorter end for a compact keychain loop or the longer end if you want extra room to attach it to a bag.
Pattern Abbreviations & Terminology
US crochet terminology is used in this pattern.
- MR: Magic ring
- ch: Chain
- sc: Single crochet
- inc: Increase; work 2 single crochet stitches in the same stitch
- dec: Decrease; crochet 2 single crochet stitches together as 1 stitch
- sl st: Slip stitch
- st/sts: Stitch/stitches
- R: Round
- Fasten off: Cut the yarn and pull the tail through the final loop to secure it.

Step-by-Step Crochet Acorn Pattern
The acorn is made in three main parts: the beige nut-shaped body, the textured brown cap, and the hanging loop. The body is worked first, stuffed, and closed before the decorative cap and strap are finished.
Part 1: Crochet the Acorn Nut (Beige Body)
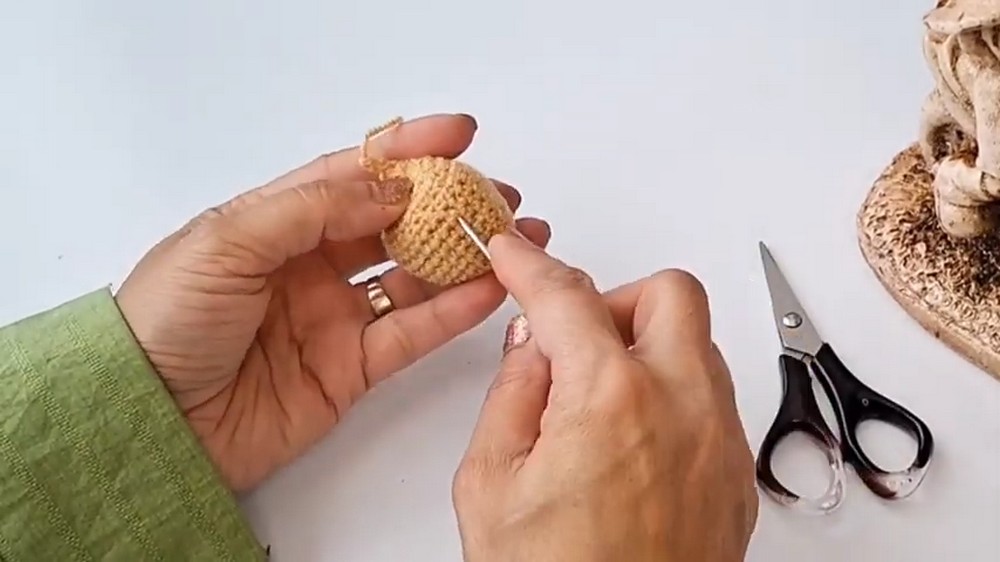
Start with the beige yarn. The first rounds increase to form the base, the middle rounds build the sides, and the final rounds decrease to close the stuffed body.
Round 1: Start the base
- Make a magic ring with the beige yarn.
- Work 4 single crochet stitches into the ring.
- Pull the yarn tail to close the center securely.
- Join with a slip stitch to the first single crochet. Stitch count: 4 stitches.
Check that the center is closed before continuing. A loose magic ring can leave a visible hole at the bottom of the finished acorn.
Round 2: Increase the base
- Chain 1.
- Work 2 single crochet stitches into each stitch around.
- Join with a slip stitch to the first stitch. Stitch count: 8 stitches.
Each stitch from the previous round receives 2 single crochets, doubling the stitch count and widening the base.
Round 3: Widen again
- Chain 1.
- Work 2 single crochet stitches into every stitch around.
- Join with a slip stitch to the first stitch. Stitch count: 16 stitches.
The base should now look like a small, flat circle. Keep the increases evenly spaced by following the instruction to work twice into every stitch.

Round 4: Continue increasing
- Chain 1.
- Work 1 single crochet into each of the next 3 stitches.
- Work 2 single crochet stitches into the next stitch.
- Repeat this sequence around.
- Join with a slip stitch to the first stitch.
Round 5: Widen the body
- Chain 1.
- Work 1 single crochet into each of the next 4 stitches.
- Work 2 single crochet stitches into the next stitch.
- Repeat the sequence around.
- Join with a slip stitch to the first stitch.
The source does not provide a stitch count for this round either.
Rounds 6-11: Build the sides
- Chain 1 at the beginning of each round.
- Work 1 single crochet into every stitch around without increasing or decreasing.
- Join each round with a slip stitch to the first stitch.
- Repeat until you have completed six rounds of even stitching.
These rounds form the main sides of the acorn. The body should begin to look taller rather than wider. Keep your tension even so the sides do not bulge in one area.

Round 12: Start shaping the top
- Chain 1.
- Work 1 single crochet into each of the next 4 stitches.
- Crochet the next 2 stitches together to make 1 decrease.
- Repeat the sequence around.
- Join with a slip stitch to the first stitch.
A single crochet decrease joins two stitches into one, making the opening smaller. Insert your hook into the next stitch and draw up a loop, then insert it into the following stitch and draw up another loop. Yarn over and pull through all loops on the hook to complete the decrease.
The source does not provide a final stitch count for this round.
Stuff the Acorn Body
Add the stuffing before the opening becomes too small.
- Chain 1 after completing Round 12, as described in the source.
- Pull the working yarn out slightly to secure the loop while you prepare the stuffing.
- Add small pieces of fiberfill or cotton stuffing through the opening.
- Push the filling gently toward the bottom and sides so the body keeps its rounded shape.
- Leave enough room to work the remaining decrease rounds comfortably.
Use small amounts at a time rather than packing one large piece inside. This makes it easier to fill the body evenly and prevent empty spaces near the sides.

Rounds 13-15: Close the body
Round 13
- Chain 1.
- Work 1 single crochet into each of the next 3 stitches.
- Crochet the next 2 stitches together to make 1 decrease.
- Repeat the sequence around.
- Join with a slip stitch to the first stitch.
Round 14
- Chain 1.
- Work 1 single crochet into each of the next 2 stitches.
- Crochet the next 2 stitches together to make 1 decrease.
- Repeat the sequence around.
- Join with a slip stitch to the first stitch.
Round 15: Finish closing
- Chain 1.
- Continue making decreases by crocheting 2 stitches together around the remaining opening.
- Keep decreasing until the opening is small enough to close.
- Cut the yarn, leaving a tail for finishing.
- Use your yarn needle to weave the tail through the remaining stitches and pull the opening closed.
- Secure the yarn and weave in the end.
The supplied tutorial does not state exact stitch counts for Rounds 13–15. Work the decreases evenly, and check the video if your stitch count does not match the shape shown.
Part 2: Make the Textured Acorn Cap (Brown Yarn)
The cap uses brown yarn and a repeated chain-loop technique. Rather than making a separate flat piece, the loops are attached to the outer loops left on the body during the color transition.
Attach the cap yarn
- Locate the unused outer strand or loop left from the earlier transition round on the body.
- Attach the brown yarn to that loop.
- Secure the yarn so it does not loosen as you work the decorative loops.
The source refers to an outer loop left from the color transition, but the exact transition round is not fully explained in the supplied notes. If you cannot find an unused loop on your finished body, review the video around 09:46 before attaching the cap yarn.

Create the textured loops
- Chain 5 with the brown yarn.
- Attach the chain to the next stitch with a slip stitch.
- Repeat the sequence: chain 5, then slip stitch into the next stitch.
- Continue around the cap area, placing the loops close together to create the raised texture.
- Follow the video toward the top of the acorn cap to see how the loops are positioned and finished.
Keep the chains fairly consistent in length. If some loops are much tighter or looser than others, the cap may look uneven. Avoid pulling the slip stitches too tightly, because the textured section needs enough room to sit over the beige body.
A useful shaping check: After working several loops, pause and look at the cap from the side. The brown texture should cover the upper portion of the acorn while leaving the beige nut visible below it.

Part 3: Crochet the Keychain Loop
The hanging loop is made from a chain that is reinforced with slip stitches.
- With the yarn used for the loop, make a slip knot.
- Chain 25–30 stitches, depending on the loop length you want.
- Join to the second chain from the hook.
- Work slip stitches along the chain, one at a time, back toward the base.
- Fasten off as directed in the video, leaving enough yarn to attach the loop securely.
A shorter chain makes a compact loop, while a longer chain gives the acorn more room to hang from a bag handle or zipper. Before fastening off, hold the loop beside the acorn to check that the length suits your intended use.

How to Join the Cap and Nut Neatly
The beige body and brown cap need to sit together without a loose gap.
- Position the textured brown cap over the upper portion of the beige body.
- Check that the cap sits evenly and does not tilt to one side.
- Use the yarn tail or a suitable sewing strand to secure the cap to the body where needed.
- Take small, discreet stitches through the cap and the body so the joining yarn is hidden among the texture.
- Adjust the loops as you sew, keeping the cap rounded and the beige portion visible.
- Weave in any remaining ends inside the work.
The source instructions describe attaching the brown yarn to an outer loop and building the textured cap directly on the body. They do not give a separate seam-by-seam joining method. If you follow the video’s direct attachment technique, use this section as a final placement check rather than adding an extra seam that changes the original design.
Adding the Keychain Hardware
Once the body, cap, and loop are secure, attach the keychain hardware.
- Position the loop at the top center of the brown cap.
- Use the remaining yarn tail to anchor the loop firmly to the cap.
- Pass the yarn through several stitches rather than securing it with only one small stitch.
- Weave in the tail and check that the loop cannot pull free with gentle handling.
- Attach the metal keyring or clip through the finished loop.
If the acorn will hang from a bag or keys, give the loop a gentle tug before using it. The attachment should hold the weight of the charm without stretching the cap or loosening the stitches.
Styling Ideas: Gifts and Bag Decorations
The finished acorn is small enough to suit several everyday uses.
- Pink backpack charm: Pair the warm brown and beige colors with a pink bag for a cute autumn contrast.
- Keyring accessory: Add a metal keyring for a small handmade detail on your keys.
- Zipper pull: Attach a secure clip or loop to a backpack, pouch, or pencil case.
- Autumn gift: Give it to a friend who enjoys handmade accessories, woodland motifs, or seasonal crafts.
- Fantasy-color acorn: Try lavender and cream, dusty pink and burgundy, or mint and pale yellow for a playful version.
- Matching set: Make several acorns in different colors and attach them to gift bags or handmade pouches.
For a gift, check all yarn ends and attachments before wrapping the charm. A neat finish helps the tiny shape look polished, even when you are using leftover yarn.