Those sweet, rounded features make this crochet bear special, and this step-by-step pattern helps you shape its head, muzzle, ears, and little limbs.
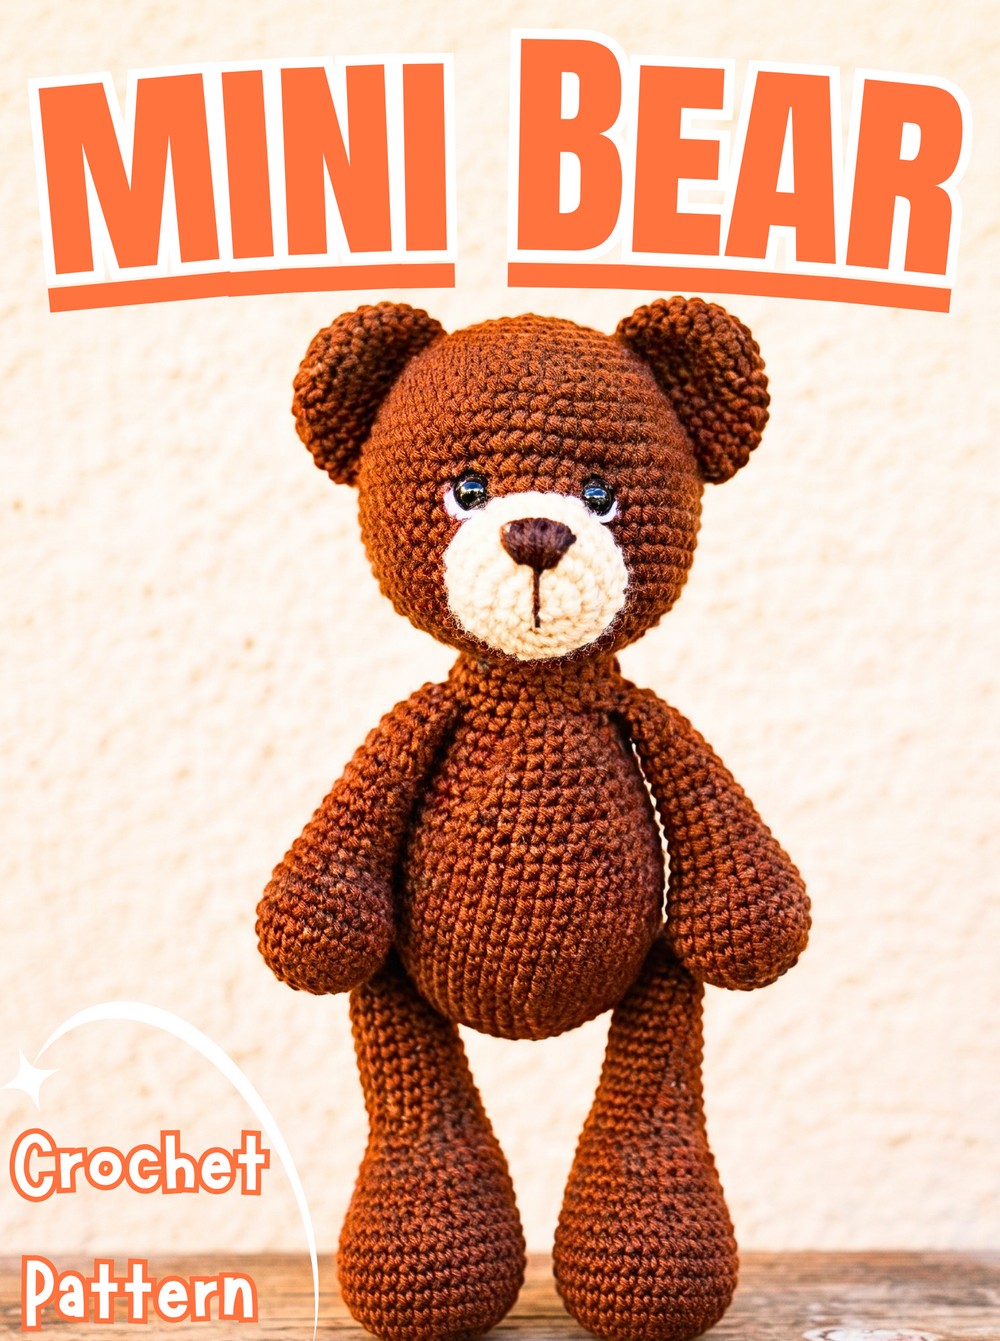
A classic crochet teddy bear gets its charm from its rounded face, soft-looking muzzle, and little ears that give it a lovable expression. This brown-and-cream crochet bear brings those familiar details together in a handmade toy that can make a thoughtful gift, a keepsake, or a sweet addition to an amigurumi collection.
The secret to a neat, balanced bear lies in how you form and join each crochet piece. This step-by-step pattern guides you through shaping the head and body, placing the safety eyes and cream muzzle, and attaching the ears, arms, legs, and tail so your finished crochet bear looks carefully put together, not pieced together.
Credit: Hooks & Needles By Mita
Materials & Tools Needed
- Yarn: Brown for the main body and cream for the muzzle and inner details.
- Crochet Hook: 2 mm.
- Safety Eyes: 10 mm.
- Fiberfill Stuffing: To shape the head, body, and limbs.
- Yarn Needle: For sewing pieces together and weaving in yarn ends.
- Scissors: For cutting yarn.
- Pins: To hold pieces in position before sewing.
- Scrap Yarn or Stitch Markers: To mark round beginnings and keep track of stitch counts.
Pattern Abbreviations
- MR: Magic Ring
- ch: Chain
- st(s): Stitch(es)
- sc: Single Crochet
- inc: Increase – work 2 single crochet stitches into the same stitch.
- dec: Invisible Decrease – insert hook through the front loops of the next 2 stitches, yarn over and pull through both front loops, then yarn over and pull through remaining loops.
- (…) x N: Repeat instructions inside parentheses N times.

Before You Start
This bear is made from separate crocheted pieces that are stuffed where needed and sewn together. Most shaping comes from single crochet stitches, increases, and decreases, so keeping track of each round will help you maintain the intended shape.
Place a stitch marker in the first stitch of every round and move it as you continue. At the end of each round, count the stitches before starting the next one. If your count does not match the number shown, check the round you just worked rather than carrying the mistake forward.
For increases, work two single crochet stitches into one stitch. For invisible decreases, pick up only the front loops of two neighboring stitches before completing the stitch. This creates a smoother surface, especially around the head and body.
1. Head (Cream or Main Color)
Start with cream or brown yarn, depending on your preferred bear design. The first rounds expand from a small circle, while the later rounds create height and then bring the shape inward.
- Round 1: Make an MR and work 6 sc into the ring. Pull the yarn tail to close the center. (6 sts)
- Round 2: (inc) x 6. (12 sts)
- Round 3: (1 sc, inc) x 6. (18 sts)
- Round 4: (2 sc, inc) x 6. (24 sts)
- Round 5: (3 sc, inc) x 6. (30 sts)
- Round 6: (4 sc, inc) x 6. (36 sts)
- Round 7: (5 sc, inc) x 6. (42 sts)
- Round 8: (6 sc, inc) x 6. (48 sts)
- Round 9: (7 sc, inc) x 6. (54 sts)
- Rounds 10-11: Sc in all 54 sts for 2 straight rounds. (54 sts per round)
- Round 12: (8 sc, inc) x 6. (60 sts)
- Rounds 13-20: Sc in all 60 sts for 8 straight rounds. (60 sts per round)

Position the Safety Eyes
Place the eyes while the head is still open so you can secure their backing caps from inside.
Fold the head in half to find its center line. From the top center, count down 16 rounds and identify the eye-placement level. At that level, mark one eye position 4 stitches to the right of the center and the other 4 stitches to the left.
Before inserting the 10 mm safety eyes, look at both marks from the front. They should sit at equal heights and equal distances from the center. Once you are satisfied with their placement, push the eyes through the marked stitches and secure the backing caps inside the head.
Continue shaping the lower part of the head:
- Round 21: (8 sc, dec) x 6. (54 sts)
- Round 22: (7 sc, dec) x 6. (48 sts)
- Round 23: (6 sc, dec) x 6. (42 sts)
- Round 24: (5 sc, dec) x 6. (36 sts)
- Round 25: (4 sc, dec) x 6. (30 sts)
The opening should become progressively smaller as you work these rounds. If the fabric starts to form sharp folds instead of a smooth curve, check that your decreases are evenly spaced and that you have not missed a stitch.
Stuff the head: Add fiberfill after Round 25. Push small portions toward the sides and top so the head looks evenly rounded. Fill it firmly enough to hold its shape, but avoid stretching the stitches until stuffing shows through.
- Round 26: (1 sc, dec) x 10. (20 sts)
Fasten off, leaving a long yarn tail for joining the head to the body. Keep the 20-stitch opening available for sewing.

2. Body (Main Color)
Use brown yarn for the body. The first rounds widen the base, the straight rounds build its height, and the decreases shape the upper section.
- Round 1: Make an MR and work 6 sc into the ring. (6 sts)
- Round 2: (inc) x 6. (12 sts)
- Round 3: (1 sc, inc) x 6. (18 sts)
- Round 4: (2 sc, inc) x 6. (24 sts)
- Round 5: (3 sc, inc) x 6. (30 sts)
- Round 6: (4 sc, inc) x 6. (36 sts)
- Round 7: (5 sc, inc) x 6. (42 sts)
- Round 8: (6 sc, inc) x 6. (48 sts)
- Round 9: (7 sc, inc) x 6. (54 sts)
- Rounds 10-19: Sc in all 54 sts for 10 straight rounds. (54 sts per round)
As you work the straight rounds, the flat base should begin rising into a tube-like body. Keep the sides even by working into every stitch once and checking that the count remains 54.
Shape the upper section:
- Round 20: (7 sc, dec) x 6. (48 sts)
- Round 21: Sc in all 48 sts. (48 sts)
- Round 22: (6 sc, dec) x 6. (42 sts)
- Round 23: Sc in all 42 sts. (42 sts)
- Round 24: (5 sc, dec) x 6. (36 sts)
- Round 25: Sc in all 36 sts. (36 sts)
- Round 26: (4 sc, dec) x 6. (30 sts)
- Rounds 27-28: Sc in all 30 sts for 2 straight rounds. (30 sts per round)
- Round 29: (1 sc, dec) x 10. (20 sts)
- Round 30: Sc in all 20 sts. (20 sts)
Begin adding fiberfill after Round 22, then continue stuffing gradually as the opening narrows. Spread the filling around the sides instead of pushing it all into the center. The body should feel firm enough to support the head while retaining a rounded shape.
Fasten off, leaving a long yarn tail for sewing. Keep the 20-stitch opening accessible for attaching the head.

3. Muzzle (Cream Yarn)
The cream muzzle sits below the eyes and creates the lighter area around the bear’s nose and mouth. Its increases are concentrated in two sections of Round 3 to shape its outline.
- Round 1: Make an MR, work 8 sc into the ring, and pull it closed. (8 sts)
- Round 2: (inc) x 8. (16 sts)
- Round 3: Work 3 sc, then (inc) x 4 into the next 4 stitches. Work 4 sc, then (inc) x 4 into the next 4 stitches. Finish with 1 sc. (24 sts)
- Rounds 4-6: Sc in all 24 sts for 3 straight rounds. (24 sts per round)
For Round 3, keep your place carefully through both increase sections. You will work into all 16 stitches from the previous round, creating 24 stitches in total. Count the completed stitches before continuing.
Fasten off, leaving a long tail for sewing. Keep the muzzle unstuffed until you position it on the face, when you can add a small amount of fiberfill before closing the seam.

4. Ears (Make 2 – Cream or Main Color)
Make two ears using cream or brown yarn. Work the increases evenly so both pieces have matching rounded bases.
- Round 1: Make an MR, work 6 sc into the ring, and close it. (6 sts)
- Round 2: (inc) x 6. (12 sts)
- Round 3: (1 sc, inc) x 6. (18 sts)
- Rounds 4-6: Sc in all 18 sts for 3 straight rounds. (18 sts per round)
Close the Ear Openings
Flatten each ear by folding it in half. Line up the front and back layers so their stitches match, then work single crochet stitches through both layers at once across the opening.
This creates a flat edge that is easier to sew onto the head. Check that both ears have similar widths and that neither has twisted before fastening off.
Leave a long yarn tail on each ear for attachment.

5. Legs (Make 2)
Each leg begins with a cream foot and changes to brown for the upper section. Complete both feet in the same way so the color boundary and overall length match.
- Round 1: With cream yarn, make an MR and work 8 sc into the ring. Close the ring. (8 sts)
- Round 2: (inc) x 8. (16 sts)
- Round 3: (1 sc, inc) x 8. (24 sts)
- Rounds 4-5: Sc in all 24 sts for 2 straight rounds. (24 sts per round)
Change to Brown Yarn
At the final stitch of Round 5, stop before the last yarn-over and pull-through. Use brown yarn for the final pull-through, then continue Round 6 in brown. This places the color change neatly at the top of the cream foot.
- Round 6: Work 24 sc around in brown. (24 sts)
- Rounds 7-9: Sc in all 24 sts for 3 straight rounds. (24 sts per round)
- Round 10: Work 9 sc, (dec) x 3, then 9 sc. (21 sts)
- Round 11: Work 8 sc, (dec) x 3, then 7 sc. (18 sts)
- Round 12: Work 7 sc, (dec) x 2, then 7 sc. (16 sts)
- Rounds 13-22: Sc in all 16 sts for 10 straight rounds. (16 sts per round)
The decreases narrow the leg before the longer straight section. Check the stitch count after each decrease round, especially Round 12, which should finish with 16 stitches.
Lightly stuff the foot and leg. Keep the foot firm enough to hold its shape, but avoid filling the long upper section so tightly that it becomes difficult to flatten. Fold the top opening in half and single crochet through both layers to close it.
Leave a long tail for sewing and repeat for the second leg.

6. Arms (Make 2)
Use brown yarn for both arms. The wider starting section forms the upper arm, while the decreases narrow it before the longer section.
- Round 1: Make an MR and work 6 sc into the ring. Close it. (6 sts)
- Round 2: (inc) x 6. (12 sts)
- Round 3: (1 sc, inc) x 6. (18 sts)
- Round 4: (2 sc, inc) x 6. (24 sts)
- Rounds 5-8: Sc in all 24 sts for 4 straight rounds. (24 sts per round)
- Round 9: (2 sc, dec) x 6. (18 sts)
- Rounds 10-11: Sc in all 18 sts for 2 straight rounds. (18 sts per round)
- Round 12: (7 sc, dec) x 2. (16 sts)
- Rounds 13-21: Sc in all 16 sts for 9 straight rounds. (16 sts per round)
- Round 22: (2 sc, dec) x 4. (12 sts)
For Round 22, repeat the sequence four times to use all 16 stitches from Round 21 and finish with 12 stitches. This leaves an opening that can be flattened neatly without extra stitches remaining.
Lightly stuff each arm, keeping its shape soft rather than rigid. Flatten the opening and single crochet across both layers to close it. Leave a long yarn tail for attaching each arm to the body.
7. Tail
Use brown yarn to create the tail.
- Round 1: Make an MR, work 6 sc into the ring, and close it. (6 sts)
- Round 2: (inc) x 6. (12 sts)
- Round 3: (1 sc, inc) x 6. (18 sts)
- Rounds 4-5: Sc in all 18 sts for 2 straight rounds. (18 sts per round)
Fasten off, leaving a long yarn tail for sewing. Keep the tail ready for attachment to the lower back.

Assembly & Finishing Techniques
Before sewing, lay out all pieces and use pins to test their positions. Looking at the bear from the front helps you compare heights and spacing before seams become permanent.
1. Sculpt the Eyes
Thread yarn onto your needle and insert it through the bottom opening of the head. Bring it out at the inner corner of one eye, then guide it around toward the outer corner. Pull gently to create a deeper socket line around the eye.
Repeat for the second eye. Use similar tension on both sides so one eye does not sit deeper than the other. Knot the yarn securely and hide its ends inside the head.
2. Attach the Muzzle
Pin the cream muzzle centered below the eyes, spanning roughly Rows 1–4 down from the eyes as specified in the supplied placement notes.
Check the muzzle from the front and make sure its upper edge sits evenly beneath both eyes. Sew around the perimeter using the long yarn tail. Before closing the final stitches, add a small amount of fiberfill so the muzzle has gentle fullness without becoming bulky.
3. Embroider the Nose and Mouth
Use dark brown yarn to stitch a small triangle in the center of the cream muzzle. From the bottom point of the triangle, work a short vertical straight stitch to form the mouth.
Check that the nose sits between the eyes and directly above the mouth line. Secure the yarn ends inside the muzzle or head so they do not show on the finished face.
4. Sew on the Ears
Position the ears symmetrically on the upper sides of the head, approximately 7 rounds down from the top center.
Pin both ears first and compare their height, spacing, and angle. Sew around each flattened edge with its long yarn tail, catching the head stitches securely without pulling the seam so tightly that the ear curls inward.
5. Join the Head and Body
Place the head on top of the body and align both openings. Each opening has 20 stitches, so match the head stitches with the body stitches around the join.
Use the long yarn tail to sew through corresponding stitches. Keep the seam firm while allowing the head to sit naturally above the body. Before closing the final section, look at the bear from the front and sides to check that the head is straight and centered.

6. Attach the Arms
Position the arms just below the third row of the body, aligned neatly underneath the ears as described in the supplied instructions.
Pin both arms at matching heights. Sew around each flattened opening, checking the front view as you go. If one arm points outward more than the other, adjust its angle before finishing the seam.
7. Attach the Legs and Tail
Sew the legs onto the lower sides of the body, approximately 9 rounds up from the bottom. Position them so both feet face forward and sit at the same level. Pin them in place first and check the bear’s balance before sewing.
Lightly stuff the tail and attach it to the lower back. Secure every yarn end inside the body and trim the excess after checking that all parts are firmly attached.
Final Details to Check
Turn the bear to view its face, sides, and back. Make sure the eyes are level, the muzzle is centered, both ears match, and arms and legs are attached securely. Check that the stuffing remains inside the stitches and that no loose yarn ends are visible.
Safety note: For toys intended for children under 3 years old, embroidered eyes are preferable to safety eyes, which can become choking hazards if they come loose. Secure all sewn-on pieces firmly and inspect the toy before use.