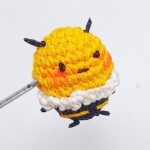
Looking for a cheerful crochet bear with a bright red shirt? This beginner-friendly amigurumi tutorial guides you through shaping its yellow body, creating its features, and finishing its charming look.

This yellow crochet bear stands out with its rounded head, little ears, soft muzzle, and bright red shirt. Its simple color contrast makes the character instantly recognizable, while the embroidered smile and facial details bring its personality to life.
This crochet bear tutorial has two connected parts, so you can focus on the main shape first and finish the smaller pieces afterward. Part One covers the head, legs, and shirted body, while Part Two introduces the arms, ears, muzzle, and final assembly. Follow both parts to bring your little crochet bear together.
Credit Crochet cuties
Materials & Tools
Yarn: Yellow yarn for the head, body, ears, muzzle, and legs; red yarn for the shirt and sleeves.
Crochet hook: Approximately 2.0-3.5 mm, depending on yarn thickness and the tight stitches needed for amigurumi.
Fiberfill stuffing: For shaping the head and body.
Yarn needle: For sewing the pieces together.
Stitch markers: To keep track of rounds.
Black embroidery floss or yarn: For the nose, eyebrows, and smile.
Safety eyes or black beads: For the bear’s eyes, if preferred.
Scissors: For cutting yarn.
Finished Size & Customization
The finished bear is expected to measure approximately 10–12 cm tall, depending on yarn weight and hook size. For a fluffier version, use velvet or chenille yarn with a suitably sized hook. You can also crochet a tiny honey pot separately in beige and yellow-orange yarn as a playful accessory.
Pattern Abbreviations
MR: Magic Ring
sc: Single Crochet
inc: Increase – work 2 sc into the same stitch
dec: Decrease – crochet 2 stitches together
ch: Chain
st(s): Stitch(es)
(…) × N: Repeat the instructions inside parentheses N times

Step-by-Step Crochet Bear Tutorial
This pattern is divided into two parts. Part One builds the bear’s head, legs, and red-shirted body. Part Two creates the arms, ears, and muzzle before bringing all the pieces together with facial details.
Part One: Head, Legs & Body
Video tutorial: Watch Part One
Step 1: Crochet the Head
Start with yellow yarn and create a magic ring. The increases in the first six rounds establish the rounded shape, while the following rounds build its height before the crown and lower section are shaped.
Round 1: Work 6 sc into MR (6 stitches).
Round 2: Inc × 6 (12).
Round 3: (1 sc, inc) × 6 (18).
Round 4: (2 sc, inc) × 6 (24).
Round 5: (3 sc, inc) × 6 (30).
Round 6: (4 sc, inc) × 6 (36).
Rounds 7–10: Work 36 sc in each round (36).
Teaching tip: Use a stitch marker to identify the beginning of each round. Consistent tension helps the head retain its shape without visible gaps.

Step 2: Shape the Head
Continue with the shaping rounds to create the wider facial area and gradually narrow the lower opening.
Round 11: Work 8 sc, (inc, 2 sc) × 2, inc, 6 sc, (inc, 2 sc) × 3, 6 sc (42).
Round 12: Work 9 sc, (inc, 3 sc) × 3, 3 sc, (inc, 3 sc) × 3, 6 sc (48).
Rounds 13–15: Work 48 sc in each round (48).
Round 16: Work 9 sc, dec, 8 sc, dec, 6 sc, dec, 8 sc, dec, 9 sc (44).
Round 17: Work 9 sc, (dec, 6 sc) × 3, dec, 9 sc (40).
Round 18: Work 9 sc, dec, 4 sc, dec, 6 sc, dec, 4 sc, dec, 9 sc (36).
Round 19: (4 sc, dec) × 6 (30).
Round 20: (3 sc, dec) × 6 (24).
Cut the yarn, leaving a long tail for sewing the head to the body.
Result check: The head should have a rounded upper section and a narrower lower opening. Keep the sewing tail long enough to attach it securely later.

Step 3: Make Both Legs
Use yellow yarn to crochet two small legs. Each leg begins with a rounded base and then narrows slightly before joining the body.
Round 1: Work 6 sc into MR (6).
Round 2: Inc × 6 (12).
Round 3: Work 12 sc (12).
Round 4: (2 sc, dec) × 3 (9).
Cut the yarn on the first leg. On the second leg, keep the working yarn attached because it will be used to join both legs.
Teaching tip: Check that both legs have the same stitch count and height. Matching pieces help the finished bear sit more evenly.

Step 4: Join the Legs to Form the Body
The chain section connects the legs and establishes the lower body. Work carefully around both legs and both sides of the chain so the opening between them is closed.
Round 5: Ch 3, work 9 sc around the first leg, 3 sc along one side of the chain, 9 sc around the second leg, and 3 sc along the opposite side of the chain (24).
Round 6: Work 4 sc, inc, (5 sc, inc) × 2, 7 sc (27).
Round 7: Work 5 sc, inc, 6 sc, inc, 5 sc, inc, 8 sc (30).
Round 8: (6 sc, inc) × 3, 9 sc (33).
Rounds 9–11: Work 33 sc in each round (33).
Result check: Both legs should be connected by a continuous crocheted body, with no open gaps along the joining chain.

Step 5: Add the Red Shirt
Switch to red yarn to create the bear’s signature shirt. The decreases shape the upper body, giving it a narrower opening for attaching the head.
Round 12: (Dec, 9 sc) × 3 (30).
Round 13: Work 30 sc (30).
Round 14: (Dec, 8 sc) × 3 (27).
Round 15: Work 27 sc (27).
Round 16: (Dec, 7 sc) × 3 (24).
Cut the yarn and leave a long tail for sewing the body to the head.
Teaching tip: Keep the red color change neat, especially where the shirt begins. This clear color boundary helps the clothing detail stand out against the yellow body.
Part One establishes the main shape of the bear. In Part Two, you will make the smaller features that give it its recognizable character.

Part Two: Arms, Ears, Muzzle & Assembly
Step 6: Crochet the Arms
Make two matching arms, starting with yellow yarn and changing to red for each sleeve. The top edge is flattened before sewing the arms onto the shirt.
Round 1: Work 6 sc into MR (6).
Round 2: (2 sc, inc) × 2 (8).
Rounds 3-4: Work 8 sc in each round (8).
Rounds 5-7: Change to red yarn and work 8 sc in each round (8).
Fold the opening in half and crochet through both layers with single crochet to close the top. Cut the yarn, leaving a long sewing tail.
Result check: Both arms should have matching yellow sections and red sleeves, with flat top edges ready for attachment.

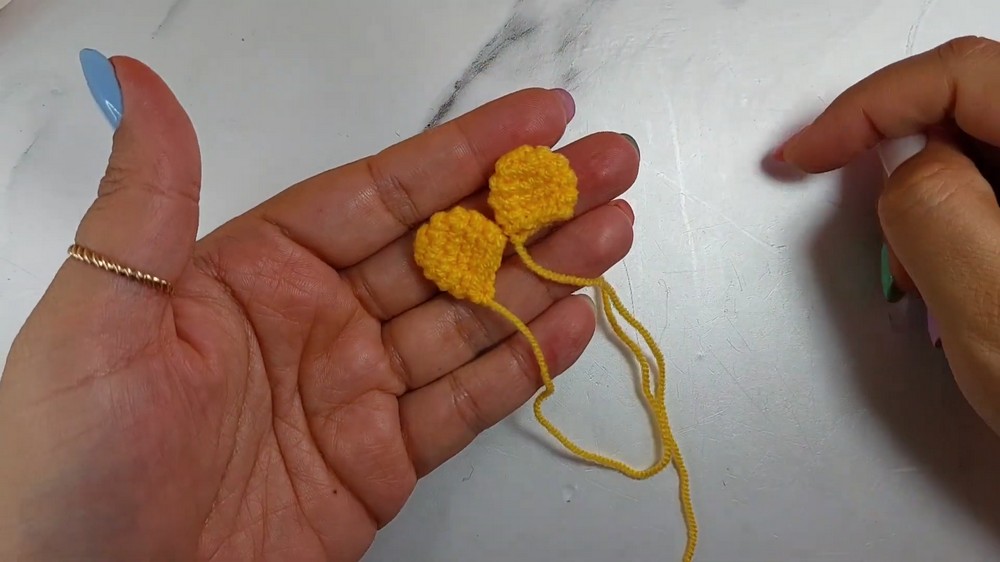
Step 7: Make the Ears
The small rounded ears add an important part of the bear’s silhouette. Use yellow yarn for both pieces.
Round 1: Work 6 sc into MR (6).
Round 2: Inc × 6 (12).
Rounds 3-4: Work 12 sc in each round (12).
Cut the yarn and leave a long tail for sewing. Make the second ear in the same way.
Teaching tip: Compare both ears before attaching them. Similar size and shape make it easier to position them symmetrically.
Step 8: Crochet the Muzzle
The muzzle creates the raised facial area where the nose and smile will be embroidered. Work it in yellow yarn according to the supplied pattern.
Round 1: Work 6 sc into MR (6).
Round 2: Inc × 6 (12).
Round 3: Work 12 sc (12).
Cut the yarn and leave a long tail for sewing.
Result check: Keep the sewing tail intact so the muzzle can be securely attached to the front of the head.

Step 9: Stuff and Join the Head and Body
Before sewing, add fiberfill to the head and body. Distribute the stuffing evenly to help preserve their rounded shapes.
Position the head over the body opening and use the long sewing tail to attach both pieces. Check the alignment from the front before securing the seam completely.
Teaching tip: Add small amounts of stuffing at a time. This makes it easier to shape the head and body without creating hard lumps.

Step 10: Attach the Muzzle and Ears
Position the muzzle on the front of the head and pin it in place before sewing. Check that it sits centrally so the facial features can be added evenly.
Next, position one ear on each upper side of the head. Compare their placement from the front and adjust them before sewing.
Result check: The muzzle should sit centrally, while both ears should appear balanced on either side of the head.

Step 11: Sew on the Arms
Place the arms on opposite sides of the red shirt, keeping their heights and angles similar.
Use the long yarn tails to sew the flattened arm openings securely to the body. Check the bear from the front before finishing the seams.
Teaching tip: Pin both arms in place before sewing either one. This makes it easier to correct uneven positioning.

Step 12: Add the Face
Finish the bear by attaching the black safety eyes or beads and embroidering its nose, eyebrows, and smile with black yarn or embroidery floss.
Check the placement of the facial features before securing them so the expression looks balanced and friendly.
Safety note: If the bear is intended for a young child, embroidered eyes are a safer alternative to small detachable parts.

Finishing Your Crochet Bear
Check all the seams, secure any loose yarn ends, and make sure the head, arms, ears, and muzzle are firmly attached. Adjust the stuffing gently if any section looks uneven.
Your yellow amigurumi bear with its red shirt is now complete. For a personal touch, you can also crochet a miniature honey pot using beige and yellow-orange yarn and place it beside the finished bear.