
Stack three scalloped crochet layers into an adorable bear-shaped Christmas tree ornament with snowy details, tiny ears, and a festive hat.

Three scalloped crochet layers create tree-like tiers beneath sleepy bear features, while embroidered snow, tiny ears, and a red hat give this ornament its festive character. Finished size typically reaches 3–4 inches, making it easy to hang on a Christmas crochet tree or add to holiday gift wrapping.
Each layer is crocheted separately, with increasing stitch counts creating different widths before scalloped edges add decorative definition. After the head, orange body, dark red body, stem, hat, and ears are finished, pieces are stacked and sewn together, then completed with embroidered details and a hanging loop.
Credit Knitting Life
Materials & Tools Needed
- Yarn: Light Weight/DK yarn in white or cream for head, ears, and hat trim; orange for 2nd layer; dark red or burgundy for 3rd layer; brown for stem; red for hat
- Thread: Small amount of dark brown embroidery thread for face
- Crochet Hook: Size appropriate for chosen yarn, typically 2.5–3.0 mm for amigurumi
- Fiberfill Stuffing: For stem
- Tapestry Needle / Yarn Needle
- Scissors
- Stitch Markers
Finished Size & Customization
Finished ornament typically measures 3–4 inches tall, depending on yarn weight and hook size.
For traditional Christmas colors, replace orange and dark red layers with light green and dark green. Tiny beads or sequins can also replace embroidered snow details, creating ornament-like decorations across tree layers.
Pattern Abbreviations & Terminology
- MR: Magic Ring
- ch: Chain
- sc: Single Crochet
- hdc: Half Double Crochet
- dc: Double Crochet
- inc: Single Crochet Increase – 2 sc in same stitch
- dc inc: Double Crochet Increase – 2 dc in same stitch
- dec: Single Crochet Decrease – sc 2 together
- BLO: Back Loop Only
- slst: Slip Stitch
- st(s): Stitch(es)
- (…) x N: Repeat instructions inside parentheses N times
- […]: Total stitch count at end of round

Head – 1st Layer
Yarn Color: White / Cream
Head forms smallest tree layer while also carrying bear facial features. Keep starting chains and slip stitches neat so round joins remain discreet.
Round 1: Make MR, work 8 sc into ring, slst to join. [8 sts]
Round 2: 1 ch, 8 inc, slst to join. [16 sts]
Round 3: 1 ch, 16 sc around, slst to join. [16 sts]
Round 4: 1 ch, (sc, inc) x 8, slst to join. [24 sts]
Rounds 5–6: 1 ch, 24 sc around, slst to join. (2 rounds total) [24 sts]
Round 7 – Scallop Edge: Skip 1 st, (hdc, dc inc, hdc, slst) all in next st x 6 times.
Finishing: Fasten off and weave in end.

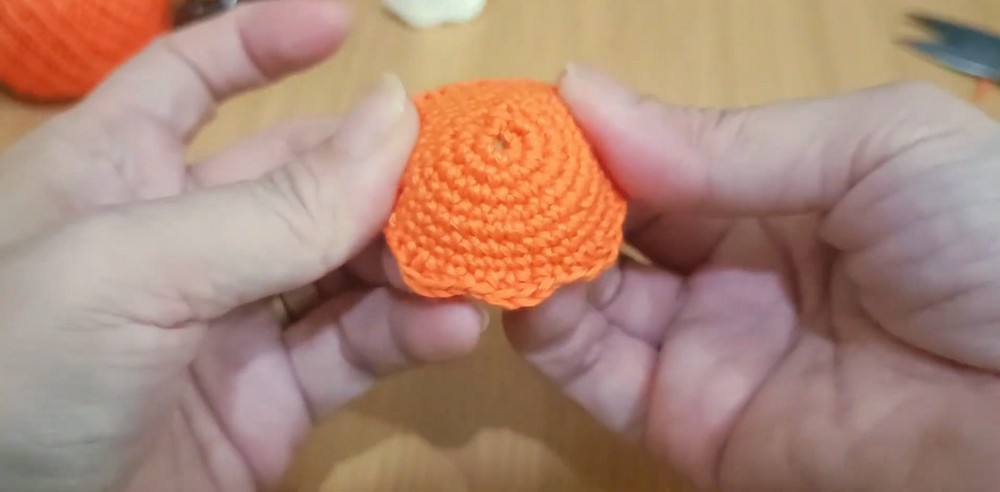
Body – 2nd Layer
Yarn Color: Orange
Second layer becomes wider than the head layer, giving a stacked tree shape.
Round 1: Make MR, work 8 sc into ring, slst to join. [8 sts]
Round 2: 1 ch, 8 inc, slst to join. [16 sts]
Round 3: 1 ch, (sc, inc) x 8, slst to join. [24 sts]
Round 4: 1 ch, 24 sc around, slst to join. [24 sts]
Round 5: 1 ch, sc, inc, (2 sc, inc) x 7, sc, slst to join. [32 sts]
Rounds 6–7: 1 ch, 32 sc around, slst to join. (2 rounds total) [32 sts]
Round 8 — Scallop Edge: Skip 1 st, (hdc, dc inc, hdc, slst) all in next st x 8 times.
Finishing: Fasten off and weave in end.
Body – 3rd Layer
Yarn Color: Dark Red / Burgundy
Largest layer creates bottom tier, so keep increases even around each round for balanced shape.
Round 1: Make MR, work 8 sc into ring, slst to join. [8 sts]
Round 2: 1 ch, 8 inc, slst to join. [16 sts]
Round 3: 1 ch, (sc, inc) x 8, slst to join. [24 sts]
Round 4: 1 ch, 24 sc around, slst to join. [24 sts]
Round 5: 1 ch, sc, inc, (2 sc, inc) x 7, sc, slst to join. [32 sts]
Round 6: 1 ch, (3 sc, inc) x 8, slst to join. [40 sts]
Rounds 7-8: 1 ch, 40 sc around, slst to join. (2 rounds total) [40 sts]
Round 9 – Scallop Edge: Skip 1 st, (hdc, dc inc, hdc, slst) all in next st x 10 times.
Finishing: Fasten off and weave in end.

Stem
Yarn Color: Brown
Stem provides support beneath the bottom tree layer. Fill it firmly enough to hold its cylindrical shape before sewing.
Round 1: Make MR, work 8 sc into ring, slst to join. [8 sts]
Round 2: 1 ch, 8 inc, slst to join. [16 sts]
Rounds 3–10: 1 ch, 16 sc around, slst to join. (8 rounds total) [16 sts]
Round 11: 1 ch, working in BLO, 8 dec, slst to join. [8 sts]
Finishing: Leave long yarn tail for sewing. Fill inside firmly with stuffing.

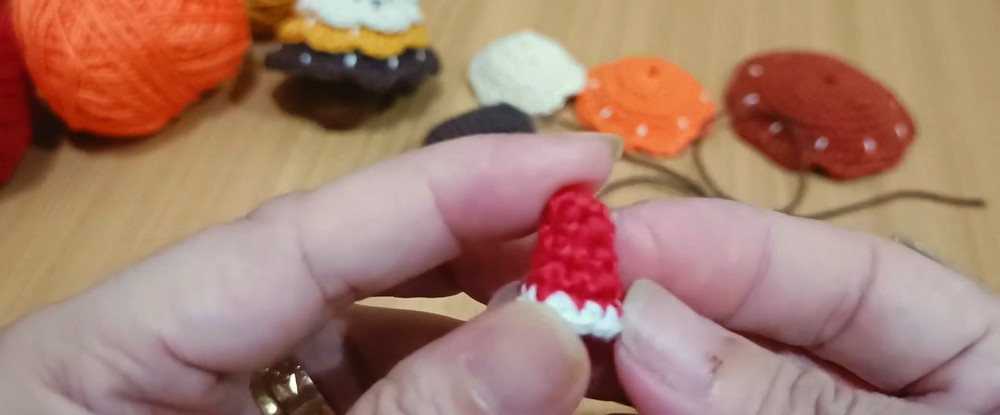
Hat
Yarn Color: Start with Red
Small hat sits between ears and receives white trim through color change in final round.
Round 1: Make MR, work 4 sc into ring, slst to join. [4 sts]
Round 2: 1 ch, (sc, inc) x 2, slst to join. [6 sts]
Round 3: 1 ch, sc, inc, 2 sc, inc, sc, slst to join. [8 sts]
Round 4: 1 ch, (3 sc, inc) x 2, slst to join. [10 sts]
Round 5 – Color Change: Switch to White yarn. 1 ch, 2 sc, inc, 4 sc, inc, 2 sc, slst to join. [12 sts]
Finishing: Fasten off and leave a long tail for sewing.
Ears
Make 2 – Yarn Color: White / Cream
Pattern: 3 ch, 3 hdc all in same first stitch, slst to secure.
Finishing: Fasten off and leave tail for sewing.

Assembly & Finishing
Add Snow and Facial Details
Using white yarn, embroider small vertical dashed lines around orange and dark red layers to create a frosting or snow effect.
Using dark brown embroidery thread, embroider two small horizontal lines for sleepy eyes on head. Add a small V shape or horizontal line at the center of the head for the bear’s nose.
Keep facial features centered before securing thread. Similar eye height and spacing help preserve sleepy expression.
Attach Ears and Hat
Sew two white ears onto upper sides of head.
Position red hat between ears and sew securely onto top of head.
Stack Tree Layers
Using matching yarn, sew layers directly together:
- 1st layer — White/Cream head — centered on top of 2nd orange layer
- 2nd orange layer — centered on top of 3rd dark red layer
- 3rd dark red layer — forms widest bottom tier
Check alignment from front before completing each seam. Centered layers keep scalloped edges evenly distributed around ornament.

Attach Stem
Sew stuffed brown stem directly onto bottom center of 3rd dark red layer.
Add Hanging Loop
Cut small length of brown yarn or string. Thread it through tip of red hat and tie secure knot to create hanging loop.
Finishing Check
Before hanging ornament, check each scalloped edge for even spacing, confirm all layers are centered, and make sure stem is firmly attached. Tight slip stitches and chains at round beginnings help keep joins neat and less noticeable.
For craft-fair displays or holiday gifts, make several ornaments using different layer colors while keeping bear facial details consistent. Green layers create classic Christmas tree colors, while orange and burgundy give original layered version its warm festive appearance.





