Looking for a festive little accessory? This crochet Christmas strap combines a tiny reindeer, Santa hat, and Christmas tree on a buttonhole strap.

Red, white, brown, and green yarn turn this simple crochet strap into a cheerful Christmas accessory. The flat crochet design makes room for three recognizable holiday details-a reindeer head, a Santa hat, and a little Christmas tree-without making the strap bulky.
You’ll first crochet the narrow strap and its three buttonholes, then create each applique separately before adding the details and attaching everything together. The reindeer head uses shaped stitches for its features, while the tree narrows row by row. Following the stitch counts carefully will help keep these small decorations balanced and easy to position.
Credit Tiệm Bé Con
Materials & Tools Needed
- Yarn: Light worsted or DK weight yarn in red, white, brown, and green
- Crochet Hook: A size suitable for your yarn, typically 2.5 mm or 3.0 mm
- Tapestry Needle: For weaving in yarn ends
- Scissors
- Hot Glue Gun: For attaching the appliqués
- Stitch Markers: To mark the first stitch of rounds
Finished Size & Customization
The finished strap will be approximately 7-8 inches long, depending on your yarn and tension, with appliques measuring about 1.5 inches.
You can make the main strap longer or shorter by adding or removing rows before beginning the buttonhole section. For a washable version, sew the appliqués onto the strap instead of using hot glue.
Pattern Abbreviations
- ch: Chain
- sc: Single crochet
- hdc: Half double crochet
- dc: Double crochet
- tr: Treble crochet
- inc: Increase – crochet 2 stitches into the same stitch space
- dec: Decrease – single crochet 2 stitches together
- sl st: Slip stitch
- st(s): Stitch(es)
- MR: Magic Ring

Crochet the Main Strap
The strap begins as a narrow strip of three single crochets. Keep your edges even as you work, since the long straight section determines how neatly the buttonholes will line up later.
Row 1: Ch 4. Skip the first ch from the hook. Work 1 sc into the 2nd ch, and 1 sc into each of the next 2 chains. (3 sc)
You should now have a three-stitch foundation. Carry and hide the starting tail behind your first few stitches as you continue so you do not have to deal with it later.
Row 2: Ch 1, turn. Work 1 sc into each of the 3 stitches across. (3 sc)
Keep all three stitches accounted for before turning. The strip should remain narrow and straight rather than widening at the edges.
Rows 3-34: Repeat Row 2 until you have completed exactly 34 rows.
After Row 34, check the length of the strap before starting the buttonholes. This is the easiest point to make a length adjustment if you want a slightly longer or shorter finished accessory.
Create the Three Buttonholes
The buttonholes are formed by replacing the three-stitch row with a chain space. Work each opening carefully so the strap remains three stitches wide once the gap is closed on the following row.
Row 35 — Hole 1: Ch 3, skip 2 sts, work 1 sc into the 3rd st.
The chain-3 creates the first opening. Do not accidentally work into either of the skipped stitches, because that would close the hole you are trying to form.
Row 36: Ch 1, turn. Work 3 sc directly into the ch-3 space. (3 sc)
Working into the chain space brings the strap back to its normal three-stitch width. Check that the opening remains visible beneath this row.
Rows 37-38: Ch 1, turn. Work 1 sc in each of the 3 sts across.
Row 39 – Hole 2: Ch 3, skip 2 sts, work 1 sc into the 3rd st.
Rows 40-42: Repeat the same process as the first hole: work 3 sc into the ch-3 space for the first row, then work normal sc rows for the next two rows.
Row 43 – Hole 3: Ch 3, skip 2 sts, work 1 sc into the 3rd st.
Row 44: Ch 1, turn. Work 3 sc into the ch-3 space. Fasten off and cut the yarn.
Before adding the border, lay the strap flat and make sure all three openings are clearly defined. Their edges should not be twisted or accidentally closed with loose yarn.

Add the Strap Border
Reattach your yarn to the edge of the strap and work 1 sc evenly around the entire perimeter. When you reach the sides of the buttonhole sections, place 1 sc into the side of each row edge to keep those areas neat.
This border gives the narrow strap a cleaner finished edge and helps the buttonhole sections hold their shape. Work evenly rather than pulling tightly around the corners.
Sl st into the first sc to join. Cut the yarn, pull through, and use your tapestry needle to weave in all loose ends.
Make the Reindeer Head
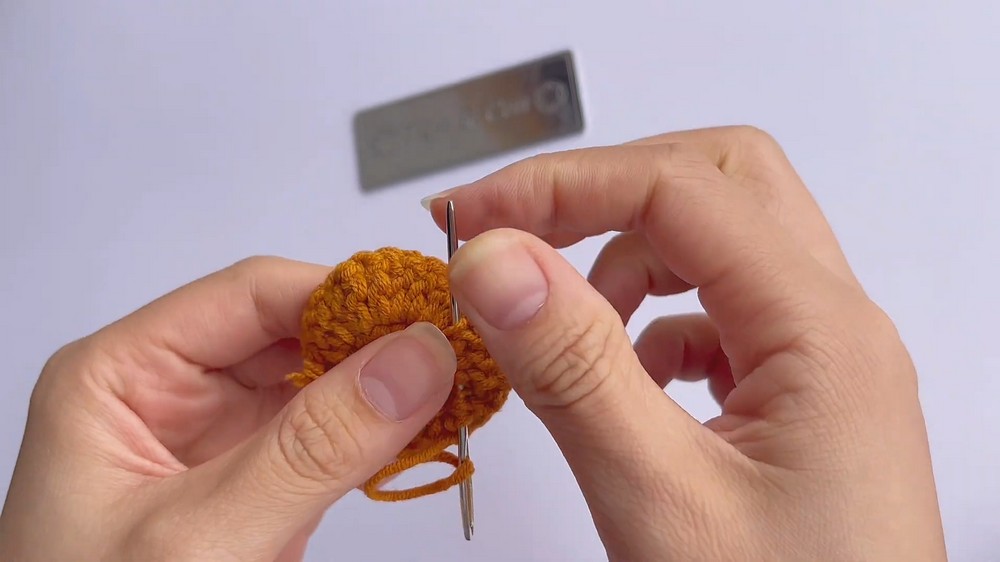
Use brown yarn for the reindeer head. This piece begins with a round of hdc stitches and then expands through different stitch heights. Because the second round uses several different stitches, keep your place carefully as you move from one stitch to the next.
Round 1: Create a Magic Ring, ch 2. Work 12 hdc into the MR. Pull the ring tightly to close. Sl st to the first st to join. (12 hdc)
Place a stitch marker in the first stitch if it helps you identify the beginning of the round.
Round 2: Ch 2. Work the following sequence into the 12 stitches from Round 1: St 1: 2 dc in the same st; St 2: 1 dc and 1 tr in the same st; St 3: 2 tr in the same st; St 4: 1 tr and 1 dc in the same st; St 5: 2 dc in the same st; St 6: 1 dc and 1 tr in the same st; St 7–12: repeat the sequence exactly as above for the remaining 6 stitches.
The changing stitch heights create the shaped outline of the reindeer head. Work the combinations in the stated stitch order rather than treating them as interchangeable increases, because the taller tr stitches are part of the finished silhouette.
Sl st into the first st to join. Fasten off, cut the yarn, and weave in the ends.
Add the Reindeer Santa Hat
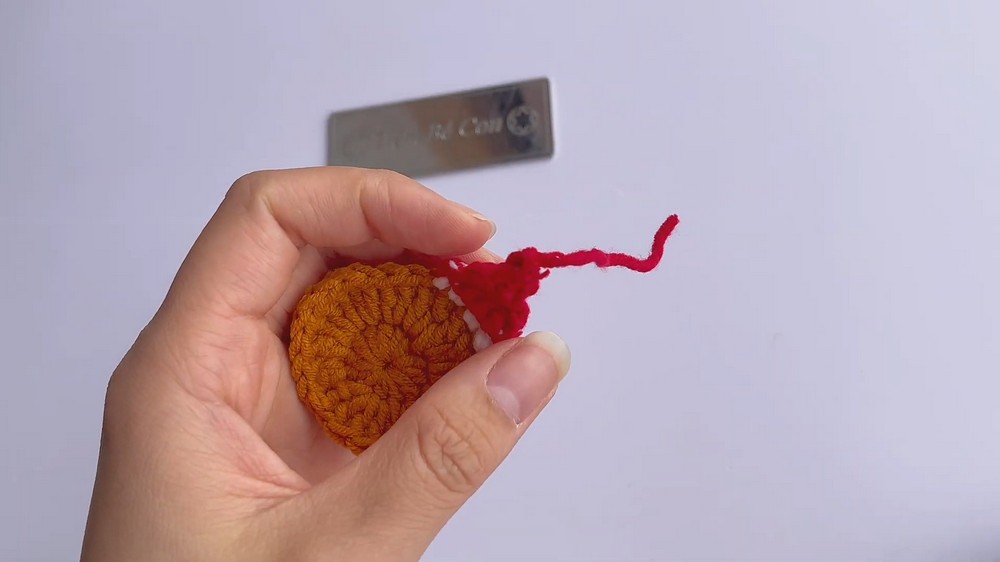
The Santa hat is worked directly onto the top edge of the reindeer head, so make sure you identify the intended four stitches before attaching the white yarn.
Row 1: Attach white yarn to the top of the reindeer head across 4 stitches. Work 1 sc into each of the 4 sts. On the 4th sc, do not complete the final pull-through with white; loop red yarn onto your hook and pull through to finish the stitch. (4 sc)
This color change places the red yarn in position for the next row without creating a separate seam between the white and red sections.
Row 2: Ch 1, turn. Work 1 sc in each of the 4 sts. Crochet over the white and red tails to hide them. Cut the white yarn completely. (4 sc)
Row 3: Ch 1, turn. Dec over the first two sts, sc into the next 2 sts. (3 sc)
Row 4: Ch 1, turn. Dec over the first two sts, sc into the last st. (2 sc)
Row 5: Ch 1, turn. Dec over the remaining two sts. (1 sc)
The decreases progressively narrow the red section into the pointed end of the hat. After the final decrease, cut the yarn, pull it through the remaining loop, and weave in the end.
Crochet the Reindeer Nose
Use red yarn for the tiny nose.
Round 1: Create a Magic Ring. Work 5 sc into the ring.
Pull the ring tight so the five stitches form a compact little circle. Knot the ends securely with a tight double knot as shown in the tutorial, then trim the yarn.
Because this nose is very small, make sure the center is firmly closed before attaching it to the face.
Crochet the Christmas Tree
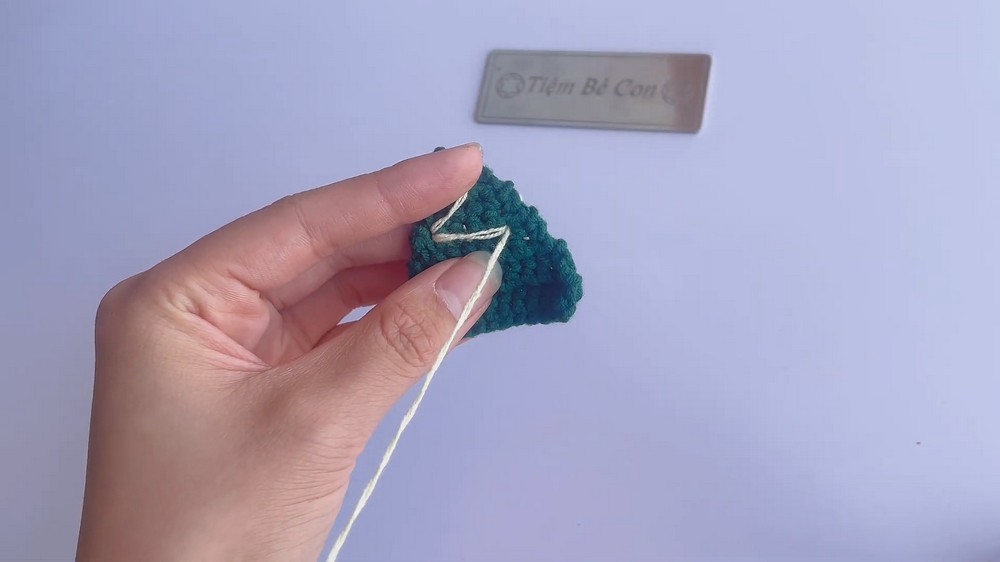
Use green yarn. The tree begins as an 11-stitch rectangle and gradually narrows through decreases at both ends. The alternating plain and decrease rows help create its triangular outline.
Row 1: Ch 12. Skip the first ch from the hook, work 1 sc into the 2nd ch and in each ch across. (11 sc)
Row 2: Ch 1, turn. Work 1 sc into each st across. (11 sc)
Row 3: Ch 1, turn. Dec (sc2tog), work 1 sc in each st across until the last 2 sts, dec (sc2tog) in the last two sts. (9 sc)
The two decreases reduce the width evenly from both sides. Keep the center stitches straight so the tree remains symmetrical.
Row 4: Ch 1, turn. Work 1 sc into each st across. (9 sc)
Row 5: Ch 1, turn. Dec, sc in the next 5 sts, dec. (7 sc)
Row 6: Ch 1, turn. Work 1 sc into each st across. (7 sc)
Row 7: Ch 1, turn. Dec, sc in the next 3 sts, dec. (5 sc)
Row 8: Ch 1, turn. Work 1 sc into each st across. (5 sc)
Row 9: Ch 1, turn. Dec, sc in the next 1 st, dec. (3 sc)
Row 10: Ch 1, turn. Work 1 sc into each st across. (3 sc)
Row 11: Ch 1, turn. Work continuous decreases until you have 1 stitch remaining.
Fasten off, leaving a long tail for easier hiding and weaving, then weave in the ends.
Lay the finished tree flat before assembly. Its widest section should be at the bottom, with each decrease row visibly bringing the shape toward its narrow top.
Assemble the Christmas Strap
Before gluing anything, arrange the reindeer and tree on the strap to decide where you want them. This gives you a chance to check the spacing and orientation without committing the pieces to the strap.
Prepare the Appliques
Make sure all loose tails on the reindeer, Santa hat, nose, and Christmas tree are securely knotted and woven into the back of the work. Keeping the back tidy will make the appliques sit flatter against the strap.
Attach the Reindeer Nose
Warm up the hot glue gun and place a small dot of glue on the back of the tiny red magic-ring nose. Press it firmly into the center of the reindeer’s face.
Hold it briefly in position while the glue sets. A small amount of glue is enough for such a lightweight piece; excess glue can spread beyond the edge of the nose.
Attach the Appliques
Apply hot glue to the back of the finished reindeer head and Christmas tree, then press them securely onto the flat sections of the strap.
You can position them according to the original layout or place them closer to the buttonhole end if that suits how you plan to use the strap. Before the glue sets completely, check that both appliques are facing the same direction and that none of the buttonholes has been covered.

Holiday Use & Washing Option
This strap can work as a phone charm, keychain lanyard, or ID badge holder during the Christmas season. For a version that needs regular washing, sew the reindeer and tree onto the strap instead of using hot glue. This also makes it easier to remove or reposition the appliqués later.