
Here’s a festive Christmas crochet tree hood for a large-headed doll, complete with snowy leaf layers and a puffy gold star that makes the finished look extra cheerful.
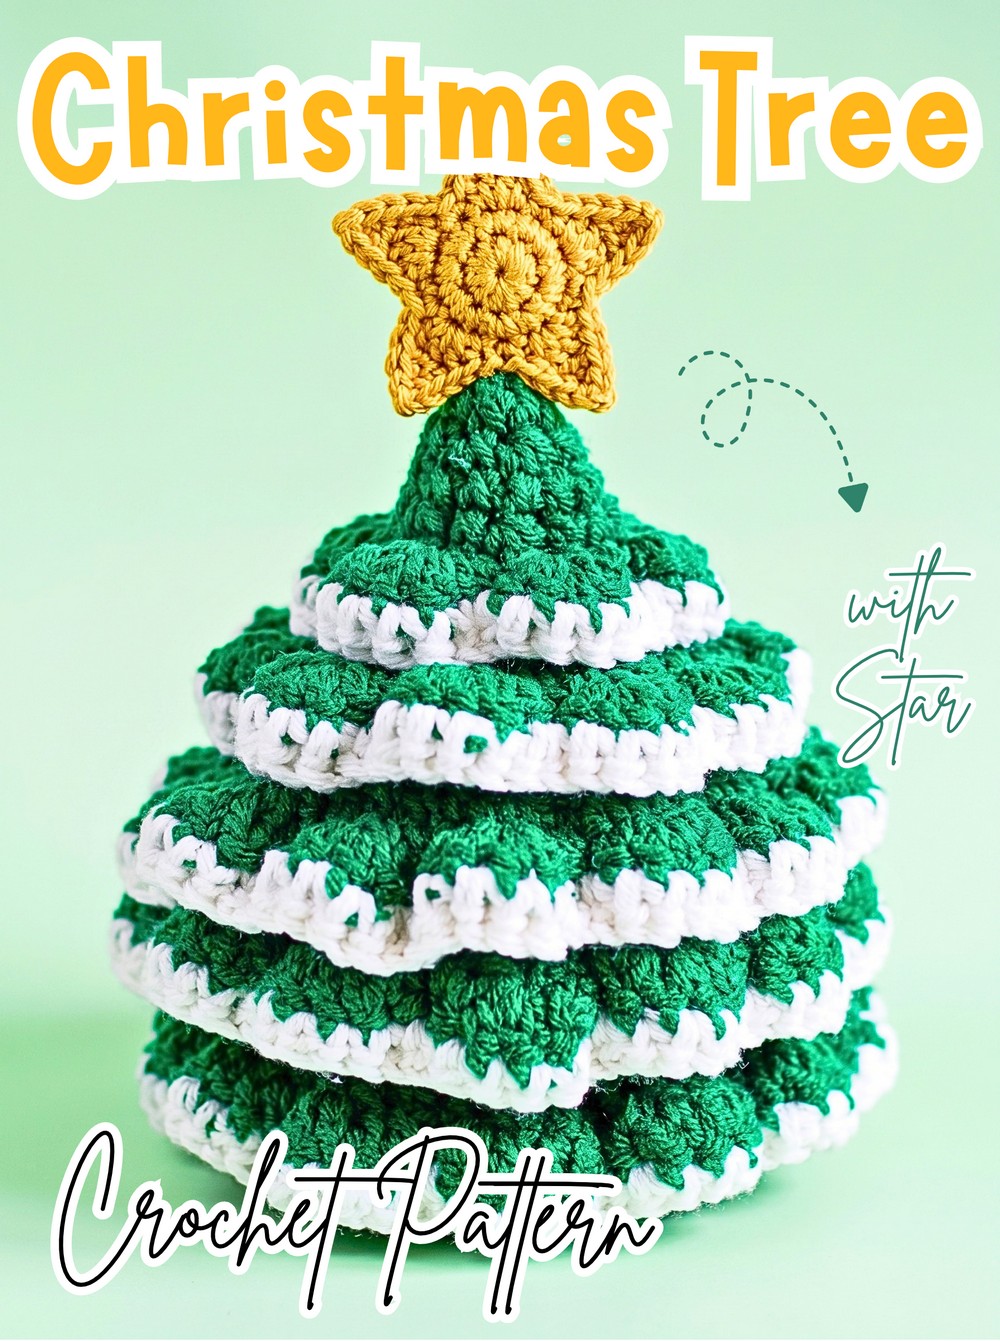
Dress-up gets a Christmas twist with this crochet tree hood, where layered green ruffles spread around the doll’s head as branches, and a small star sits at the very top. White edging adds the look of freshly fallen snow without making the crochet design complicated.
Sized to fit snugly around a large-headed doll, the crochet pattern begins with a rounded hood, opens at the face, then narrows toward the top. You’ll also learn how to add the five leafy layers, finish them with a snowy border, make the padded star, and adjust the decoration with your own ornaments or color choices.
Credit Nida Catty Official
Materials & Tools Needed
- Yarn: Medium/worsted weight yarn in Green for the tree, White for the snow trim, and Yellow or Gold for the star
- Crochet Hook: Size appropriate for your chosen yarn
- Large doll face/head: The hood is designed to fit around a large-headed doll
- Fiberfill: A small amount for the star
- Yarn needle: For sewing and weaving in ends
- Scissors
- Stitch markers
Finished Size & Customization
The finished hood is designed to fit snugly around a large-headed doll. Because the fit depends on the doll you are dressing, check the hood against the doll’s head as you work, particularly before the opening begins to close.
For a different Christmas style, make the entire tree white for a winter-wonderland look. Small colorful beads or buttons can be sewn on as ornaments, or a thin strand of tinsel can be woven through the green layers for extra sparkle.
Abbreviations
- MR: Magic Ring
- ch: Chain
- sc: Single Crochet
- inc: Increase – 2 sc in the same stitch
- dec: Decrease – sc 2 stitches together
- hdc: Half Double Crochet
- dc: Double Crochet
- sl st: Slip Stitch
- BLO: Back Loop Only
- FO: Fasten Off
- ( ) x number: Repeat the instructions inside the parentheses the stated number of times

The beginning ch 1 of each round or row does not count as a stitch.
Crochet the Tree Base and Hood
The first section creates the rounded tree shape that will sit around the doll’s head. The early rounds increase evenly to widen the piece; later rounds work without increases before the face opening is formed.
Build the rounded top
Round 1: Start with a MR, ch 1, work 6 sc into the ring, then join with a sl st. (6 sts)
Round 2: Ch 1, inc in each st around. (12 sts)
Round 3: Ch 1, (1 sc, inc) 6 times. (18 sts)
Round 4: Ch 1, (1 sc, inc, 1 sc) 6 times. (24 sts)
Round 5: Ch 1, (3 sc, inc) 6 times. (30 sts)
Round 6: Ch 1, (2 sc, inc, 2 sc) 6 times. (36 sts)
Round 7: Ch 1, (5 sc, inc) 6 times. (42 sts)
Rounds 8-9: Ch 1, work 1 sc in each st around. (42 sts)
At this point, the piece should have a rounded, evenly widened shape with 42 stitches around the circumference. The next rows stop working in a complete circle so an opening can be formed for the doll’s face.

Shape the Face Opening
Work the next rows back and forth rather than joining each row into a round. Keep the turning direction consistent so the opening develops across one side of the hood.
Row 10: Ch 1, turn, work 33 sc, leaving the remaining stitches unworked. (33 sts)
Row 11: Ch 1, turn, work 33 sc in BLO. (33 sts)
Rows 12–14: Ch 1, turn, work 33 sc. (33 sts)
Row 15: Ch 1, turn, work 33 sc in BLO. (33 sts)
Row 16: Ch 1, turn, work 33 sc, then ch 9 and sl st to the first sc of the row to rejoin the piece into a circle.
The ch-9 section now bridges the opening you created. Rather than leaving a permanent gap in the side of the hood, it gives you a chain section that can be crocheted into on the following round.
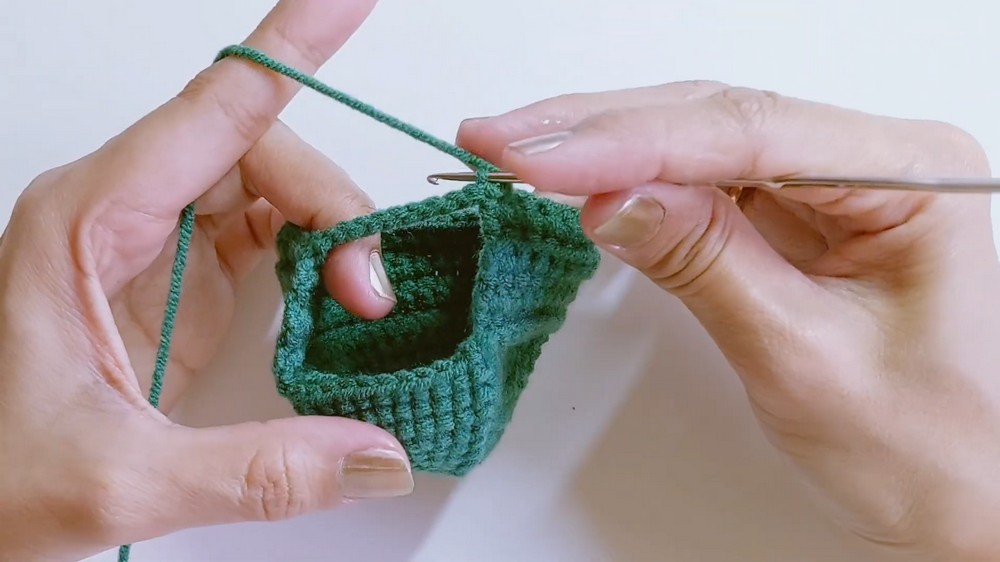
Close the Hood Around the Doll
Round 17: Ch 1, work 9 sc along the ch-9 space, then 33 sc around the remaining stitches. (42 sts)
Round 18: Ch 1, work 42 sc in BLO. (42 sts)
The exposed front loops from this round will later hold one of the leafy layers, so make sure the BLO stitches are worked cleanly and the unused loops remain visible.
Round 19: Ch 1, (5 sc, dec) 6 times. (36 sts)
Insert the doll’s head now
Before the opening becomes smaller, insert the doll’s head through the face opening. This is much easier while the hood still has enough room to pass over the head.
Once the doll is positioned inside, continue crocheting the narrowing rounds around it.

Round 20: Ch 1, work 1 sc in each st around. (36 sts)
Round 21: Ch 1, (2 sc, dec, 2 sc) 6 times. (30 sts)
Round 22: Ch 1, work 30 sc in BLO. (30 sts)
Round 23: Ch 1, (3 sc, dec) 6 times. (24 sts)
Round 24: Ch 1, work 1 sc in each st around. (24 sts)
Round 25: Ch 1, (1 sc, dec, 1 sc) 6 times. (18 sts)
Round 26: Ch 1, work 18 sc in BLO. (18 sts)
Round 27: Ch 1, (1 sc, dec) 6 times. (12 sts)
Round 28: Ch 1, work 1 sc in each st around. (12 sts)
Round 29: Ch 1, work 6 dec. (6 sts)
Round 30: Ch 1, work 1 sc in each st around. (6 sts)
The top should now have narrowed to a small six-stitch opening. The leafy layers will cover the outside of the hood, while the final closure finishes the pointed tree shape.
Close the Tree Top
Fasten off, leaving a long tail. Using a yarn needle, weave the tail through the front loops of the final 6 stitches, pull firmly to close the opening, and weave in the end.
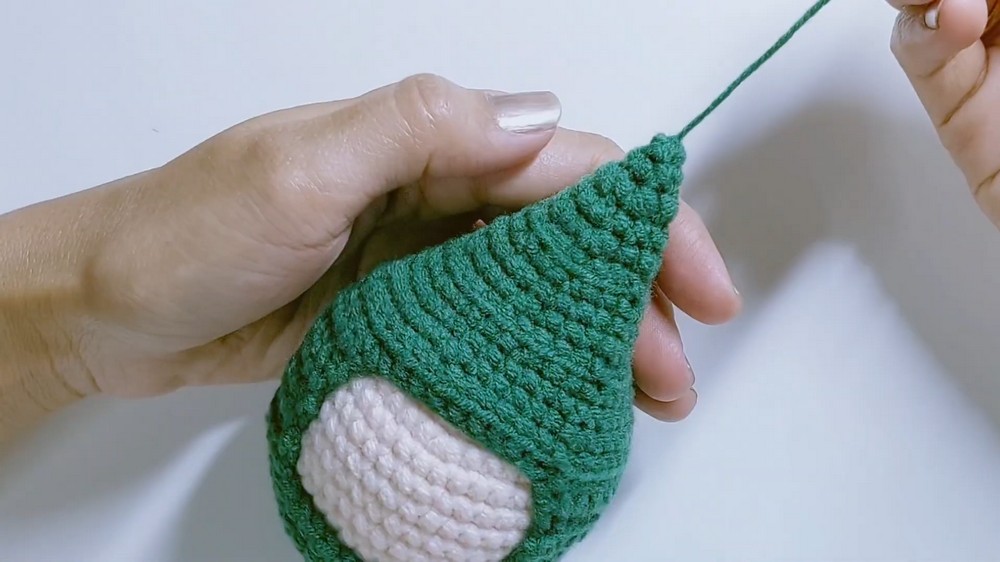
Add the Layered Tree Leaves
The ruffled branches are created from the front loops that were left exposed when the BLO rounds were worked. This is why the BLO rounds are important: those unused loops provide the attachment points for the leafy layers.
Work from the bottom layer upward:
- Layer 1 – Row 11: 11 petals
- Layer 2 – Row 15: 11 petals
- Layer 3 – Round 18: 14 petals
- Layer 4 – Round 22: 10 petals
- Layer 5 – Round 26: 6 petals
Each petal uses 3 stitches. Attach Green yarn to the first available front loop of the chosen layer.
Each petal: In Stitch 1, ch 2, work 1 sc and 1 dc in the same st; in Stitch 2, work 2 dc; in Stitch 3, work 1 dc and sl st in the same st. Repeat this 3-stitch sequence around the layer, then FO and weave in the ends.
Work each layer completely before moving upward. The lower layers should spread wider around the tree, while the upper layers become progressively smaller, creating the stepped Christmas-tree silhouette.
When checking your work, make sure the ruffles sit outward rather than curling tightly against the hood. If one layer looks uneven, check that each petal has used exactly three front loops before continuing.

Give the Branches a Snowy Edge
White yarn turns the green ruffles into frosted Christmas branches.
Attach White yarn to the edge of any green leaf petal. Ch 1, then loosely sc evenly around the entire perimeter of the leaves on all layers. FO and weave in the ends.
Keep these stitches loose enough to travel around the pointed petals without pulling them inward. The white edging should lightly trace the branch tips, giving the green layers a snowy finish.

Crochet the Gold Star
Make 2 identical stars in Yellow or Gold yarn. These two pieces will be sewn together and lightly stuffed so the topper has a little dimension instead of lying completely flat.
Round 1: Start with a MR, ch 1, work 5 sc into the ring, then join with a sl st. (5 sts)
Round 2: Ch 1, inc in each st around, then join with a sl st. (10 sts)
Round 3 – Star Points: Ch 4, working back down the chain, sc in the 2nd ch from hook, sc in the next ch, hdc in the last ch, sl st into the next stitch on the circle base, then sl st into the following stitch to begin the next point. Repeat from * 5 times to create 5 points.
FO and weave in the ends.
The five points should radiate around the small center. Keep the chain tension fairly even so the points remain similar in size.
Assemble the Puffy Star
Place the two finished star pieces flat against each other.
Using a yarn needle and Yellow yarn, sew around their edges. Leave a small opening until you are ready to add the stuffing.
Before completely closing the star, place a very small amount of fiberfill in the center. You only need enough to create a gentle puff; too much stuffing can distort the points and make the star lose its crisp shape.
Finish sewing the opening closed and weave in the ends.

Attach the Star to the Tree
Position the finished star directly on the pointed top of the green Christmas tree. Sew it securely to the very tip, passing the needle through the base of the star and the top of the tree as needed.
Check the star from the front before securing the final stitches. It should sit upright and centered rather than leaning toward one side.
Final Fit Check
Place the completed hood on the doll and adjust the face so it sits neatly inside the opening. The green layers should fall around the head like Christmas-tree branches, with the white trim visible along their edges and the gold star centered above.
Securely weave in any remaining yarn tails on the inside of the work. For a more decorated Christmas look, add small colorful beads or buttons as ornaments, or weave a thin piece of tinsel through the leafy layers.






