Need a huggable crochet gingerbread plushie? Brown blanket yarn, white icing, bobble gumdrops, rosy cheeks, and a tiny bow give this cookie its sweet personality.
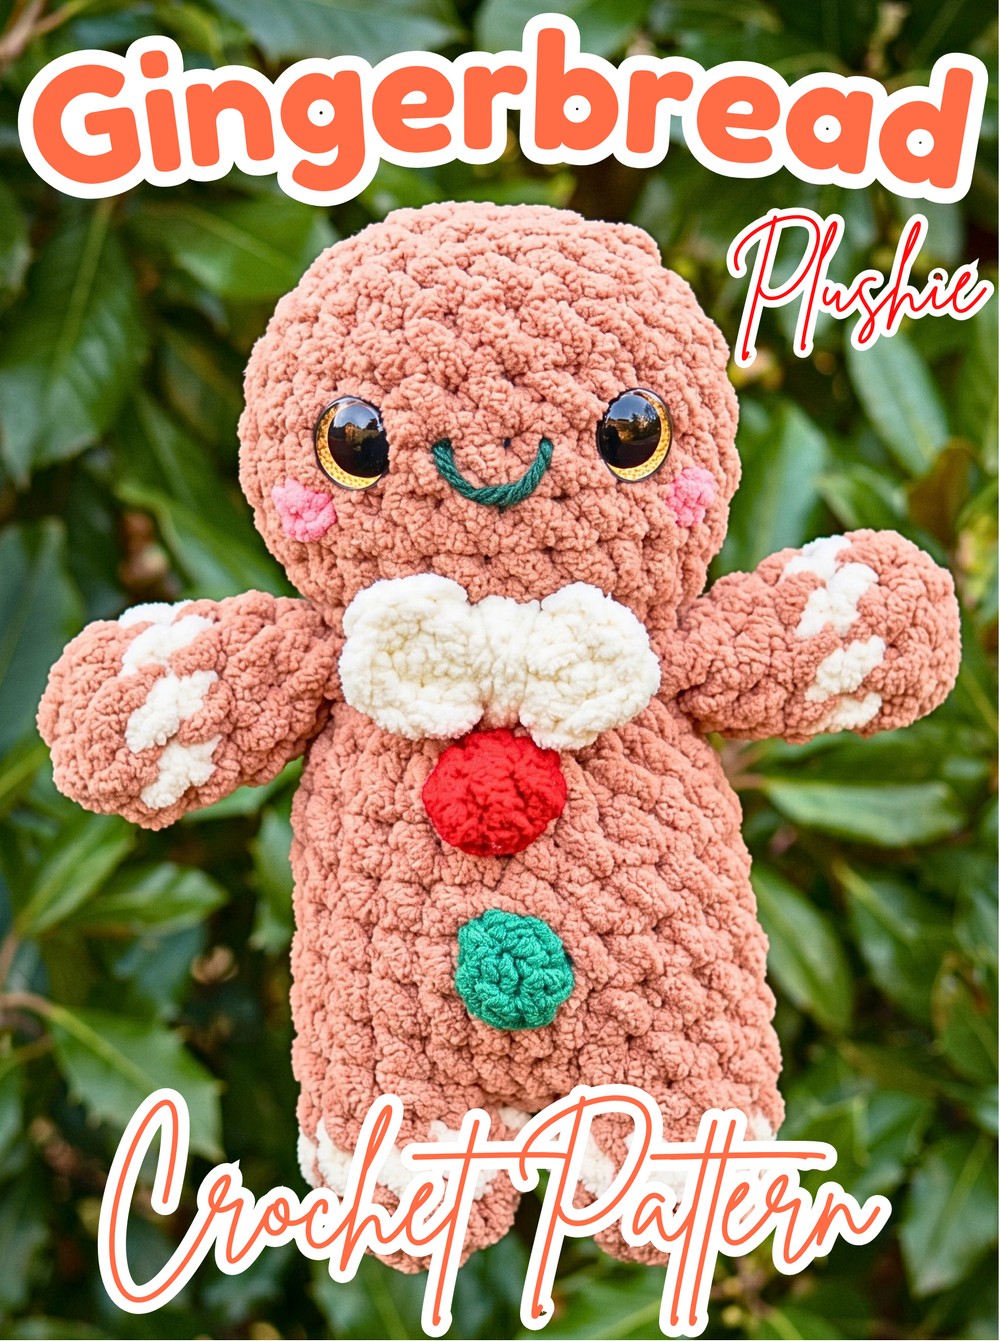
Nothing says cozy holiday crochet quite like a little gingerbread character you can actually hug. This crochet plushie combines a soft brown cookie body with a white icing stripe, colorful bobble buttons, expressive eyes, a curved smile, and rosy cheeks for a finished look that feels cheerful rather than overly complicated.
What makes the pattern especially useful is the way the arms are attached while you crochet, keeping sewing to a minimum. You’ll also shape the feet, body, neck, and head in clear stages, then add the face and bow at the end. Color changes are placed directly into the rounds, so you can follow the icing and gumdrop details without having to recreate them afterward.
Credit Annie Carraway Art
Choose the Look Before You Start
Bernat Blanket Yarn in Sienna gives the cookie its soft brown base, while Sparkly White creates the icing. For the gumdrop buttons, use a contrasting shade such as green, red, or pink.
For the face, use cotton worsted weight yarn in white for the smile and pink for the blush. The pattern uses 16 mm Kawaii safety eyes, with painted green or gold eyes giving the character an especially playful appearance.
Because blanket yarn can vary slightly in thickness and tension, the finished plushie may not be exactly the same size from one yarn choice to another. Using blanket yarn should give you a small-to-medium plushie with a soft, huggable feel.
Materials & Tools
- Yarn: Bernat Blanket Yarn or preferred super bulky yarn in Sienna (Brown), Sparkly White, and a contrasting gumdrop color such as Green, Red, or Pink
- Facial Details: Cotton worsted weight yarn in White and Pink
- Hook: 6.5 mm crochet hook
- Eyes: 16 mm Kawaii safety eyes
- Stuffing: Polyfill
- Tools: Yarn needle, scissors, and stitch marker
- Optional: Aleene’s Fabric Fusion glue for securing the smile
Pattern Terms
- MC: Magic Circle
- SC: Single Crochet
- INC: Increase – 2 SC in the same stitch
- INV DEC: Invisible Decrease – SC 2 together using the front loops only
- FLO: Front Loop Only
- DC: Double Crochet
- CH: Chain
- SL ST: Slip Stitch
- Bobble: 3 unfinished Double Crochets made in the same stitch, pulled through together with the main body color

Crochet Gingerbread Plushie Pattern
Arms – Make 2
The arms are made first and later crocheted directly into the body. Keep the stuffing light so they remain soft and flexible rather than becoming stiff.
R1: Using Brown, make a MC and place 8 SC inside. (8)
R2: SC around. On the final stitch, do not finish the stitch completely; change your color to White. (8)
R3: SC around in White to create the icing. On the final stitch, change your color back to Brown. (8)
R4-R5: SC around in Brown for 2 rows. Tie the yarn tails together and tuck them inside the bottom of the arm now. (8)
R6: 1 INV DEC, 6 SC. (7)
Slip stitch, cut the yarn, and fasten off, leaving a short tail because the arms will be crocheted directly into the body. Lightly stuff the bottom of each arm and set both aside.

Feet – Make 2
The two feet need to be prepared slightly differently because they will be joined together to begin the lower body.
Foot 1 — R1: Using Brown, make a MC and place 10 SC inside. (10)
R2: SC around. Change color to White on the final stitch. (10)
R3: SC around in White. Change color to Brown on the final stitch. (10)
R4: SC around in Brown. (10)
For Foot 1, leave the very last stitch unfinished. Cut the yarn, carefully remove the hook while keeping the loops open, and set the foot aside.
Make Foot 2 in exactly the same way through Round 4, but finish the last stitch normally and do not cut the yarn.

Join the Feet Before Building the Body
This joining step turns the two separate feet into one continuous lower section. Take a moment here to make sure both feet are facing the same direction before continuing.
R5: Place the unfinished stitch of Foot 1 back onto your hook. Grab the finished loop from Foot 2 and pull it through the unfinished loops of Foot 1 to join them, just like a color change. Work 9 SC around the first foot, then place an INC in the last stitch; work 9 SC around the second foot, then place an INC in the last stitch. (22)
R6-R7: SC around for 2 rows. (22)
Stuff the feet now, before the opening becomes harder to reach. Keep the stuffing firm enough to hold the shape but avoid packing it so tightly that the stitches stretch apart.

Add the Gumdrop Buttons
The first bobble appears while the body is still fairly open, making this a convenient point to check its placement.
R8: 10 SC. Yarn over with your Gumdrop color (Green). In the next stitch, make a Bobble Stitch using 3 unfinished DC in the same stitch, pulling through with the Brown yarn at the very end to finish the bobble cleanly. 11 SC to finish the round. (22)
If your tension makes the button look slightly off-center, adjust its placement by one stitch if needed so the finished bobble sits where you want it.
R9-R10: SC around for 2 rows in Brown. (22)
The second gumdrop is positioned lower on the body and works alongside a decrease.

R11: 9 SC, 1 INV DEC. Yarn over with your Gumdrop color and make the second Bobble Stitch. 9 SC, counting the stitch right after the bobble to close it down tight plus 8 more, then 1 INV DEC in the last stitch. (21)
R12: (3 SC, 1 INV DEC) repeat exactly 4 times. (16)
Attach the Arms While You Crochet
Round 13 is where the arms become part of the body, so this is one of the most important placement points in the pattern. Before crocheting through both pieces, position the arms so their color-change seams face downward.
R13: 3 SC on the body, 4 SC crocheting through both the arm and the body to attach the first arm, 4 SC across the front chest, 4 SC crocheting through both the second arm and the body, 1 SC in the final stitch.
Check both arms before moving on. Their icing sections should face outward while the color-change seams remain underneath.
Shape the Neck and Head
Round 14 creates a defined neck before the head begins to widen. Working through the front loops only gives this section a visible ridge and helps distinguish the neck from the head.
R14: Working in FLO, (3 FLO SC, 1 FLO INC) repeat 4 times total.
Stuff the neck firmly now. This is the best point to support the neck from inside before the head becomes larger, helping prevent the finished character from flopping.
R15: (4 SC, 1 INC) repeat 4 times total.
R16-R19: SC around for 4 rows.

Place the Safety Eyes Before Closing the Head
The eye placement is easier to adjust while the head is still open. Place the 16 mm safety eyes between Rows 17 and 18, approximately 4 stitches apart, leaving enough space between them for the embroidered smile.
Once the eyes are positioned securely, stuff the head generously. Spread the polyfill evenly as you fill so the face stays rounded instead of developing noticeable empty spots.
R20: (3 SC, 1 INV DEC) repeat 4 times.
R21: (2 SC, 1 INV DEC) repeat 4 times.
R22+: Continue doing INV DEC around until the hole is small. Add stuffing to any remaining gaps before the opening closes.
Fasten off, leaving a long tail. Weave the needle through the front loop of every remaining stitch and pull tight like a magic circle to close the top of the head. Tie a knot to secure it, then hide the tail inside the plushie.
Give the Cookie Its Expression
The face is what turns the crocheted shape into a recognizable gingerbread character, so keep the smile and blush placement balanced around the eyes.
Smile
Thread the white cotton worsted yarn and sew a small curved smile directly between the eyes. If you want the smile to stay especially flat and secure, you can dab a tiny amount of fabric glue onto the back of the thread before pressing it down.
Blush
Thread the pink cotton yarn. Insert the needle from the side of the head and loop it 2–3 times around a stitch beside the outer edge of each eye. Tie off and hide the yarn tails inside the body.
A slightly wider or narrower smile can change the expression noticeably, so this is an easy place to give your gingerbread character its own personality.
Finish with the Tiny Bow
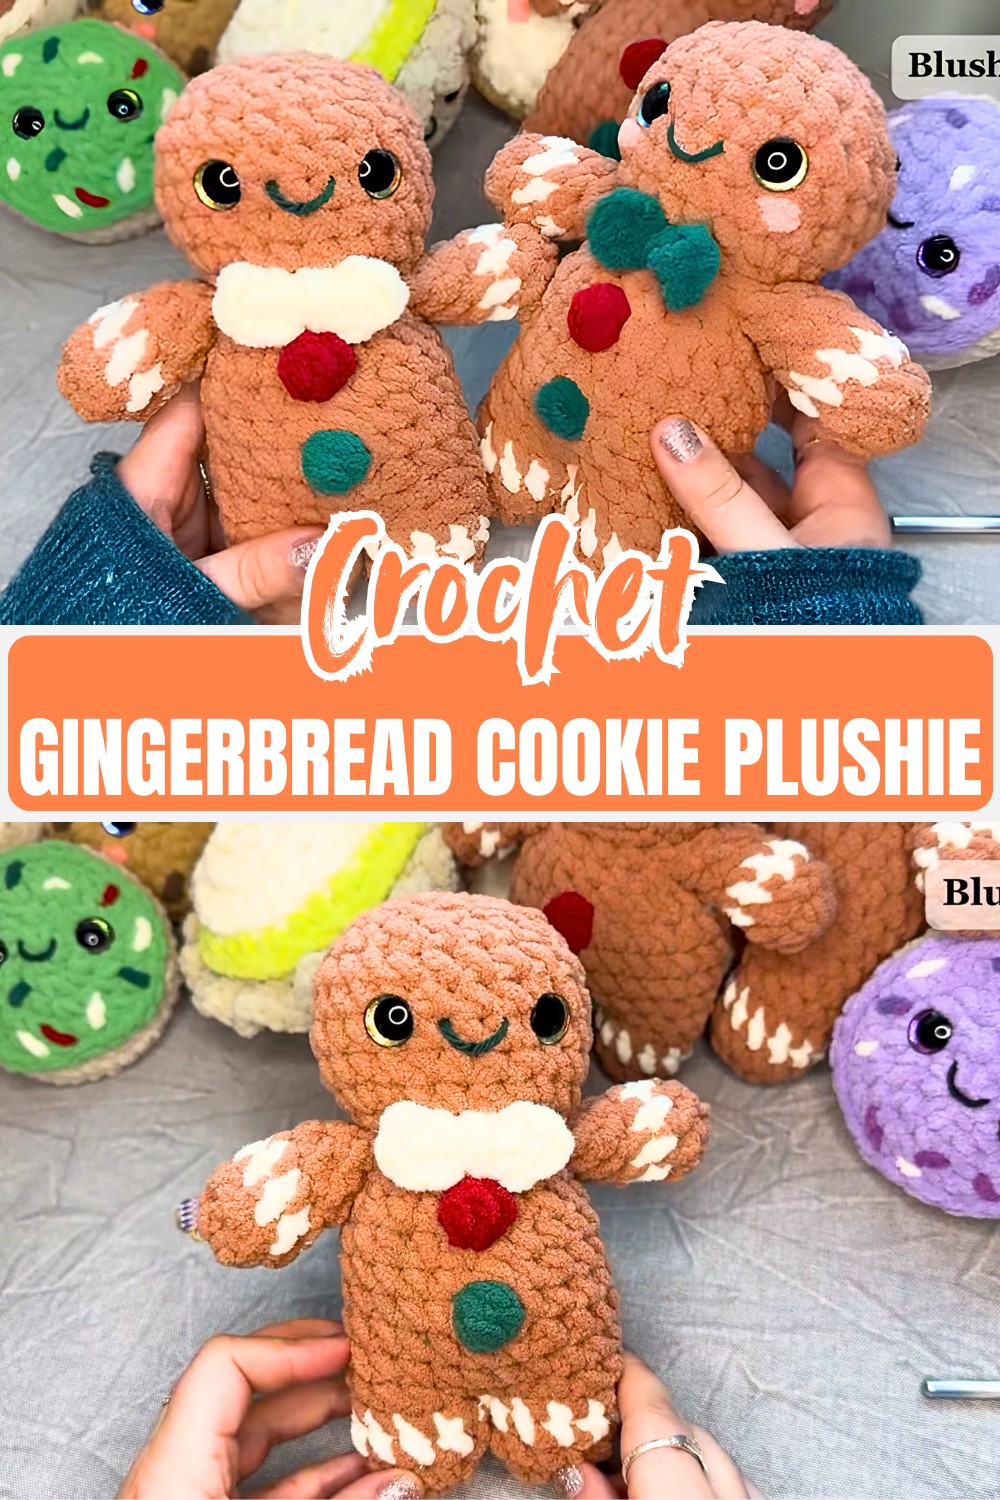
The bow can change the character’s look depending on where you place it. At the neckline, it reads as a little bow tie; on the head, it becomes a sweet hair bow.
Make a Magic Circle.
Bow: Ch 2, 1 DC into the MC, Ch 2, SL ST into the MC; Ch 2, 1 DC into the MC, Ch 2, SL ST into the MC.
Pull the MC closed tightly and leave a long tail. Take the shorter starting tail and wrap it around the center of the bow several times to create the knot shape. Tie the two tails together securely at the back.
Sew the finished bow onto the neckline or the top of the head.
Easy Ways to Personalize Your Gingerbread
Once the basic character is complete, small color and placement changes can make several versions without changing the main shaping.
- Gumdrops: Use red, pink, or green for the bobble buttons, or mix the colors.
- Bow placement: Sew the bow at the neck for a dapper bow tie or place it off-center on the head for a hair bow.
- Expression: Make the embroidered smile narrower or wider to create a different personality.
- Eyes: Green or gold-painted 16 mm safety eyes can give the cookie a different finished expression.
Before putting your gingerbread plushie on display, weave in any remaining loose ends and make sure the facial details and bow are securely attached. The result is a soft cookie character with built-in icing, raised gumdrop buttons, rosy cheeks, and a knitted-look texture created entirely with crochet.