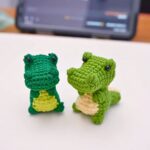
Create your own adorable mini crochet dog—a timeless craft that combines charm, creativity, and utility. This project is perfect for gifting, decorating, or simply indulging in a relaxing hobby.
Its detailed design and customization options make it suitable for all skill levels.

This mini crochet dog is not only lovable but also practical. Use it as a keychain, décor piece, or a special handmade gift.
Its sturdy construction ensures it stands the test of time, while its cute and customizable design appeals to people of all ages, adding a personal touch to your creations.
Credit Luaji Crochet
In this post, you will find a step-by-step Crochet Mini Dog Pattern along with detailed instructions. However, if you encounter any difficulties or mistakes while creating your desired design, feel free to watch the video tutorial provided at the end of the blog post.
Materials and Preparation
To make this adorable mini crochet dog, you’ll need the following materials:
- Yarn: DK weight yarn in white (main body), black (nose), and red (for the bow).
- Hook size: 2 mm crochet hook.
- Stuffing: Polyester fiberfill for stuffing the body and legs.
- Tapestry Needle: For sewing parts together and weaving in ends.
- Stitch Marker or Scrap Yarn: To mark the last stitch of each round.
- Optional: Black embroidery thread for details (eyes and mouth) and blush for adding color to the cheeks.
- Keychain Ring: If making a keychain version.
Abbreviations and Notes
Common Abbreviations:
- MR: Magic Ring
- CH: Chain
- SC: Single Crochet
- HDC: Half Double Crochet
- SL ST: Slip Stitch
- INC: Single Crochet Increase (2 SC in the same stitch)
- DEC: Single Crochet Decrease (invisible or regular)

Notes:
- This pattern is worked in continuous rounds; do not join or turn unless specified.
- Mark the last stitch of each round using a stitch marker or small piece of scrap yarn to help keep track of your rounds.
- Adjust your hook size if you are using a different yarn weight.
Gauge, Approximate Size, and Pattern Notes
- Gauge: Not critical for this project, as it is a small amigurumi. However, ensure your stitches are tight enough to prevent stuffing from showing.
- Finished Size: Using DK weight yarn and a 2 mm hook, the dog will be approximately 5–7 cm tall when finished.
Pattern Notes:
- The dog is crocheted in sections. The head and body are made as one seamless piece, while the legs, ears, tail, and snout are created separately.
- The assembly involves sewing parts onto the body, so leave long tails for attaching.
- A gauge swatch is not required for this project.
Step-by-Step Pattern
Head and Body (worked in one piece)
Round 1: Start with white yarn. Make 6 SC in a Magic Ring. [6 stitches]
Round 2: INC in each stitch around. [12 stitches]
Round 3: (SC, INC) x 6. [18 stitches]

Round 4: (2 SC, INC) x 6. [24 stitches]
Round 5: (3 SC, INC) x 6. [30 stitches]
Rounds 6–10: SC in each stitch around. [30 stitches per round]
Round 11: (3 SC, DEC) x 6. [24 stitches]
Round 12: (2 SC, DEC) x 6. [18 stitches]
Round 13: (SC, DEC) x 6. [12 stitches]
Round 14: (SC, INC) x 6. [18 stitches]
Round 15: (2 SC, INC) x 6. [24 stitches]
Rounds 16–19: SC in each stitch around. [24 stitches per round]
Round 20: (2 SC, DEC) x 6. [18 stitches]
Round 21: (SC, DEC) x 6. [12 stitches]
Round 22: (SC, DEC) x 4. [8 stitches]

Cut the yarn, leaving a tail. Use the tapestry needle to thread through the front loops of the remaining stitches and pull tight to close. Stuff the body as you work.
Front Legs (Make 2)
Round 1: Make 6 SC in a Magic Ring. [6 stitches]
Rounds 2–5: SC in each stitch around. [6 stitches per round]
Round 6: Fold the piece in half and make 3 SC to close the leg.
Leave a tail for sewing.

Back Legs (Make 2)
Round 1: Start with a Magic Ring, CH 1, make 7 HDC in the ring. [7 stitches]
Leave a tail for sewing.
Ears (Make 2)
Round 1: Make 6 SC in a Magic Ring. [6 stitches]
Round 2: INC in each stitch around. [12 stitches]
Rounds 3–6: SC in each stitch around. [12 stitches per round]
Round 7: (2 SC, DEC) x 3. [9 stitches]
Round 8: (SC, DEC) x 3. [6 stitches]
Round 9: Fold in half and make 3 SC to close the ear.

Leave a tail for sewing.
Snout
Round 1: Start with a Magic Ring, CH 2, and make 7 DC in the ring.
Leave a tail for sewing. Embroider the nose and mouth using black yarn or thread.

Tail
CH 10, skip the first chain, and make 9 SL ST back along the chain.
Leave a tail for sewing.

Assembly Instructions
- Front Legs: Sew the front legs between rounds 14–15 of the body, leaving about 2 stitches between them.
- Back Legs: Attach the back legs between rounds 18–20. Sew through the back loops of the stitches for a cleaner finish.
- Snout: Stitch the snout between rounds 8–10 of the head.
- Ears: Attach the ears between rounds 5–6, leaving 12 stitches between them.
- Tail: Sew the tail at the back, just above the back legs.
- Eyes: Add embroidered eyes on round 7, leaving 3 stitches between them. Alternatively, use safety eyes.
- Bow: Create a bow using red yarn and tie it around the dog’s neck.
If creating a keychain version, attach the keychain ring to the top of the dog’s head. Add a little blush to the cheeks for extra charm.

Finishing Touches
Your mini crochet dog is complete! This adorable dog can be used as a keychain, decorative gift, or cherished toy.
Key to Success
- Choose high-quality yarn for durability.
- Follow the video tutorial carefully for precise results.
- Use a crochet hook suited for the yarn thickness.
- Take your time to focus on smaller details for a polished look.
- Add personalized colors or accessories to make it unique.
Conclusion
Creating a mini crochet dog is a rewarding experience that blends creativity with functionality. This project offers lasting charm, makes great gifts, and lets you enhance your crafting skills. It’s a fun and worthwhile project for beginners and seasoned crocheters alike!