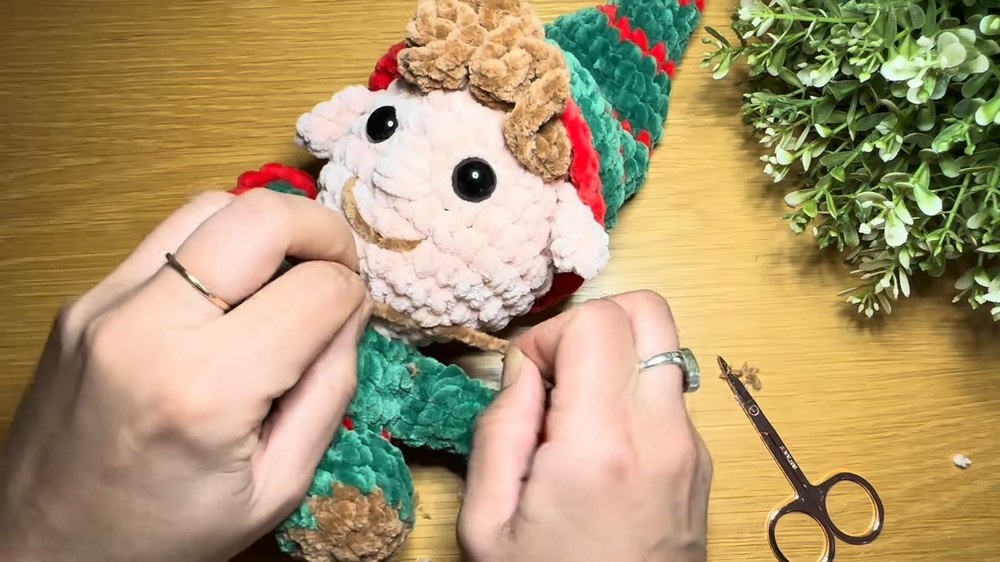
Want a cuddly crochet elf with a striped outfit, curled hair, pointed hat, and tiny embroidered smile? This pattern walks you through each part clearly.
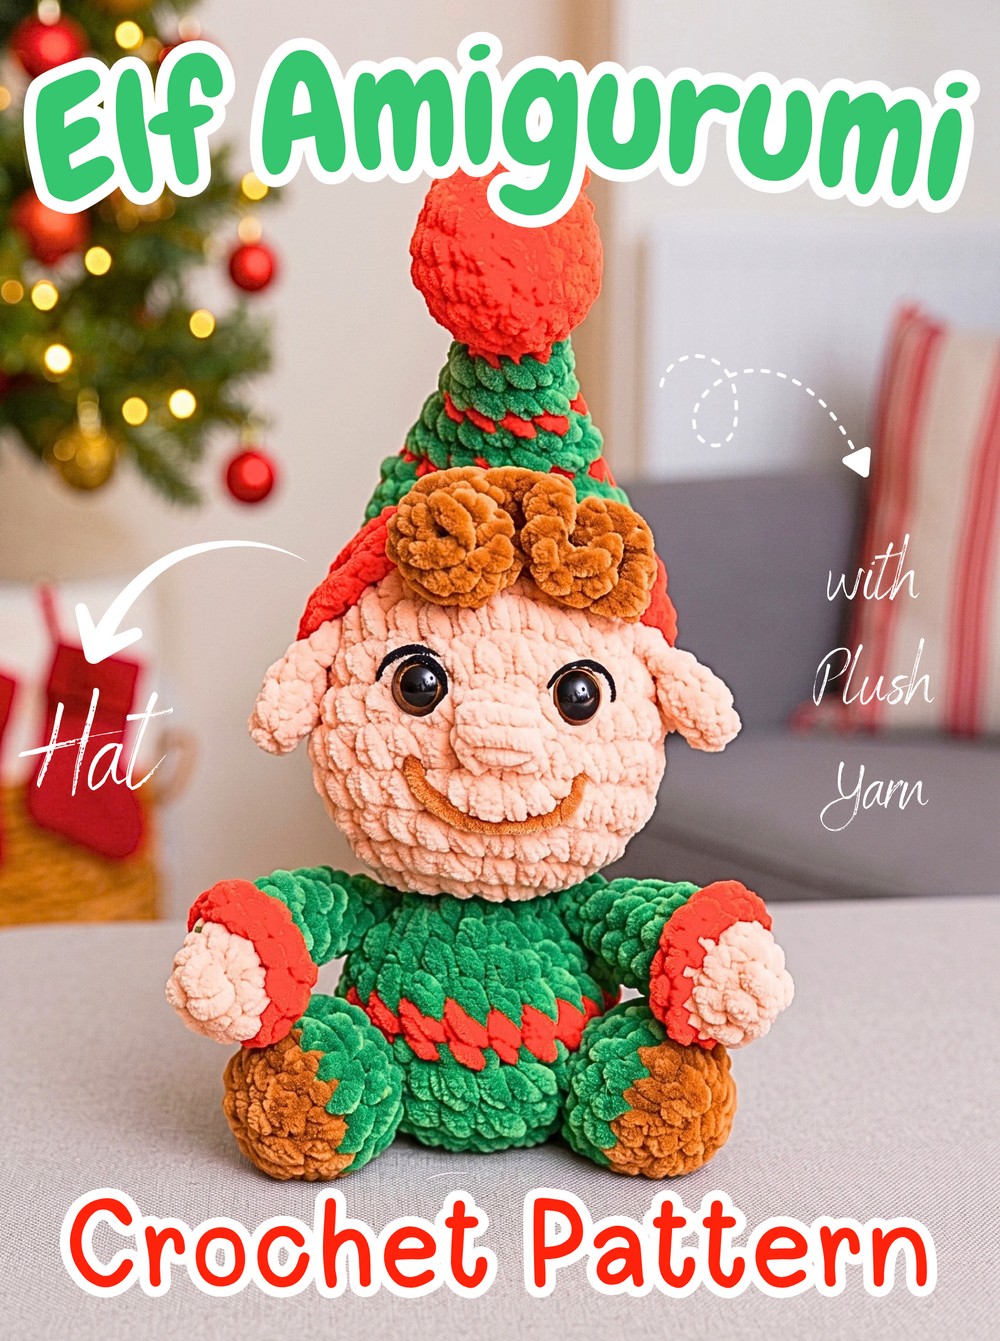
Bright holiday colors give this crochet elf plenty of character, from the green-and-red outfit to the tall striped hat topped with a soft bobble. The plush yarn makes the finished crochet elf wonderfully squishy, while the embroidered nose, smile, eyelashes, and curled brown hair bring the face to life.
You’ll crochet the head and body as one continuous piece, then make the legs, arms, hat, bobble, and curled hair separately before bringing everything together. The tutorial also explains where to place the safety eyes, how to keep the hat brim loose, and how to position the facial details so your elf keeps its cheerful proportions.
Credit Keep Calm and Crochet
Materials and Tools
- Plush yarn (super bulky/chenille): green, red, skin color, and brown
- DK-weight yarn: a small amount of dark yarn such as black or brown for the eyelashes
- 14 mm safety eyes
- 5.5 mm crochet hook
- Stitch marker
- Darning needle
- Scissors
- Fiberfill stuffing
Using super bulky plush yarn with a 5.5 mm hook gives the elf a classic, huggable amigurumi size, although the exact dimensions will vary with yarn and tension. For a smaller ornament-style elf, you can substitute worsted-weight acrylic or cotton and use a 3.5 mm or 4.0 mm hook. Hair and mouth colors can also be changed to suit your preferred look.
Abbreviations
- ch: Chain
- sc: Single crochet
- dc: Double crochet
- inc: Increase – 2 sc in the same stitch
- dec: Invisible decrease – pull up a loop from the front loops of the next 2 stitches and crochet them together
- sl st: Slip stitch
- BLO: Back loop only
- FLO: Front loop only
- st(s): Stitch(es)
- FO: Fasten off

Easy Crochet Elf Pattern
Head and Body
Work the head and body continuously in a spiral, beginning at the top of the head. Keep a stitch marker in the working stitch so you can easily identify the beginning of each round.
Round 1 (Skin Color): Ch 2, work 6 sc in the 2nd ch from the hook. (6 sts)
Round 2: Inc in every st around. (12 sts)
Round 3: [1 sc, inc] 6 times. (18 sts)
Round 4: [2 sc, inc] 6 times. (24 sts)
Round 5: [3 sc, inc] 6 times. (30 sts)
Round 6–11: 1 sc in each st around for 6 rounds. (30 sts)
At this point, the repeated single-crochet rounds should have created the main rounded portion of the head. Before you continue into the decreases, place the safety eyes so they remain level.
Safety Eye Placement: Insert the 14 mm safety eyes 2 rounds up from your current working round, between Rounds 9 and 10, leaving 5 stitches of space between them.
Round 12: [3 sc, dec] 6 times. (24 sts)
Round 13: [2 sc, dec] 6 times. (18 sts)
Round 14: [1 sc, dec] 6 times. (12 sts)
Round 15: [2 sc, dec] 3 times. (9 sts). Sl st to FO the skin color.
The decreases now narrow the bottom of the head into the neck area. When you finish R15, the remaining 9 stitches provide the transition into the green body section.
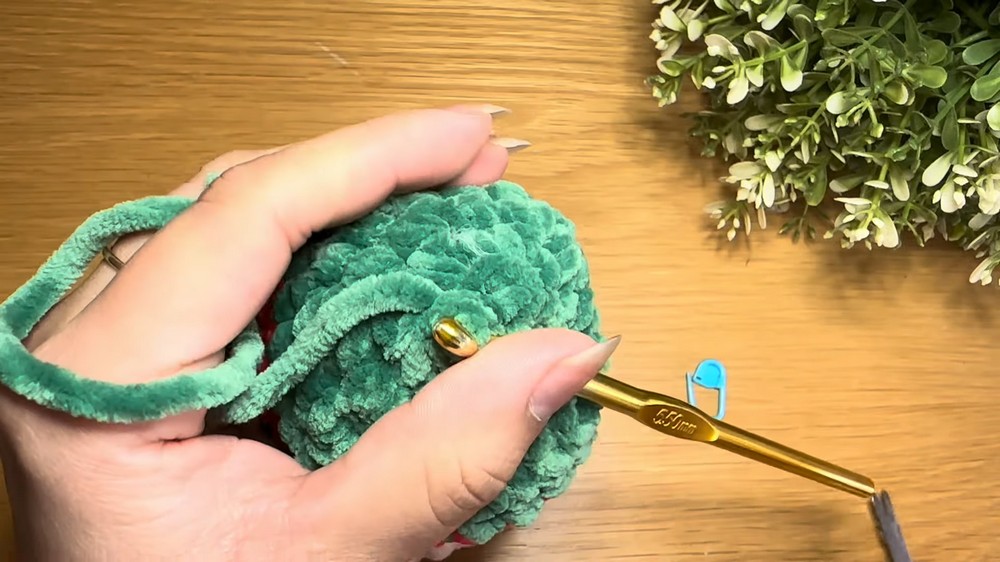
Round 16 (Green Color): Attach green yarn to any stitch on the last round. Ch 1, inc in the same st. Inc in every st around. (18 sts)
Round 17: [2 sc, inc] 6 times. (24 sts)
Stuff the head firmly with fiberfill at this stage. Work the stuffing into the sides and crown rather than packing everything into one spot; the face should remain rounded and smooth around the eyes.
Round 18–19: 1 sc in each st around for 2 rounds. (24 sts). Sl st to FO the green color.
The short green section forms the upper body beneath the head. Keep the stuffing evenly distributed so the body does not become lopsided.
Round 20 (Red Color): Attach red yarn to any stitch. Ch 1, 1 sc in every st around. (24 sts). Sl st to FO the red color.
Round 21 (Green Color): Attach green yarn to any stitch. Ch 1, 1 sc in every st around. (24 sts)
Round 22: [2 sc, dec] 6 times. (18 sts)
Round 23: [1 sc, dec] 6 times. (12 sts)
The final decreases bring the lower body inward. Add the remaining stuffing now and check the shape before closing; it should feel firm while still retaining the soft, rounded appearance of plush amigurumi.
Round 24: Dec 6 times. (6 sts). To close the final gap, work 1 or 2 extra decreases across the opening, sl st, and FO. Weave the yarn tail completely inside the body.

Legs – Make 2
Each leg begins with brown yarn for the shoe and changes to green for the leg. After making both, keep their lengths and stuffing similar so the elf sits evenly.
Round 1 (Brown Color): Ch 2, work 6 sc in the 2nd ch from the hook. (6 sts)
Round 2: Inc in every st around. (12 sts). Sl st to FO the brown color.
Round 3 (Green Color): Attach green yarn to any stitch. Ch 1, 1 sc in every st around. (12 sts)
Round 4: 1 sc in each st around. (12 sts)
Round 5: [1 sc, dec] 4 times. (8 sts). Sl st to FO. Leave a long tail for sewing.
Stuff the upper portion of each leg before attaching it. The legs should remain plump enough to hold their shape but not so tightly stuffed that they become difficult to sew onto the body.

Arms – Make 2
The hands are worked in skin color first, followed by the green sleeves. Pay attention to the BLO instruction in R3 because it creates the exposed front loops needed later for the red cuffs.
Round 1 (Skin Color): Ch 2, work 6 sc in the 2nd ch from the hook. (6 sts)
Round 2: [1 sc, inc] 3 times. (9 sts). Sl st to FO the skin color.
Round 3 (Green Color): Attach green yarn into the BLO of any stitch. Ch 1, 1 sc in the same BLO, and sc in the BLO of the next 8 sts. (9 sts)
Round 4: Working in both loops again, [1 sc, dec] 3 times. (6 sts)
Lightly stuff the hand with fiberfill, or tuck the excess yarn tails inside to give the hand a little plumpness without overfilling it.
Round 5–7: 1 sc in each st around for 3 rounds. (6 sts)
Pinch the top of the arm flat before closing. Insert the hook through both layers, front and back, and work 3 sc across to seal the opening. Ch 1 and FO, leaving a long tail for sewing.
Add the Red Arm Cuffs
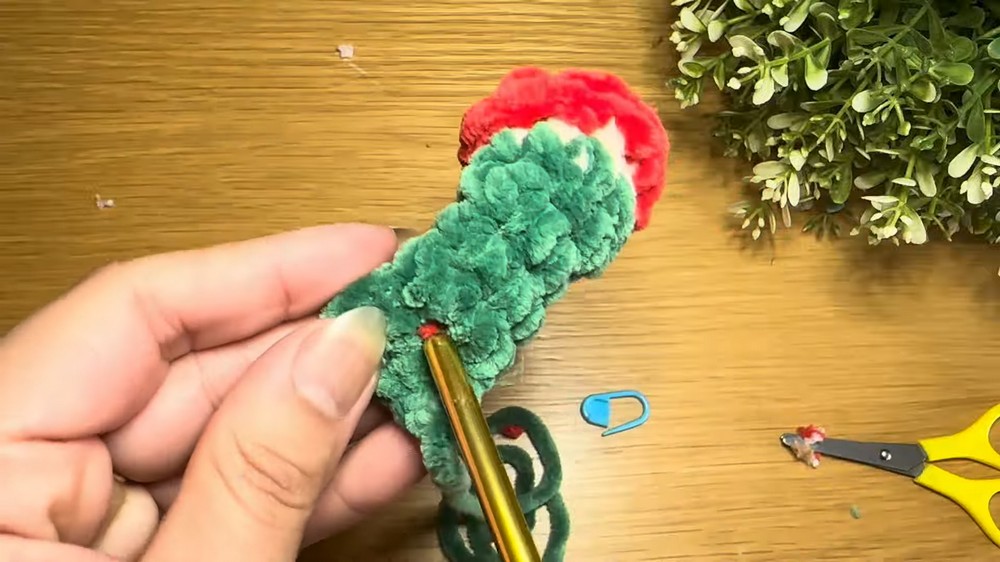
Point the hand upward so you can clearly see the exposed front loops left from R3.
Arm Cuffs (Red Color): Attach red yarn to the exposed FLO from Round 3. Ch 1, work 1 sc in every front loop around. (9 sts). Sl st to FO. Hide the red tails inside the arm.
The cuff should sit around the transition between the skin-colored hand and green sleeve. If it looks uneven, gently rotate the arm before sewing it onto the body.
Hat Bobble and Hat
The hat is built from the small bobble upward, with green, red, and green sections gradually increasing to create the tall striped shape. Keep the color changes tidy because they will remain visible around the hat.
Round 1 (Bobble Color): Ch 2, work 6 sc in the 2nd ch from the hook. (6 sts)
Round 2: Inc in every st around. (12 sts)
Round 3–4: 1 sc in each st around for 2 rounds. (12 sts)
Round 5: Dec 6 times. (6 sts). Sl st to FO. Stuff lightly.
The bobble should remain soft rather than firmly packed. Too much stuffing can make it look stiff once the hat is attached.
Round 6 (Green Color): Attach green yarn. Ch 1, 1 sc in every st around. (6 sts)
Round 7: 1 sc in each st around. (6 sts)
Round 8: [1 sc, inc] 3 times. (9 sts). Sl st to FO the green color.
Round 9 (Red Color): Attach red yarn. Ch 1, 1 sc in every st around. (9 sts). Sl st to FO the red color.
Round 10 (Green Color): Attach green yarn. Ch 1, 1 sc in every st around. (9 sts)
Round 11: [2 sc, inc] 3 times. (12 sts)
Round 12: 1 sc in each st around. (12 sts). Sl st to FO the green color.
Round 13 (Red Color): Attach red yarn. Ch 1, 1 sc in every st around. (12 sts). Sl st to FO the red color.
Round 14 (Green Color): Attach green yarn. Ch 1, [1 sc, inc] 6 times. (18 sts)
Round 15–16: 1 sc in each st around for 2 rounds. (18 sts). Sl st to FO the green color.
Round 17 (Red Color): Attach red yarn. Ch 1, 1 sc in every st around. (18 sts). Sl st to FO the red color.
Round 18 (Green Color): Attach green yarn. Ch 1, [2 sc, inc] 6 times. (24 sts)
Round 19–20: 1 sc in each st around for 2 rounds. (24 sts). Sl st to FO the green color.
Round 21 (Red Color): Attach red yarn. Ch 1, 1 sc in every st around. (24 sts). Sl st to FO the red color.
Round 22 (Green Color): Attach green yarn. Ch 1, [2 sc, inc] 8 times. (32 sts)
Round 23–24: 1 sc in each st around for 2 rounds. (32 sts). Sl st to FO the green color.
Round 25–26 (Red Color): Attach red yarn. Ch 1, 1 sc in every st around for 2 rounds. (32 sts). FO leaving a long tail for sewing.
As the hat widens, lay it flat occasionally to check that the stripes sit evenly. The finished piece should have a noticeably wider lower edge than the bobble end, giving you enough room to place it over the elf’s head.
Curled Hair
Brown yarn creates the elf’s playful curled hair. The multiple stitches worked into each chain make the strip curl naturally, so avoid trying to flatten it before attaching.
Row 1 (Brown Color): Ch 10. Skip the first 2 chs (counts as your first dc). Work 3 dc in the 3rd ch from the hook. Work 4 dc in every single ch stitch down the row.
The piece will curl heavily on its own. Ch 1 and FO, leaving a long tail for sewing.
Note: The supplied video does not give specific stitch counts for the small skin-colored ears. A standard ear variation is to work a magic ring with 4 sc, tighten it into a half-circle, and fasten off with a long sewing tail.

Assemble the Elf
1. Attach the Legs
Stuff the upper portions of both legs, then place them symmetrically against the bottom of the body in the green section, just below the red shirt stripe.
Before sewing, check the elf from the front so both legs sit at the same height. Whipstitch around the edge, catching one stitch of the body and one stitch of the leg. Tie a knot, then push the needle out through the body so the tail can be hidden inside.
2. Sew on the Arms
Position the flattened tops of the arms against the sides of the body, right at the seam between the neck and red stripe.
Sew over the attachment stitches a couple of times so the arms stay secure. Tie a knot and pull the remaining tails into the body. From the front, check that the arms hang at similar heights.
3. Place the Hat
Set the hat securely over the elf’s head and use the long red tail to sew it in place.
For a softer, more natural hat, avoid sewing directly along the entire bottom edge. Instead, insert the needle one row upward and sew between the final two red rounds. This keeps the brim loose so it rests over the head instead of looking firmly attached.
4. Attach the Curled Hair
Tie the starting and ending brown yarn tails together. Decide how far down the forehead you want the hair to sit before making the first stitches.
Sew the curled end directly onto the front of the head. Then take the remaining uncurled chain edge and sew it horizontally across the forehead, keeping it tucked neatly underneath the hat brim.
5. Add the Ears
Lift the hat rim slightly on both sides of the head. Position the small ears horizontally underneath the brim.
Sew each ear firmly by catching one stitch of the head and one stitch of the ear. Check the elf from the front before finishing so the ears sit at matching heights.
6. Embroider the Nose
Use a strand of skin-colored yarn and bring the needle out exactly one round below the eyes. Span 2 stitches horizontally, then loop over this 2-stitch section about 6 times to create a small, rounded nose.
Tie the yarn ends together and pull the knot completely into the head. Gently massage the surrounding plush yarn so the stitches settle into the face.
7. Stitch the Smile
Using the same color yarn as the hair, bring the needle out one round below the nose and create a small horizontal line.
Then dip the needle underneath that straight strand and pull it down slightly one stitch below, securing the center so the mouth curves into a cheerful smile.
8. Add the Eyelashes
Thread a darning needle with a small piece of dark DK-weight yarn. Bring the needle out directly against the outer edge of one eye, then insert it back in one stitch diagonally away.
Pull the yarn firmly enough for it to sink into the plush texture rather than sitting prominently on the surface. Knot and hide the ends deep inside the head.
Finish by gently massaging and plumping the fiberfill around the face. This helps the plush stitches settle back into place after the embroidery and gives the elf its soft, rounded finish.