Want a tiny crochet duck with extra personality? Dress it in a wavy frog hat and mini sling bag for a playful finish that stands out.

Cute details make this little crochet duck especially fun to make. The yellow body, orange beak and feet, expressive eyes, and three-pointed tail give it a cheerful shape, while the crochet frog hat and tiny sling bag turn it into a playful character.
Everything is made from simple amigurumi shapes, so you can build the crochet duck first and then add the accessories separately. You’ll also get clear guidance for stuffing, joining the head and body, placing the facial details, and securing the hat and bag so the finished duck keeps its shape.
Credit Tedzukurida
Materials and Tools
Duck
- 4-ply Milk Cotton yarn in yellow for the body
- 4-ply Milk Cotton yarn in orange for the beak and feet
- 4-ply Milk Cotton yarn in white for the eye details
- 3.00–3.50mm crochet hook
- 9mm safety eyes
- Black sewing thread
- Stitch marker
- Yarn needle
- Scissors
- Fiber fill
Frog Hat and Sling Bag
- 4-ply Milk Cotton yarn in green for the hat
- 4-ply Milk Cotton yarn in grey for the bag
- Pink yarn for the blush details
- Black sewing thread for facial expressions
- 3.00-3.50mm crochet hook
- Yarn needle
- Scissors
- A very small amount of fiber fill

Crochet Abbreviations
MR: Magic Ring
ch: chain
sc: single crochet
slst: slip stitch
inc: increase
dec: decrease
dc: double crochet
BLO: back loop only
[ ] x: repeat the instructions inside the brackets
( ): total number of stitches at the end of the round
Crochet Duck Amigurumi with Frog Hat and Sling Bag
Part 1: Crochet Duck
Head
Work the head in continuous rounds with yellow yarn. Keep a stitch marker at the beginning of each round so you can easily track where each round starts.
Rnd 1: 6 sc in magic ring (6)
Rnd 2: [inc] x 6 (12)
Rnd 3: [sc, inc] x 6 (18)
Rnd 4: [sc, inc, sc] x 6 or [2sc, inc] x 6 (24)
Rnd 5: [3sc, inc] x 6 (30)
Rnd 6: [4sc, inc] x 6 or [2sc, inc, 2sc] x 6 (36)
Rnd 7–12: sc all around (36)
Rnd 13: [sc, dec] x 6 (24)
Rnd 14: [2sc, dec] x 6 (18)
Cut the yellow yarn and fasten off, leaving a long tail for sewing.

Eye Placement
Insert the two 9mm safety eyes between Rnd 8 and Rnd 9. Leave 5 loops between the eyes so they sit evenly across the face.

Body
Continue with yellow yarn for the body. Work in continuous rounds and use a stitch marker to keep track of the beginning.
Rnd 1: 6 sc in magic ring (6)
Rnd 2: [inc] x 6 (12)
Rnd 3: [sc, inc] x 6 (18)
Rnd 4: [2sc, inc] x 6 or [sc, inc, sc] x 6 (24)
Rnd 5: [3sc, inc] x 6 (30)
Rnd 6–8: sc all around (30)
Rnd 9: [3sc, dec] x 6 (24)
Rnd 10: [2sc, dec] x 6 (18)
Cut the yarn and fasten off, leaving a long tail for joining the body to the head.

Before Assembly
Stuff the head and body firmly with fiber fill. Add the stuffing gradually rather than filling everything at once; this makes it easier to keep the rounded shapes even.
Hands or Wings
Make 2 in yellow yarn.
Rnd 1: 4 sc in magic ring (4)
Rnd 2: [inc] x 4 (8)
Rnd 3–5: sc all around (8)
Cut the yarn, leaving a sewing tail, and fasten off. Keep both pieces ready for attachment after the head and body have been joined.

Beak
Work the beak in orange yarn.
Start: ch 4.
Rnd 1: Starting from the 2nd chain from the hook, work 3sc, inc, 2sc.
Rnd 2: sc all around (8)
Cut the yarn, leave a sewing tail, and fasten off.

Feet
Make 2 in orange yarn.
Rnd 1: 4 sc in magic ring (4)
Rnd 2: [inc] x 4 (8)
Rnd 3: sc all around (8)
Fasten off and leave a tail on each foot for sewing.

Tail
Use yellow yarn to make the three-pointed tail.
Row 1: Start with 3 ch → 2 slst → 3 ch, 2 slst → 3 ch, 2 slst.
Fasten off and leave a sewing tail. The three chained points form the small tail shape that will sit at the back of the duck.

Assemble the Duck
Join the Head and Body
Place the bottom opening of the head against the top opening of the body. Sew Rnd 14 of the head to Rnd 10 of the body using the long yarn tails. Work around the opening evenly so the head sits straight rather than leaning forward or backward.
Add the Eye Details
Thread white yarn onto the yarn needle and stitch a small curved line along the outer edge of each black safety eye. Keep both curves similar in size and placement for a balanced expression.
Attach the Wings
Sew one yellow wing to each upper side of the body. Position them so they sit naturally against the sides, with the first hand 5 loops apart from the second hand across the front belly.
Sew on the Beak
Center the orange beak between the lower halves of the safety eyes. Hold it in place first to check the expression, then sew around the edges securely.
Add the Feet
Place the orange feet at the lower front of the body. Check that the duck can sit evenly before sewing them down. If one foot sits higher than the other, adjust its position before making the stitches permanent.
Attach the Tail
Center the three-pointed yellow tail at the lower back of the body and sew it securely in place.

Part 2: Frog Hat and Sling Bag
The accessories are made separately, which makes it easier to finish the duck neatly before adding its character details.
Frog Hat
Use green yarn for the hat.
Rnd 1: 6 sc in magic ring (6)
Rnd 2: [inc] x 6 (12)
Rnd 3: [sc, inc] x 6 (18)
Rnd 4: [2sc, inc] x 6 or [sc, inc, sc] x 6 (24)
Rnd 5: [3sc, inc] x 6 (30)
Rnd 6–7: sc all around (30)

Wavy Brim
Rnd 8: Working in BLO, start with a slst and ch 3. Make 2 dc in the same loop, then 3 dc in the same loop. Continue with 3 dc in each stitch around until the last loop.
The brim is what gives the hat its wavy edge, so keep the stitches evenly worked around the round. Cut the yarn and fasten off, leaving a long green tail for sewing the finished hat to the duck’s head.
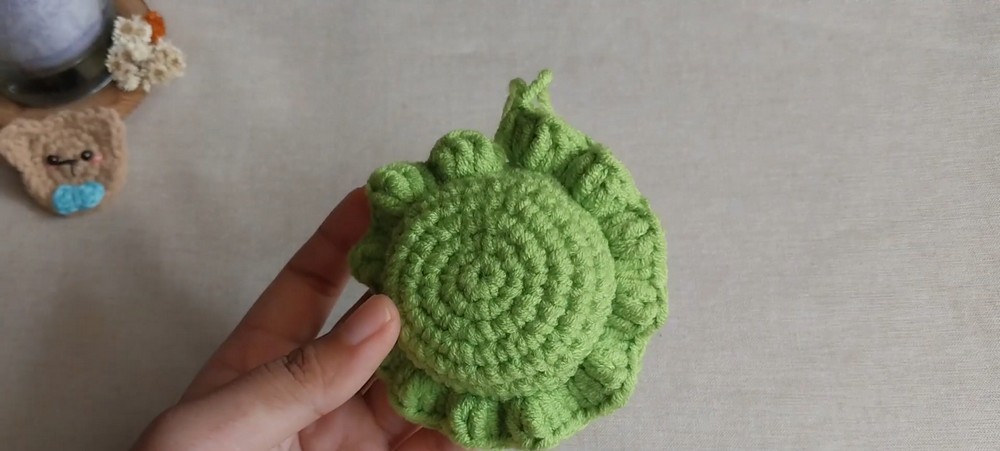
Frog Hat Eyes
Make 2 green eyes.
Rnd 1: 5 sc in magic ring (5)
Rnd 2: [inc] x 5 (10)
Rnd 3: sc all around (10)
Fasten off each eye. Leave a longer tail on the first eye for sewing.
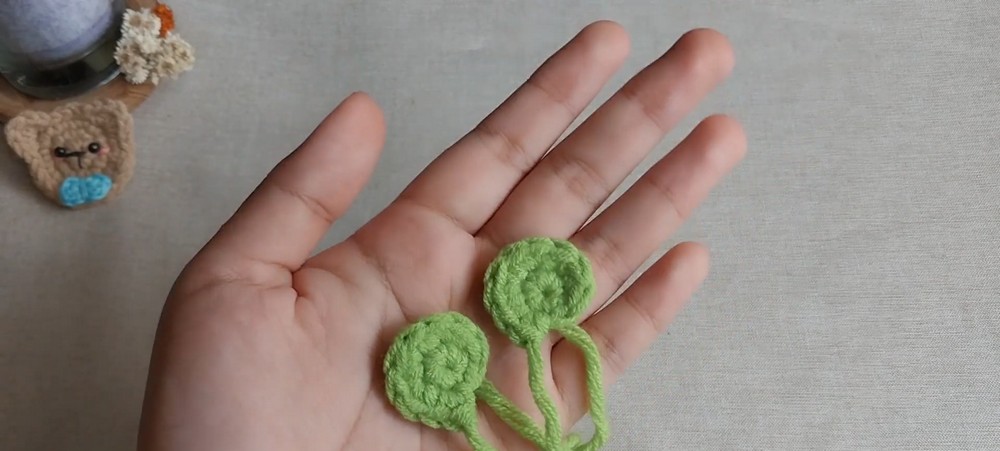
Give the Frog Eyes Their Expression
Place a very small amount of fiber fill inside each green eye. Using black sewing thread, embroider a tiny > < shape onto the front of each eye.
Use pink yarn to add small horizontal lines beneath the black embroidery for the blush.
Sew both completed eyes firmly to the top of the green hat.
Sling Bag
Use grey yarn for the bag.
Start: ch 5.
Rnd 1: Starting in the 2nd chain from the hook, work 4sc, inc, 3sc, inc (10).
Rnd 2–4: [slst, ch 1, 10 sc]. Repeat this exact sequence for 3 joined rounds.
Cut the yarn, leaving a sewing tail, and fasten off.

Sling Bag Strap
Make approximately 33 ch for the strap. Before sewing it down, place it around the duck’s body to check the length. Add or remove chains if needed for a comfortable fit.
Fasten off and sew each end of the strap to opposite sides of the grey bag base.
Add the Bag Detail
Use black sewing thread to embroider a small X at the center front of the grey sling bag.
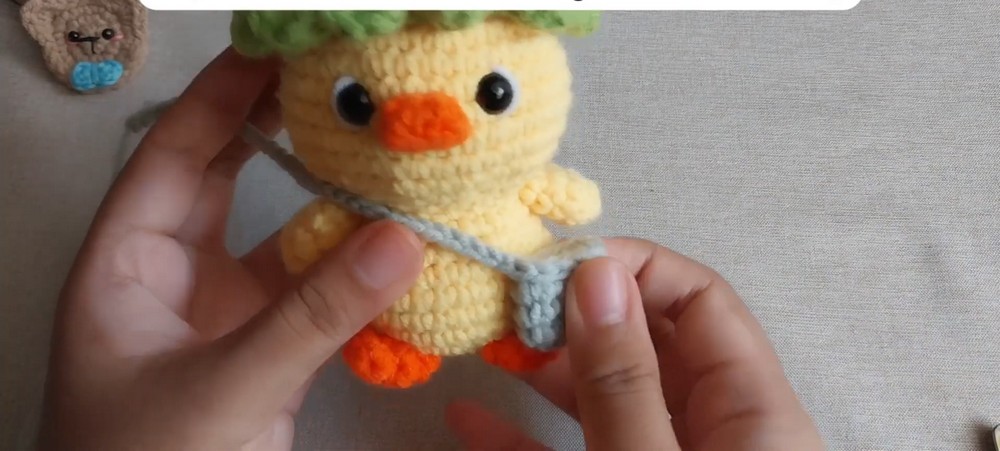
Put the Accessories on the Duck
Place the green frog hat over the duck’s head and adjust it until the brim sits evenly. Use the long green tail from Rnd 8 to sew the hat securely to the head.
Next, place the grey sling bag diagonally across the duck’s body. Let the strap follow the shape of the body rather than pulling it tightly, so the bag remains visible from the front.
With the hat secured and the sling bag positioned diagonally, your little duck is ready to show off its frog-inspired look.
Quick Placement Check
Before trimming your final sewing tails, look at the duck from the front and side:
- The safety eyes should sit evenly between Rnd 8 and Rnd 9.
- The beak should be centered beneath the eyes.
- Both wings should sit at similar heights.
- The feet should allow the duck to sit without tipping.
- The frog eyes should be balanced on top of the hat.
- The sling bag should lie diagonally without covering too much of the duck’s face or belly.
A few minutes spent checking these details can make the finished character look much more balanced.