Want a fluffy holiday crochet baby with tiny stars, rosy cheeks, and a sweet Santa or gingerbread look? Make both versions from one charming pattern.
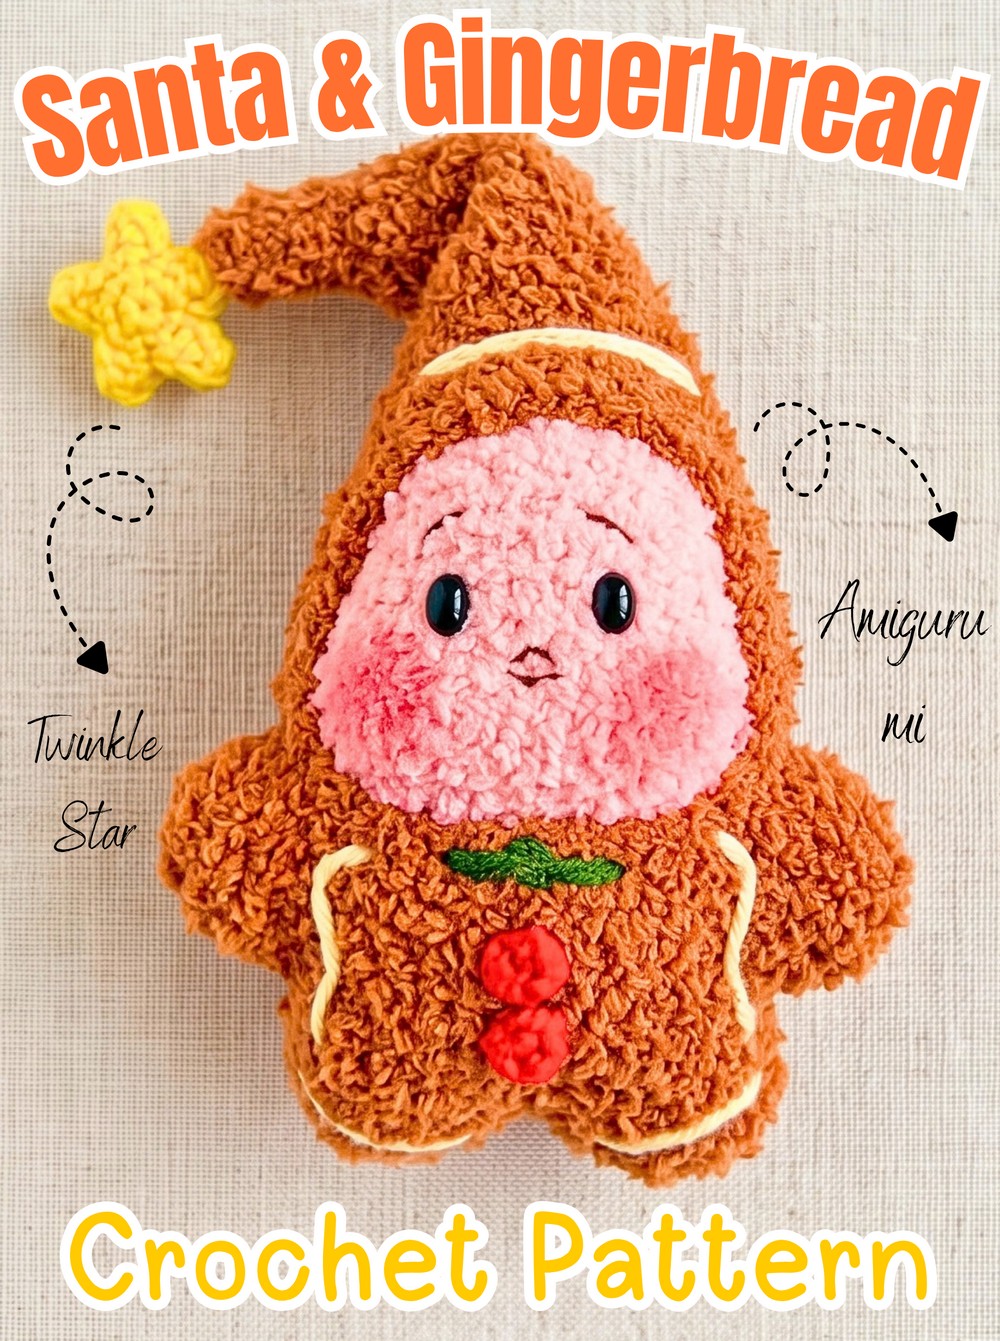
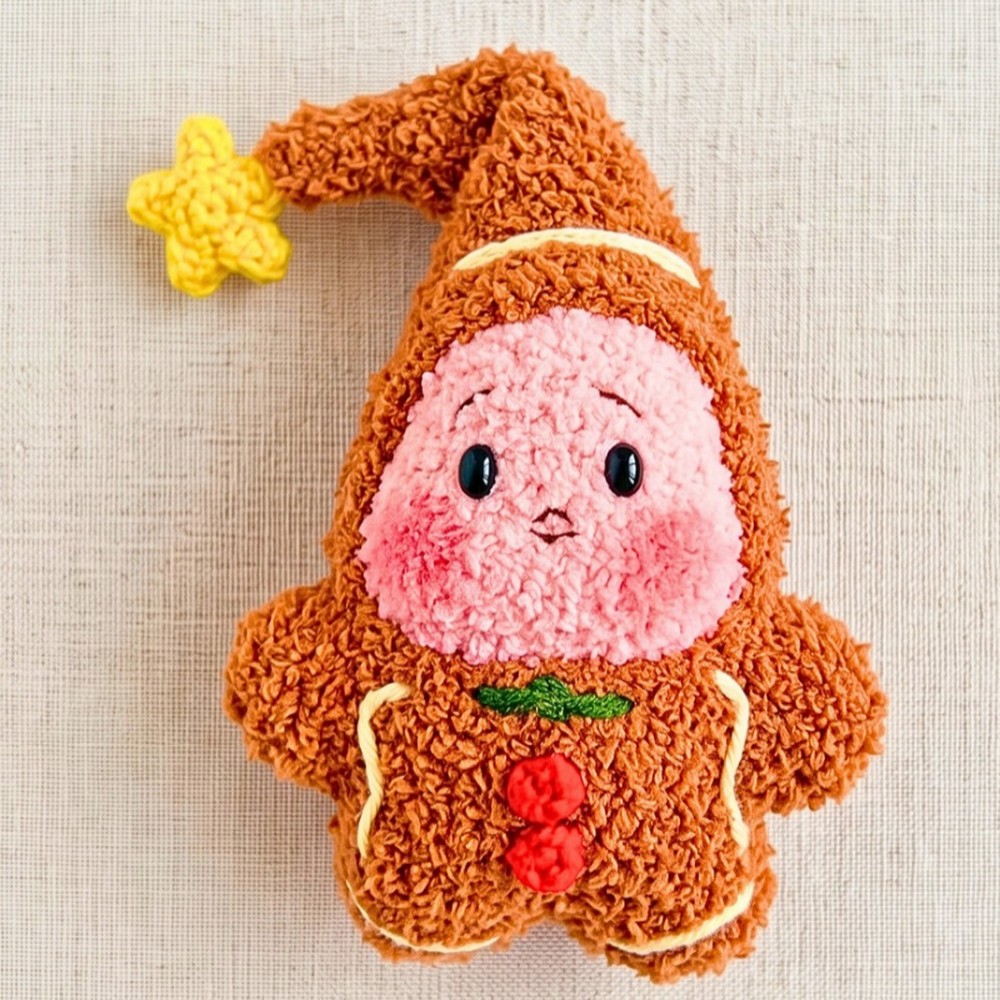
Soft, fluffy yarn gives these little crochet Twinkle Star Babies their cuddly appearance, while the tiny yellow stars held in their hands add an especially playful holiday detail.
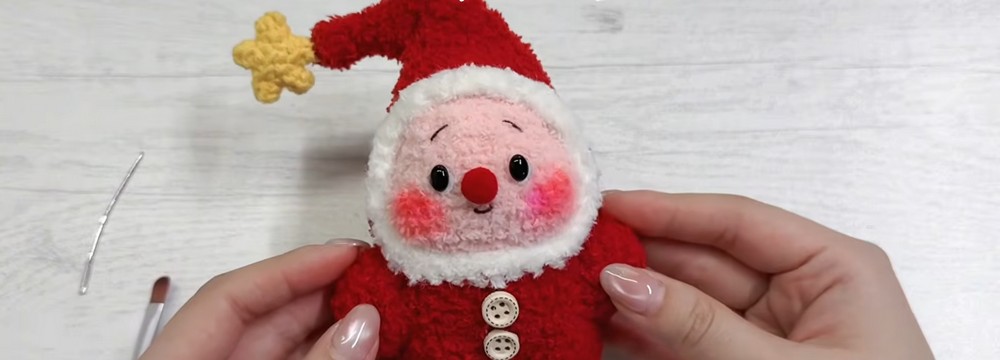
The Santa version pairs pink, red, white, and yellow accents for a cheerful seasonal character, while the crochet gingerbread variation changes the cover to brown and adds colorful icing-style embroidery.
From the rounded head and tiny hands to the shaped star cover and face opening, each section has its own small technique to watch. You’ll work the crochet pieces separately, add just enough stuffing to keep the stars dimensional, shape the lower cover into two legs, and finish with either Santa-inspired facial details or crochet gingerbread decorations.
Credit Gold Yarn
Before You Start
Use tight, even tension throughout the fluffy-yarn pieces so the fiberfill stays hidden. Gauge does not need to be exact for this amigurumi, but loose stitches can leave noticeable gaps between the fuzzy fibers.
The pattern uses two hook sizes: the 2.5 mm hook works with the yellow Milk Cotton stars, while the 3.0 mm hook is used for the fluffy yarn. Keep your stitch marker handy for every circular section, especially where the shaping changes.
Materials & Tools
- Fluffy yarn in white, pink, and red/brown
- Milk Cotton yarn in yellow
- 2.5 mm crochet hook
- 3.0 mm crochet hook
- Fiberfill stuffing
- Flat safety eyes or beads
- White non-woven fabric for eye backing
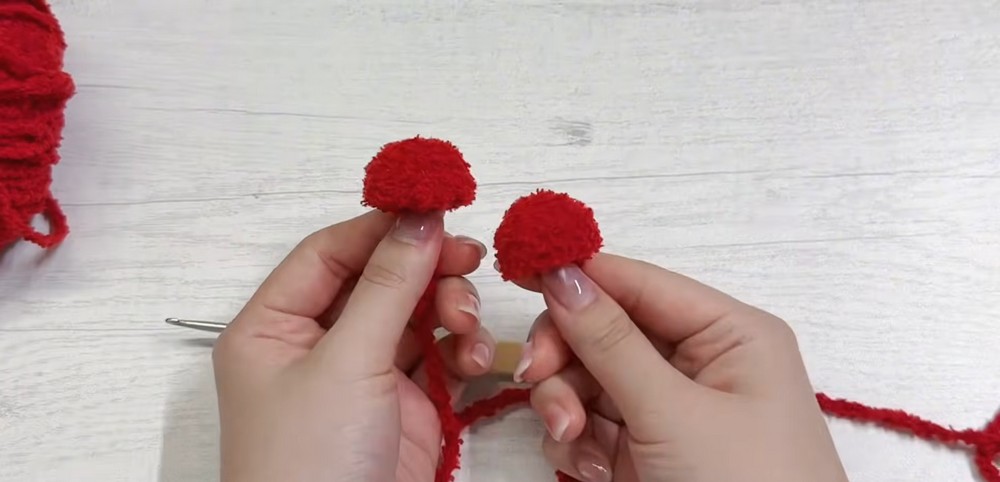
- 10 mm red pom-pom for the Santa nose
- 1-ply brown yarn for facial embroidery
- Yellow and green thread for gingerbread details
- Decorative buttons or pre-crocheted red buttons
- Stitch markers
- Yarn needle
- Scissors
- Craft or hot glue
- Blush for the cheeks
Abbreviations
- MR: Magic Ring
- ch: Chain
- sc: Single Crochet
- hdc: Half Double Crochet
- inc: Increase – 2 sc in the same stitch
- dec: Decrease – single crochet 2 together
- sl st: Slip Stitch
- [ ]: Stitch count at the end of the round
Make the Head First
Keep the first stitch marked throughout the circular rounds. The early increases widen the small starting ring, while the later decreases bring the shape back in before closing.
Round 1: MR, 6 sc, sl st into the first st to join. [6]
Round 2: ch 1, 6 inc. [12]
Round 3: ch 1, (1 sc, 1 inc) x 6. [18]
Round 4: ch 1, (2 sc, 1 inc) x 6. [24]
Rounds 5–7: ch 1, 1 sc in each stitch around. [24]
Round 8: ch 1, 5 sc, 5 inc, 4 sc, 5 inc, 5 sc. [34]
Rounds 9–12: ch 1, 1 sc in each stitch around. [34]
Round 13: ch 1, 5 sc, 5 dec, 4 sc, 5 dec, 5 sc, using the same shaping method to mirror the previous increase areas. [24]
Round 14: ch 1, (2 sc, 1 dec) x 6. [18]
At this point, the head has narrowed enough for stuffing. Add fiberfill firmly so the shape stays rounded, but avoid forcing so much stuffing into the piece that the stitches spread.
Round 15: ch 1, (1 sc, 1 dec) x 6. [12]
Finish: Fasten off, leaving a yarn tail. Thread the tail through the front loops of the remaining 12 stitches and pull tightly to close, then hide the loose end.
Shape check: The finished head should feel full and rounded rather than soft and collapsed. Closing the final 12 stitches after stuffing also gives you a neat base for the facial details later.

Tiny Stars for the Hands
Each hand holds one small yellow star, so make two matching star pieces for each hand. Only a very small amount of stuffing goes between the matching pieces; too much will hide the crisp points.
Round 1: MR, 5 sc, pull to close and sl st into the first st. [5]
Round 2: (ch 3, insert hook into the 2nd ch from hook and make 1 sc, make 1 hdc in the next ch, sl st into the next stitch on the MR base) repeat 5 times to create 5 star points.
Finish: Make a second matching star piece, place the two pieces together, and sew around them, adding a very small amount of fiberfill before completely closing for a lightly raised 3D shape.
Check the five points before securing the final stitches. If one point looks compressed, gently reshape it while the seam is still accessible.

Shape the Twinkle Hands
The hands begin with a small ring and widen slightly before decreasing. Leave a sewing tail at the end so they can be attached to the sides of the cover.
Round 1: MR, 6 sc, sl st to join. [6]
Round 2: ch 1, 6 inc. [12]
Round 3: ch 1, (2 sc, 1 inc) x 4. [16]
Round 4: (6 sc, 1 dec) x 2. [14]
Finish: Fasten off and leave a tail for sewing.
The hands should remain small enough to sit beside the body without overpowering the star cover. The stars are added after the hands have been attached.
Build the Fluffy Star Cover
The red/brown fluffy yarn forms the main cover. The first few rounds create the narrow top point, then the piece gradually widens toward the base.
Round 1: MR, 4 sc, sl st to join. [4]
Rounds 2–3: Continue repeating the pattern of 4 sc to build the top star point. [4]
Round 4: ch 1, (1 sc, 1 inc) x 2. [6]
Round 5: ch 1, 6 sc. [6]
Rounds 6–18: Follow the supplied gradual increase sequence to widen the cover until the base reaches 30 stitches at Round 18. [30 at Round 18]
Because the detailed increase sequence for Rounds 6–18 is not included in the supplied instructions, use the original tutorial’s sequence for these rounds rather than substituting an invented one.
Once Round 18 reaches 30 stitches, the next section changes the circular shape into an opening for the face.
Round 19: ch 1, 22 sc, skip the remaining 8 stitches, and turn your work. [22]
Rounds 20–25: Work back and forth in rows, making 22 sc across each round to create the face opening. [22]
The opening should now be clearly visible rather than closed like the earlier rounds. Keep the 22-stitch edge even because this section will later be joined back into a circle.
Connecting the opening: After Round 25, ch 10 and join directly to the first stitch on the other side with a sl st to form a complete circle again. [32]
Rounds 26–33: 1 sc in each stitch around, including across the chain section. [32]
At this stage, the cover has moved beyond the face opening and is once again being worked in rounds. The 32-stitch count is the key check before separating the lower portion into two legs.

Separate the Two Legs
The 32 stitches are divided into two equal sections of 16 stitches. Work carefully at the point where you connect across the opposite side, because this is what creates the separation.
Rounds 34–35: For the first leg, crochet 8 sc, insert your hook into the opposite stitch to split the piece in half, then crochet another 8 sc around the opening. [16]
Round 36: ch 1, (2 sc, 1 dec) x 4. [12]
Stuff the cover firmly and evenly before closing the leg. Thread the yarn through the front loops of the remaining 12 stitches and pull tightly to close.
Reattach the yarn to the other side and repeat the same leg steps.
Shape check: Both legs should have comparable fullness and size. Work a little fiberfill into each section rather than packing one side heavily, so the finished baby sits evenly.
Add the Snowy Cover Edge
The white fluffy trim gives the face opening a soft, snowy finish.
Trim: Attach white fluffy yarn and crochet a round of single crochets completely around the face opening border.
Work around the full opening so the white edge forms one continuous border. Keep the stitches even enough that the trim does not pull the pink or brown cover inward.

Assemble the Santa Twinkle Baby
Once the head, hands, stars, and cover are finished, place the smaller details before permanently securing everything. This makes it easier to adjust the expression and the position of the hands.
1. Attach the Hands and Stars
Sew the two Twinkle Hands securely to the sides of the cover. Position the stuffed yellow stars directly onto the hands and either sew or glue them in place.
The stars should face outward enough for their five points to remain visible instead of disappearing against the cover.
2. Add the Belly Buttons
Place the decorative buttons down the center of the belly and hot glue them securely. Pre-crocheted red buttons can also be used for the Santa version.
3. Create the Eyes
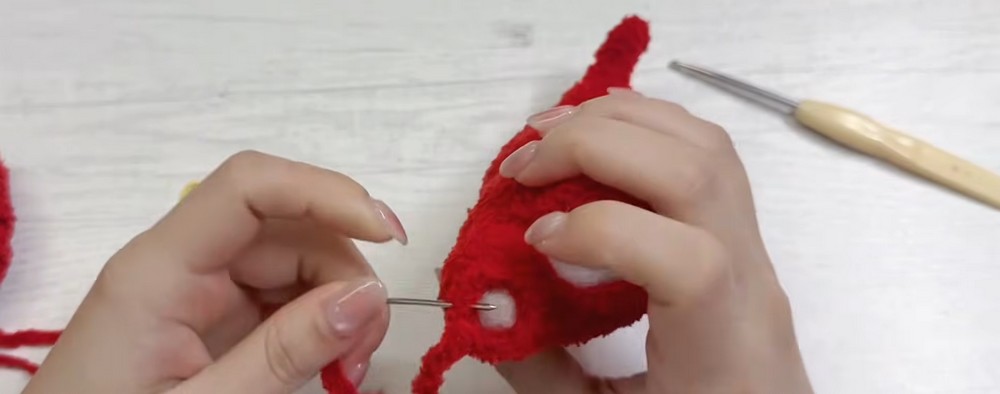
Cut two small crescent shapes from white non-woven fabric. Glue each piece beneath a flat safety eye, then attach the prepared eyes to the pink head.
Check the spacing from the front before the glue sets so the eyes remain level.
4. Finish the Face
Place the 10 mm red pom-pom between the eyes for the nose. Use 1-ply brown yarn to embroider small eyebrows and a delicate smile.
Keep the facial stitches light against the fluffy yarn so the expression stays visible without becoming too heavy.
5. Add Rosy Cheeks
Apply a small touch of blush to both cheeks for the final soft, playful expression.
Turn It Into a Gingerbread Baby
The same basic pieces can become a gingerbread-inspired version simply by changing the cover color and adding a few embroidered details.
Icing-Style Edge
Using yellow thread, embroider a scalloped or dashed icing outline around the edge of the brown cover. Follow the outer shape so the decoration reads as a deliberate gingerbread border.
Green Accents
Use green thread to tie or sew small knots or bows onto the gingerbread suit.
Red Buttons
Attach pre-crocheted red circles down the belly as buttons.
Finish the Face
Attach the eyes and embroider the eyebrows and smile using the same facial method as the Santa version, then add a little blush to the cheeks.

Santa or Gingerbread: Easy Color Swap
The fluffy cover is the easiest place to change the character’s personality. Keep the yellow stars and general shape the same, then choose:
- Pink fluffy yarn: soft Santa-inspired baby
- Rich brown fluffy yarn: gingerbread baby
- Pastel fluffy shades: nursery or spring-inspired variation
- Different decorative buttons: change the belly detail without changing the crochet pattern
The important part is keeping the fluffy yarn tension tight enough that stuffing remains hidden, especially when experimenting with a different yarn color or texture.