Looking for quick crochet turtle gifts? This pocket-sized design combines simple rounds, shaped flippers, colorful shell options, and optional keychain hardware.
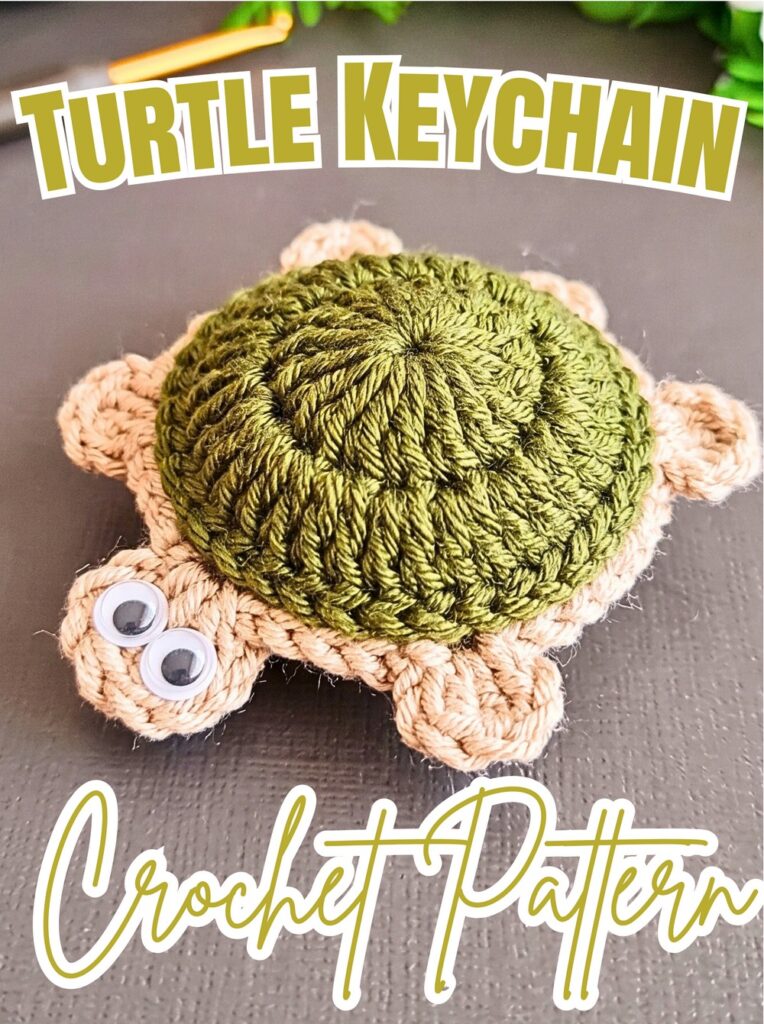
Compact handmade accessories can be especially satisfying when simple shapes come together into something useful. This crochet turtle keeps its form small and manageable, while crochet shaping creates head, flippers, tail, and rounded shell in separate sections.
This crochet tutorial explains each part from underbody and flippers through shell, joining, stuffing, face, and optional keychain attachment. Clear teaching points help you follow each stage without losing track of shape or placement. Let’s begin.
Credit Knitting Life
Materials & Tools
- Yarn: Two contrasting colors:
- Beige/Cream: Underbody and flippers
- Brown, green, dusty orange, or another main shade: Shell
- Crochet Hook: 2.5 mm
- Fiberfill: Polyfill stuffing
- Googly Eyes
- Hot Glue Gun: For attaching googly eyes
- Key Ring Chain: Optional for keychain or bag charm use
Finished Size & Customization
Finished turtle is compact and pocket-sized, making it suitable for keychains, bag charms, small gifts, or tiny play figures.
Try several shell shades such as olive green, warm brown, or soft peach for a colorful group. Leave off keychain hardware when making turtle as plush toy or small play figure.
Pattern Abbreviations & Terminology
- ch: Chain
- sl st: Slip stitch
- dc: Double crochet
- tr: Treble crochet
- st(s): Stitch(es)

Step-by-Step Crochet Instructions
Step 1: Form the Underbody Center
Using beige yarn with a 2.5 mm hook, begin with Magic Ring.
Chain 3, then work 15 dc into ring.
Slip stitch into third chain to join.
Result check: Completed Round 1 should form small circular center. Keep stitches positioned evenly around ring because this circle becomes foundation for underbody.
Step 2: Expand the Underbody
For Round 2, chain 3 and work 1 dc into same stitch.
Continue with 2 dc into every stitch around, creating 30 dc total.
Slip stitch to join.
Increasing every stitch expands circular base evenly and gives enough width for later head and flipper shaping.
Helpful tip: Keep increase placement consistent around round. Even tension will make outer edge easier to shape during next stage.
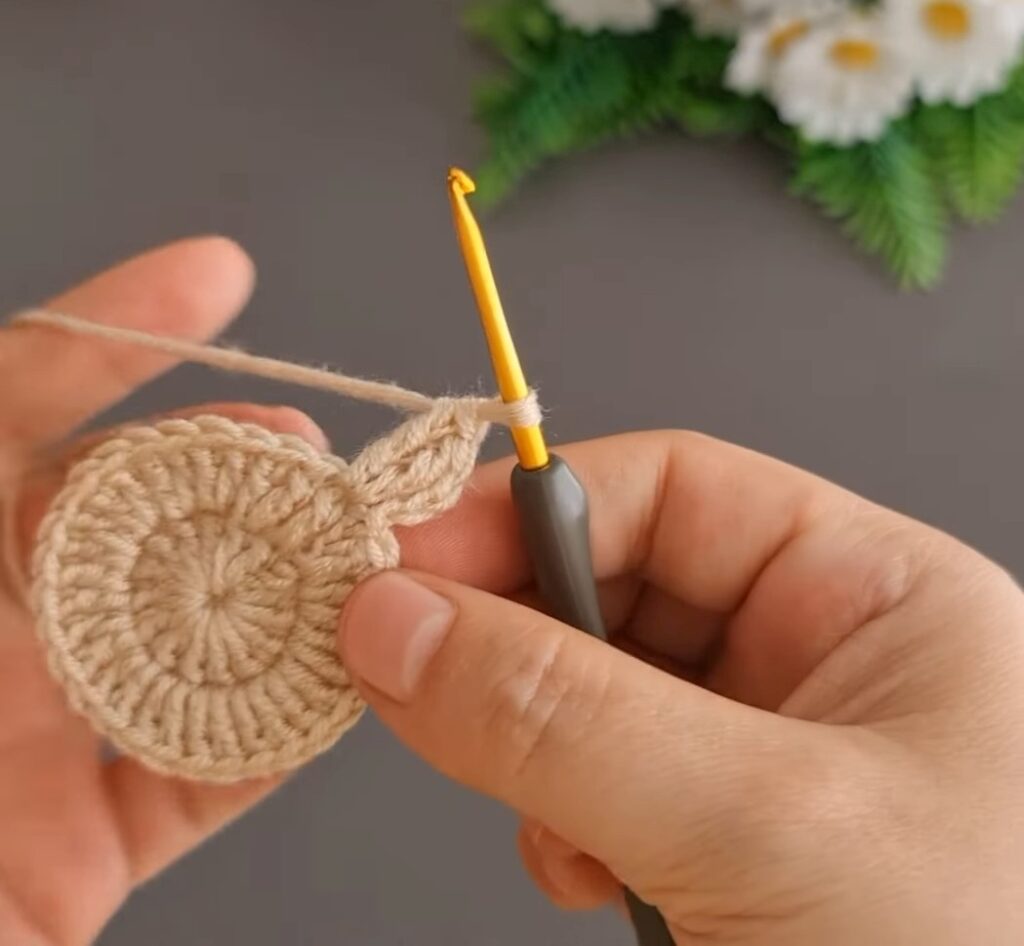
Step 3: Shape Head and First Side
Round 3 introduces turtle silhouette.
Chain 3, then work:
- 3 tr
- 3 dc
into next stitches for head section.
After head shaping, work 4 sl st across next four stitches.
These shorter stitches move work around side of underbody without adding extra height.
Look for: Taller treble stitches should create raised head area, while slip stitches should keep side section lower and flatter.
Step 4: Create Front Flipper
After first side section, make first front flipper: 2 ch, 2 dc, 2 ch, sl st
This short chain-and-stitch combination forms one rounded flipper extending from body edge.
Keep chain loops relaxed enough to form visible shape without pulling surrounding stitches inward.
Step 5: Shape Opposite Side and Back Flipper
Work 5 sl st across next five stitches.
Then form back flipper: 2 ch, 2 dc, 2 ch, sl st
This mirrors first flipper placement across opposite side.
Result check: At this stage, head and two flipper sections should be distinguishable around beige circular underbody.
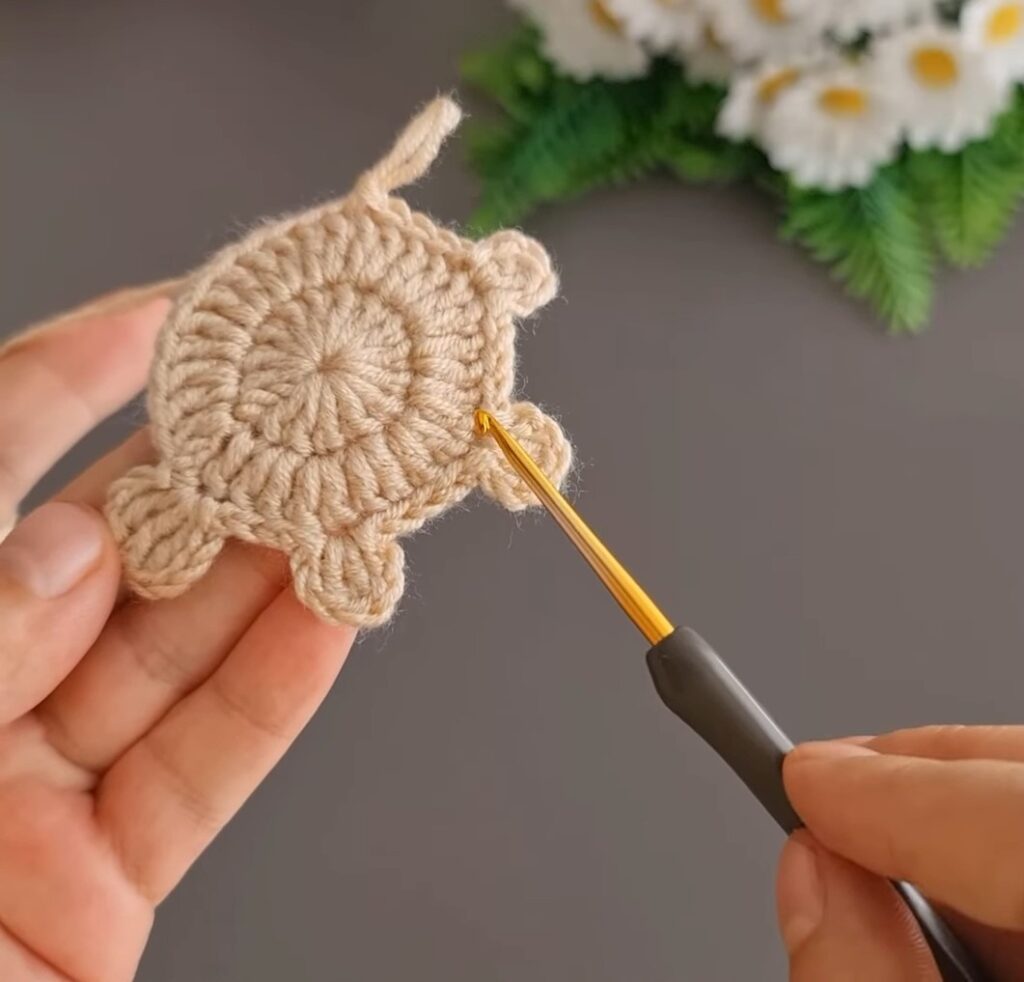
Step 6: Add Tail and Finish Underbody
Work 4 sl st across next four stitches.
For tail/back flipper 2, make: 1 ch, 2 dc, 1 ch, sl st
Complete remaining slip stitches around edge until you reach starting point.
Fasten off, leaving a long yarn tail for assembly.
The shorter chain used here creates smaller tail detail compared with larger front and back flippers.
Step 7: Build Shell Center
Switch to chosen shell-colored yarn.
Create Magic Ring, chain 3, and work 16 dc into ring.
Slip stitch to join.
This shell piece begins separately from underbody, allowing contrasting color to define turtle’s upper surface.
Step 8: Widen Shell for Full Coverage
For Round 2, chain 3 and work 1 dc into same stitch.
Continue with 2 dc into every stitch around.
Slip stitch to join, then fasten off while leaving long yarn tail for assembly.
Check the pieces: Shell should be wider and ready to sit directly over beige underbody, with outer edges positioned to meet during joining.
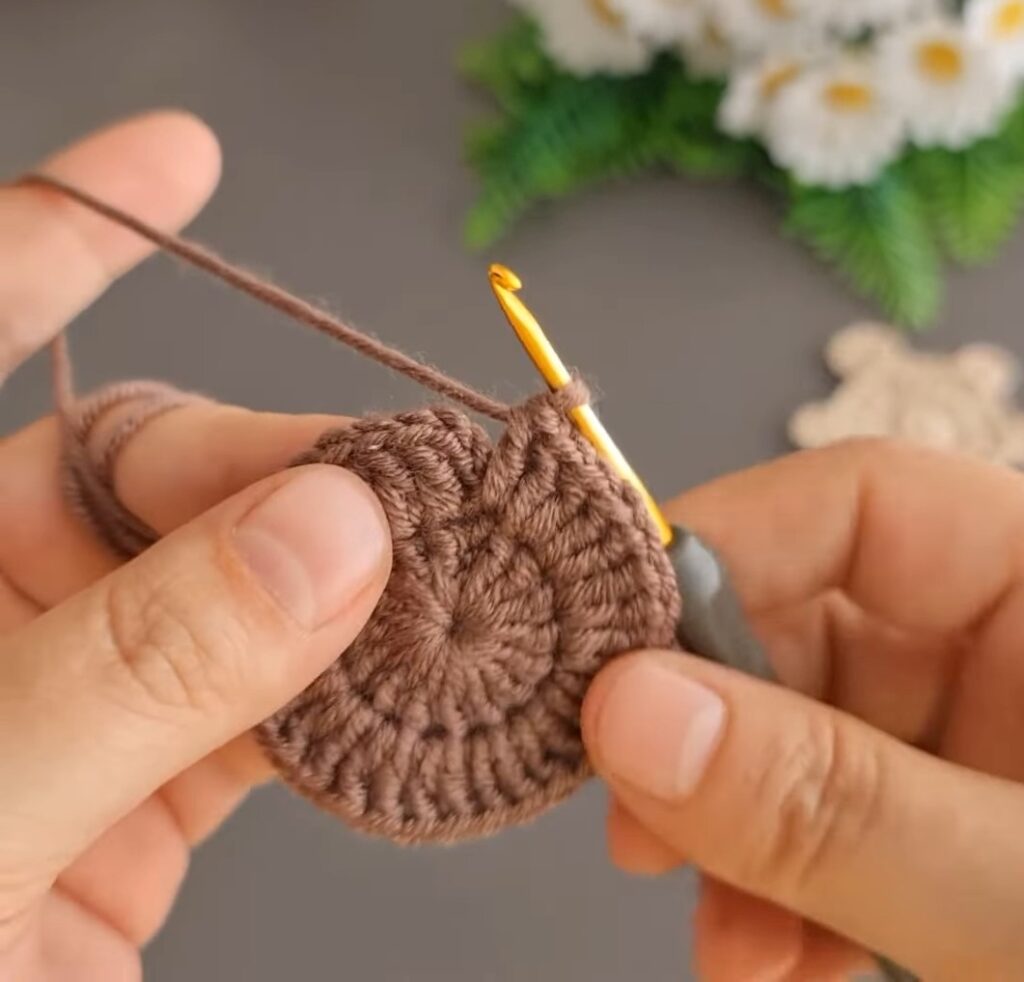
Step 9: Align Shell with Underbody
Place shell directly over beige underbody.
Match outer edges carefully before beginning joining.
Using long shell yarn tail, work slip stitches through both layers simultaneously around circumference.
Work through corresponding edges of shell and underbody so both pieces stay aligned instead of shifting as seam progresses.
Step 10: Add Fiberfill Before Closing Seam
When most of circumference has been joined, pause before closing final section.
Insert a small amount of fiberfill into cavity between shell and underbody.
Add stuffing gradually and distribute it across body rather than creating one concentrated lump.
Result check: Turtle should become gently plump and rounded while shell and underbody remain joined evenly.
Step 11: Seal Remaining Opening
Continue slip-stitching through both layers around remaining edge.
Close final section completely so stuffing remains enclosed.
Fasten and secure yarn once body is fully sealed.
Helpful tip: Check circumference before finishing. If any gap remains, work additional joining stitches so fiberfill cannot escape.
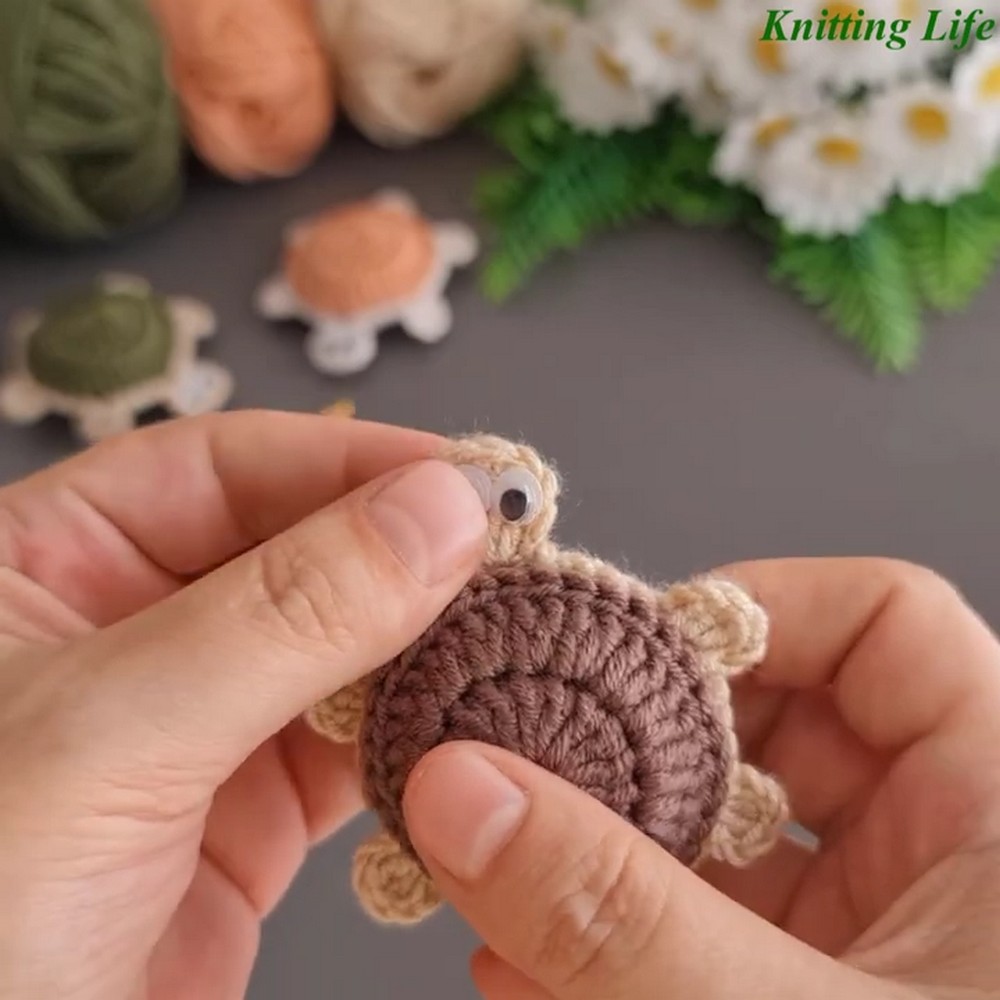
Step 12: Position Turtle’s Face
Use googly eyes to establish turtle expression.
Apply small dots of hot glue to backs of googly eyes, then press them firmly onto head area.
Allow adhesive to secure before handling turtle further.
Placement check: Position both eyes at similar height and spacing so head remains visually balanced.
Step 13: Add Keychain Hardware
For keychain or bag charm use, attach key ring chain securely to top loop.
Check attachment point before adding turtle to keys or bag.
For plush or play-figure use, simply skip this hardware step.
Step 14: Complete and Check Turtle
Give finished turtle one final inspection.
Confirm:
- Shell sits evenly over underbody.
- Head remains clearly defined.
- Front and back flippers extend naturally.
- Tail detail stays visible.
- Fiberfill remains fully enclosed.
- Googly eyes are firmly attached.
- Key ring chain, when used, is secure.
Your pocket-sized crochet turtle is ready to become a small gift, bag charm, keychain, or playful handmade figure.