Crochet potted flowers are a lovely way to bring a splash of color to any space without the need for watering or sunlight. Perfect as decorations for desks, shelves, or windowsills, these charming flowers are always in bloom. They’re simple to make and are a fun way to experiment with crochet while creating something that looks beautiful.

Crochet Potted Flowers For Beginner-Friendly Decoration
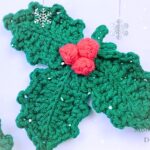
To make these amazing creations, you create small, colorful flowers like daisies or tulips, and pair them with a tiny crocheted pot. The flowers have delicate petals, leaves supported by wire, and a stem wrapped with yarn. These crochet flowers are a wonderful way to practice basic crochet skills, making them a great choice for beginners. Start with these easy, step-by-step flowers, and you’ll have a cheerful decoration in no time.
Credit Hook & Loop Crochet Tutorials
Materials Required
- Yarn: 100% cotton (multiple colors for flowers, and appropriate shades for leaves and pot).
- Polyfill: For stuffing the pot and flowers.
- Glue: Fabric glue for assembly.
- Tapestry needle: For stitching and weaving ends.
- Stitch marker: To keep track of rounds.
- Scissors.
- Two types of iron wire:
- Thin wire: For leaves structure.
- Thick wire: For flower stems.
- Small stones (optional): To add weight and stabilize the pot.

Detailed Step-by-Step Instructions
Below, you’ll find instructions for creating the flower pot, flowers, petals, leaves, stem, and assembly.
1. The Daisy Flower
Round 1:
- Make a magic ring.
- Inside the ring, crochet 7 single crochets (sc).
- Join with a slip stitch (sl st).
Round 2:
- Chain 1.
- Crochet 1 sc in each stitch around (total: 7 stitches).
- Sl st, then cut the yarn and weave in the ends.
- Make another circle using green yarn.
The Petals:
- Join the green and white circles together using white yarn.
- Chain 2, then crochet 2 double crochet (dc) in the same stitch.
- Chain 2, and make a sl st in the next stitch.
- Repeat: Chain 2, 2 dc, chain 2, sl st in the next stitch—all around until you complete 8 petals.
- End with a sl st. Cut and set aside.

2. Daisy Flower Leaf
Step 1:
- Make a slip knot.
- Chain 9.
Step 2:
- Insert your hook into the second chain from your hook and pull up a loop.
- Place thin wire between the yarn and back of your hook. Crochet as follows:
- 1 single crochet (sc).
- 1 half double crochet (hdc) in the next 2 stitches.
- 1 double crochet (dc) in the next 2 stitches.
- 1 hdc in the next 2 stitches.
- 1 sc in the last stitch.
Step 3:
- Bend the wire into a leaf shape.
- Chain 2, sl st through 2 loops to secure.
- Repeat the pattern for the other side:
- 1 sc, 2 hdc, 2 dc, 2 hdc, 1 sc.
- Sl st. Chain 1 and cut the yarn, leaving a long tail.
Step 4:
- Wrap the remaining yarn around the wire to cover.
- Repeat to make a second leaf.

3. Daisy Stem
- Take the thicker wire for the stem.
- Wrap yarn tightly around the wire until fully covered.
4. The Tulip Flower
Round 1:
- Start with a magic ring.
- Crochet 8 single crochets (sc) inside the ring.
- Sl st.
Round 2:
- Chain 1.
- Place a stitch marker in the first stitch.
- Crochet 1 sc in the same stitch, then 2 sc in each stitch around (total: 16 stitches).
- Sl st.
Round 3:
- Chain 1.
- Crochet 1 sc, then 2 sc all around (total: 24 stitches).
Round 4:
- Crochet 1 sc into the next 12 stitches, then 2 sc in the next stitch.
- 1 sc in the last 12 stitches (total: 26 stitches).
Rounds 5-9:
- Crochet 1 sc in each stitch around (total: 26 stitches per round).
- End with sl st.
Step 2:
- Cut the yarn, leaving a long tail.
- Stuff the tulip with polyfill.
- Count 13 stitches and use a needle to close the flower from inside to outside.
For the tulip leaf pattern, refer to the link provided in the original video description.

5. The Flower Pot
Round 1:
- Make a magic ring.
- Chain 1, crochet 8 single crochets (sc).
- Sl st into the first sc.
Round 2:
- Chain 1.
- Crochet 2 sc into each stitch around (total: 16 stitches).
- Sl st where you placed the stitch marker.
Round 3:
- Chain 1.
- Crochet 1 sc, then 2 sc all around (total: 24 stitches).
- Sl st.
Round 4:
- Chain 1.
- Crochet 1 sc, 1 sc, 2 sc all around (total: 32 stitches).
Round 5 (Base Shape):
- Sl st. Chain 1.
- Crochet 1 sc in each stitch (black loop only) (total: 32 stitches).
Rounds 6-13:
- Crochet 1 sc in each stitch (both loops).
Round 14:
- Crochet 1 sc into each stitch (front loop only).
- Then: 1 sc into each stitch (back loop only).
- Sl st, chain 1, and cut the yarn.
Step 2:
- Crochet the soil by repeating Rounds 1-4 of the pot pattern.
Step 3 (Final Assembly):
- Leave a small hole in the soil to insert the flower later.
- Before closing the pot with the soil, add small stones for weight and stability.
- Stuff the pot and sew the soil securely under the folded edge.

6. Assembly
- Insert the flower stems into the soil through the hole.
- Add your leaves near the stem.
- Adjust and secure all pieces with glue (if necessary).
Final Decorations
- Decorate your home with the potted flowers.
- Optional: Customize by adding more leaves, colors, or arranging differently!