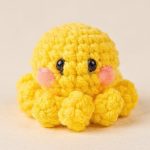
Want a tiny ocean-inspired accessory? This crochet whale keychain combines a rounded lavender body, contrasting white belly, and playful fins to create a pocket-sized charm for bags or keys.

Small amigurumi pieces are lovely for using colorful yarn and making thoughtful handmade gifts. This crochet whale has a rounded body and little tail flukes, while contrasting belly yarn helps define its shape without adding complicated crochet pieces to sew on separately.
This step-by-step crochet guide covers the body rounds, tail flukes, side fins, and white belly, then moves on to stuffing and facial details. You’ll also learn how to neatly close the opening and attach keychain hardware for a cute, portable, ocean-themed crochet accessory.
Credit ghazi craft
Materials & Tools
- Yarn: Polyester yarn in two contrasting colors
- Main color, such as purple or lavender, for the body
- Accent color, such as white, for the belly
- Crochet hook: 2.5 mm, or a size suitable for your yarn
- Polyester fiberfill: For stuffing
- Safety eyes: Small doll eyes with secure backings
- Tapestry needle: For closing the body and weaving in ends
- Scissors
- Stitch markers: For tracking rounds
- Keychain ring and chain attachment
- Optional: Hot glue gun for suitable decorative attachments
Finished Size & Customization
The finished whale is approximately 2–3 inches long, making it a compact charm for a backpack, handbag, keys, or a handmade gift.
- Choose soft colors: Lavender, mint, and baby pink pair nicely with a white belly.
- Reverse the colors: Use white for the main body and a bright accent shade for the belly.
- Add eye highlights: Embroider tiny white highlights beside the eyes with thin embroidery floss for a more expressive look.
Pattern Abbreviations & Terminology
- MR: Magic ring
- sc: Single crochet
- inc: Increase; work 2 single crochets in the same stitch
- dec: Decrease; crochet 2 stitches together
- hdc: Half double crochet
- slst: Slip stitch
- ch: Chain
- FLO: Front loop only
- [xx]: Stitch count at the end of the round

Step-by-Step Crochet Whale Keychain Pattern
Step 1: Start the Main Body – Rounds 1-3
Using your main color and 2.5 mm hook, begin with a magic ring.
- Round 1: Chain 1, then work 6 sc into the magic ring. Join with a slst and chain 1. [6 sts]
- Round 2: Work an increase in every stitch around. Join with a slst and chain 1. [12 sts]
- Round 3: Repeat (1 sc, 1 inc) 6 times around. Join with a slst and chain 1. [18 sts]
Keep the center of the magic ring closed tightly so stuffing will not show through later. Place a stitch marker at the beginning of each round if you find it difficult to track your position.

Step 2: Increase the Body Width – Rounds 4-5
Continue shaping the rounded body.
- Round 4: Repeat (1 sc, 1 inc, 1 sc) 6 times around. Join with a slst and chain 1. [24 sts]
- Round 5: Repeat (1 inc, 3 sc) 6 times around. Join with a slst and chain 1. [30 sts]
Check your stitch count before continuing. Keeping the increases consistent helps form a smooth body rather than an uneven or pointed shape.
Step 3: Work the Straight Body Rounds – Rounds 6-9
For Rounds 6-9, work 1 sc in every stitch around, maintaining 30 stitches per round. Join each round with a slst and chain 1 as specified.
These rounds build the main body length without further increases. Keep the tension even so the whale has enough room for stuffing while retaining a compact shape.
Before moving on, check that the body looks rounded and that the stitches are not too loose. The tail and fins will be formed from the body edge in the next stage.

Step 4: Create the Tail Flukes – Round 10
At the tail section, work 1 slst into the next stitch.
First tail fluke
- Chain 6.
- Skip the first chain.
- Work 1 sc, 3 hdc, and 1 sc down the chain.
- Finish with a slst as described in the supplied instructions.
Second tail fluke
- Chain 6 again.
- Skip the first chain.
- Work 1 sc, 3 hdc, and 1 sc down the chain.
- Work a slst into the same base stitch as specified.
Secure the tail section with a slst. Arrange both flukes so they spread apart rather than lying directly on top of each other.

Step 5: Form the Side Fins
Continue along the body edge to create the two side fins using front loops only where specified.
- Work 6 sc normally along the body.
- In FLO, work 1 slst, chain 2, 2 hdc in the next stitch, and 1 slst.
- Work 14 sc normally along the body.
- In FLO, work 1 slst, chain 2, 2 hdc in the next stitch, and 1 slst.
- Work the final 6 sc normally.
Chain 1, cut the main color yarn, and fasten off.
The fins should sit on opposite sides of the whale. Arrange them so they are visible when viewed from above or from the side, and make sure neither fin is pulled too tightly against the body.
Step 6: Attach the White Belly Yarn
Switch to the accent color, such as white, and attach it to the open body edge. Chain 1 as specified.
- Round 11: Work 30 sc around the opening. Join with a slst and chain 1. [30 sts]
- Round 12: Repeat (3 sc, 1 dec) 6 times around. Join with a slst and chain 1. [24 sts]
- Round 13: Repeat (1 sc, 1 dec, 1 sc) 6 times around. Join with a slst and chain 1. [18 sts]
Keep the white section centered along the underside of the whale. Check the color placement as you work so the belly remains visible instead of shifting toward one side.

Step 7: Insert the Safety Eyes
Place the safety eyes between Rounds 8 and 9, approximately 6 stitches apart, on the upper sides of the head.
Before fastening the backs, look at the whale from the front and both sides to check that the eyes are level. A small difference in placement can change the expression noticeably.
Secure the backs firmly inside the body. If this keychain is intended for a young child, avoid safety eyes and other small detachable parts; embroidered eyes are a safer alternative.

Step 8: Stuff the Whale
Stuff the remaining opening with polyester fiberfill. Start with small amounts and distribute the stuffing evenly toward the rounded front and sides.
Aim for a smooth, plump shape without stretching the stitches. Overstuffing can make the fabric look strained and make the final decreases harder to complete.
Check that the white belly remains centered and that the body holds its rounded shape before closing the opening.
Step 9: Close the Body – Rounds 14-15
Continue decreasing to close the remaining opening.
- Round 14: Repeat (1 sc, 1 dec) 6 times around. Join with a slst and chain 1. [12 sts]
- Round 15: Repeat (1 dec) 6 times around. [6 sts]
The supplied instructions specify a joined round for Round 14 but do not mention joining at the end of Round 15. Follow the original tutorial if it demonstrates a different finishing method.
Cut the yarn, leaving a short tail. Thread it onto your tapestry needle and pass the needle through the front loops of the final 6 stitches. Pull gently to close the opening, then secure the yarn and hide the tail inside the body.

Step 10: Attach the Keychain Hardware
Attach the keychain ring and chain through the secure top loops of the whale’s body. Choose a firm attachment point so the charm hangs evenly and the hardware does not pull through the crochet stitches during use.
Check that the ring is fully closed and that the whale hangs with its face and belly visible. Weave in any remaining yarn ends, then do a final inspection of the tail, fins, eyes, and attachment point.
Your mini crochet whale keychain is ready to decorate a bag, add personality to a set of keys, or become a small handmade gift.