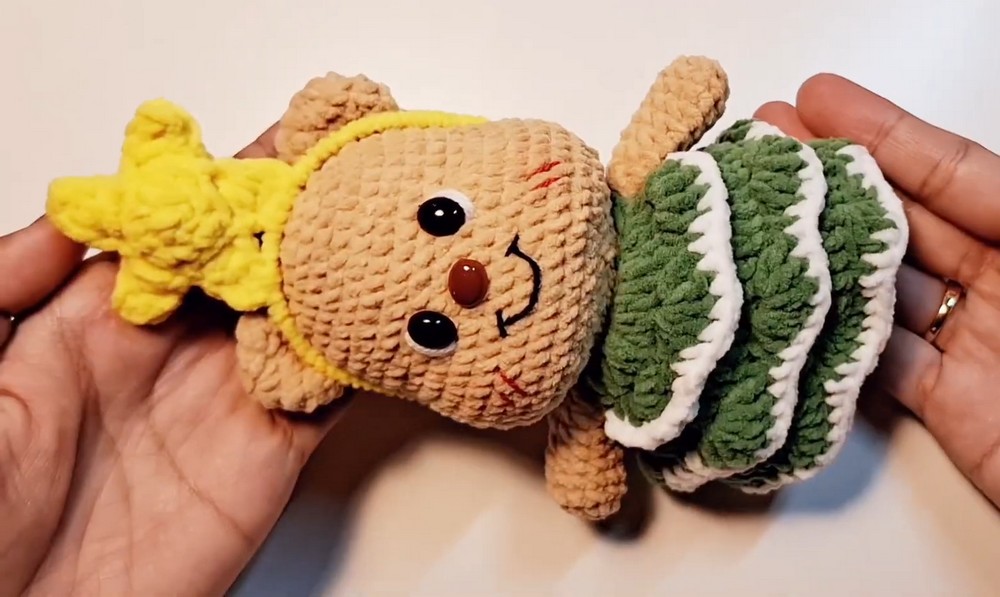
Need a festive outfit for a tiny crochet bear? This miniature Christmas dress adds snowy layered ruffles and a puffy star headband for an instantly cheerful finish.
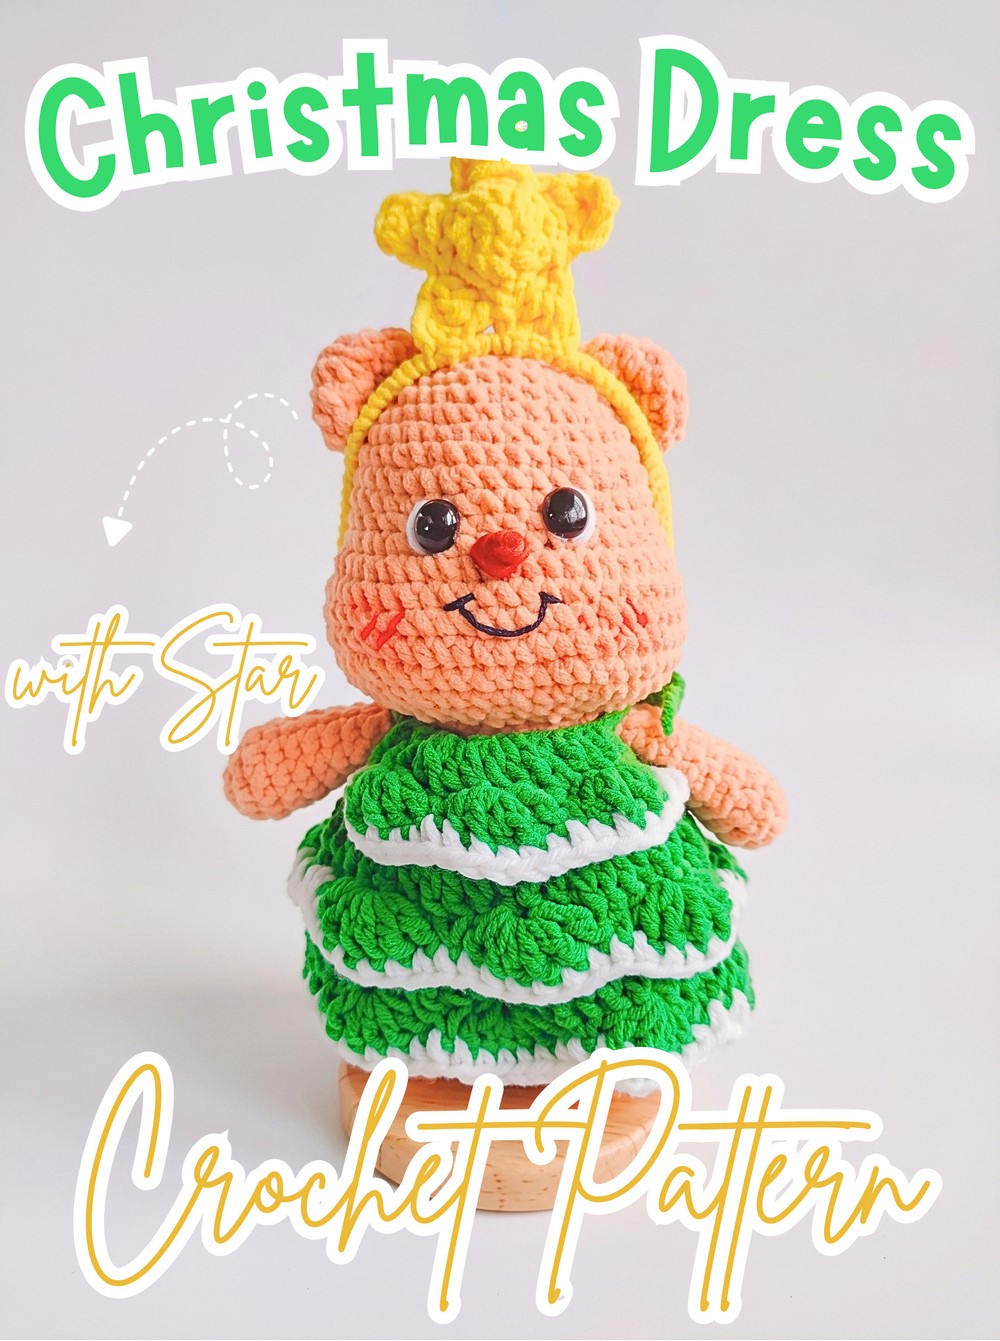
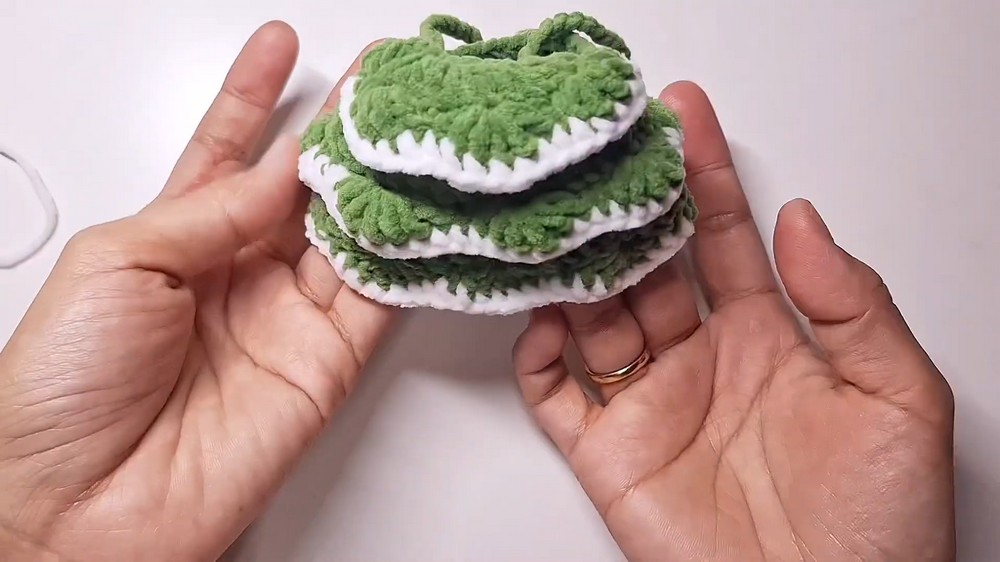
Festive ruffles turn this tiny crochet dress into a little Christmas outfit, with green layers edged in white to create a snow-covered look. The matching star headband completes the set, while the back ties make it easy to fit the dress neatly around a miniature crochet bear.
Sized around an 8-chain body section with 23-chain ties on either side, the crochet dress can be adjusted simply by changing the strap length. The tutorial also shows how the ruffles are built from different rounds, where to find the unworked loops for each layer, and how to make and attach the stuffed star without losing its shape.
Credit Nida Catty Official
Materials & Tools
- Green yarn: For the dress and headband
- White yarn: For the snowy ruffle trim
- 4/0 crochet hook: 2.5 mm
- Stitch markers
- Scissors
- Tapestry needle
- Small amount of polyester fiberfill
- Craft wire or pipe cleaner for the headband
- Craft glue
Finished Size & Customization
The dress is designed specifically for a miniature crochet bear rather than a standard human garment. The center body section is 8 chains wide, while the two tie straps are 23 chains long in the original pattern.
If your bear needs longer ties, simply increase the number of chains on either side of the 8-chain center section. You can also change the green and white combination for different festive themes while keeping the same basic dress shape.
Abbreviations
- ch: Chain
- sc: Single Crochet
- hdc: Half Double Crochet
- dc: Double Crochet
- sl st: Slip Stitch
- inc: Increase – 2 sc in the same stitch
- dc inc: Double Crochet Increase – 2 dc in the same stitch
- BLO: Back Loop Only
- FLO: Front Loop Only
- MR: Magic Ring

Crochet the Dress Body
The dress begins with one long foundation chain that is divided into 23 chains for the first tie, 8 chains for the body, and 23 chains for the second tie. Marking these sections before crocheting helps prevent accidentally working into the wrong part of the chain.
Foundation Chain: With Green yarn, ch 54.
Shape the Body
Row 1: Count 24th chain from the hook and place a stitch marker there; place another marker on the 31st chain to identify the 8-chain body section; insert hook into the 24th chain, attach Green yarn, ch 3 (counts as first dc), place a marker in the 3rd chain, work 1 dc into the same stitch, then work 1 dc inc in each of the next 7 chains across the body section for 8 sets of 2 dc (16 dc total); ch 21, then sl st to the top of the initial ch-3 to form the body circle.
The first 23 chains become the first tie, while the 8 marked chains form the center body. The second set of 23 chains becomes the opposite tie. After the 21-chain section is joined, you should have the small circular opening that will sit around the bear.
Round 2: Ch 3 and place a stitch marker in the 3rd chain; working in BLO, dc in the next 15 sts along the curved body section, then dc in each of the 21 chains; sl st to the top of the initial ch-3 to join (36 dc).
Working into the chain section now brings the entire dress body into one continuous round. Take care not to skip the chain stitches here, because they form part of the circumference.
Round 3: Ch 3 and place a stitch marker in the 3rd chain; work 5 dc, 1 dc inc around for 6 repeats; sl st to the top of the initial ch-3 to join (42 dc).
The increases spread the body outward. By the end of this round, the dress should have a slightly wider shape than it did in Round 2.
Round 4: Ch 3 and place a stitch marker in the 3rd chain; working in BLO, dc in every stitch around; sl st to the top of the initial ch-3 to join (42 dc).
The BLO round is important because it leaves the unused front loops visible on the front of the fabric. Those loops will later be used to attach the middle ruffle.
Round 5: Ch 3 and place a stitch marker in the 3rd chain; working through both loops normally, dc in every stitch around; sl st to the top of the initial ch-3 to join (42 dc).
At this point, the main dress body is complete. The next rounds add the layered skirt details rather than increasing the basic circumference.
Add the Snowy Skirt Ruffles
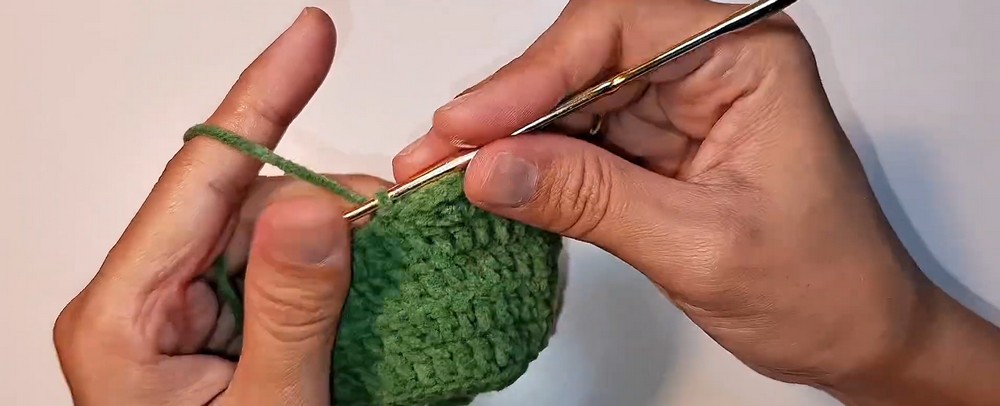
The ruffles are worked from different rounds of the dress rather than all from the final edge. Keep the distinction between unworked front loops and the current working stitches in mind: Round 7 attaches to Round 4’s unused loops, while Round 8 attaches to Round 2’s unused loops.
Bottom Ruffle – Round 6
Round 6: Ch 1, sl st into the first dc; skip 2 sts, work 6 dc in the next st, skip 2 sts, sl st into the next st; repeat (skip 2, 6 dc in one st, skip 2, sl st) around the entire hem; on the final sl st, drop Green and pull through White to change colors, keeping Green attached and pulled snug.
The six double crochets gathered into one stitch create each scalloped section. The slip stitch between scallops pulls the fabric back in and creates the valley between the fuller sections.
Add the White Snow Trim
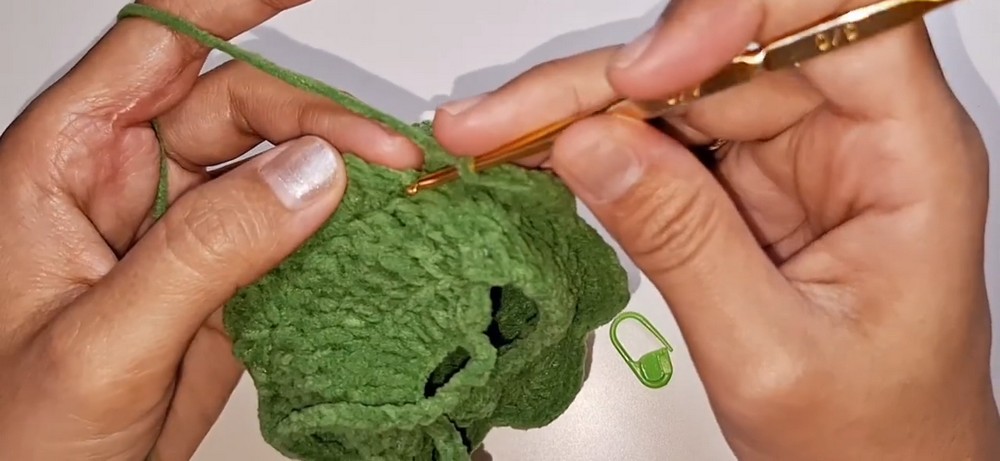
Bottom White Trim: With White, ch 1; work 1 sc into the spaces between the dc stitches across each scallop, then sc directly over the previous-round sl st when you reach each valley; continue around, sl st to the first sc to close, cut White, and weave in the ends.
Working over the valleys as well as between the dc stitches keeps the white edging continuous instead of leaving gaps between the snowy sections.
Middle Ruffle – Round 7
Round 7: Attach Green to the unworked front loops of Round 4; ch 1, sl st into the first stitch, skip 2 sts, work 6 dc in the next st, skip 2 sts, sl st into the next st; repeat this scallop sequence around; change to White on the final sl st.
These front loops are the reason Round 4 was worked in BLO. If you cannot immediately see them, look for the unused loops running along the front of the dress just above the lower ruffle.
Middle White Trim: With White, ch 1; sc between each dc across all scallops, working a sc over each valley sl st as before; sl st to close, cut the yarn, and weave in the ends.
Once finished, the second ruffle should sit above the bottom layer, giving the skirt its stacked, pine-tree-like appearance.

Top Ruffle – Round 8
Round 8: Attach Green to the unworked front loops of Round 2; ch 1, sl st into the first stitch, skip 1 st, work 5 dc in the next st, skip 2 sts, sl st into the next st; repeat (skip 1, 5 dc, skip 2, sl st) around; change to White on the final sl st.
This upper ruffle uses 5 dc instead of 6, and its spacing differs from the lower layers. Follow the stitch placement carefully rather than copying the previous ruffle automatically.
Top White Trim: With White, ch 1; sc between each dc across the scallops, working over each valley sl st; sl st to close, cut the yarn, and weave in the ends.
With all three layers finished, the skirt should have three distinct green scalloped tiers with white edging, creating the snowy Christmas effect.
Make the Star Headband
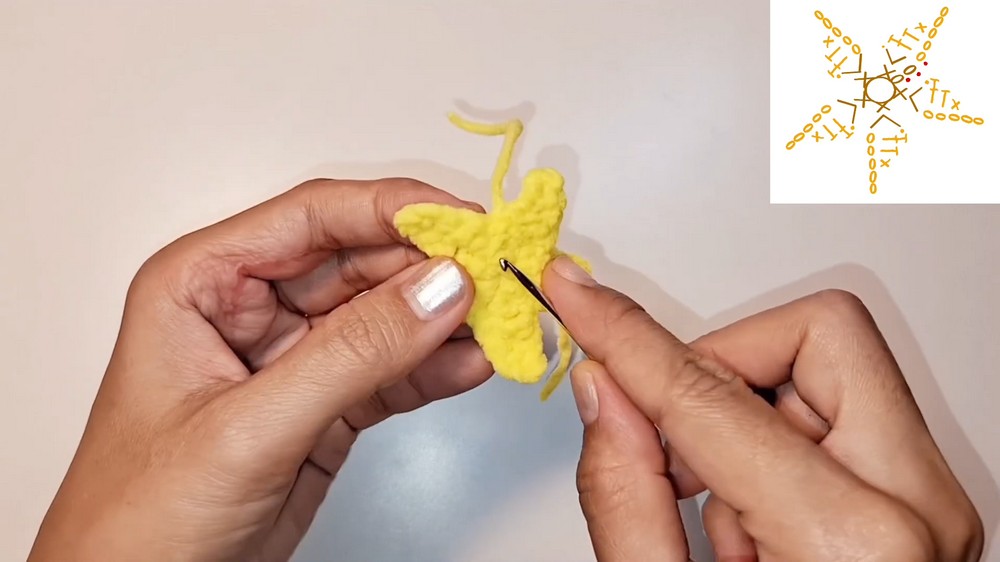
Make 2 identical stars in Green. Each star starts as a tiny circle and then uses chain spaces to form five narrow points.
Round 1: With Green yarn, make a MR, ch 1, work 5 sc into the ring, then sl st into the first sc to join; pull the starting tail tight.
Round 2: Ch 1, work 1 inc in every stitch around (10 sc).
Now, Round 3: Ch 5, sc into the 3rd ch from the hook, hdc into the next ch, dc into the final ch, skip 1 stitch on the base round, and sl st into the next stitch; repeat (ch 5, sc, hdc, dc, skip 1 st, sl st) until all 5 points are complete, joining with slip stitches into base stitches 2, 4, 6, 8, and 10.
Each chain-5 section forms one point. The sc, hdc, and dc gradually increase the height toward the tip, while the skipped base stitch and following slip stitch bring you back down before the next point begins.
After the fifth point, sl st into the first ch-1 space, cut the yarn, and leave a long tail for sewing.
Make the second star in exactly the same way.
Stuff the Star
Place the two star pieces back-to-back so their matching sides face outward.
Using the long yarn tail from one star, whipstitch around the edges of both pieces. When only the final point remains open, place a tiny amount of polyester fiberfill into the center.
Do not overstuff the star. The goal is simply to lift the two layers slightly and give the star a puffy appearance while allowing the five points to remain clearly defined.
Finish sewing the last opening closed and keep the remaining yarn tail attached because it will be needed to secure the star to the headband.
Make the Green Headband
Measure craft wire around your bear’s head to determine the appropriate curve, then cut the wire to size. If using a pipe cleaner, simply cut it to the required length.
Apply a thin layer of craft glue along the wire. Wrap Green yarn tightly around the entire length, keeping the wraps close together so no metal remains visible.
Allow the glue to secure the yarn wrapping before moving on to the star. The covered wire should follow the bear’s head comfortably rather than forming a completely flat strip.
Attach the Star
Place the stuffed star at the center of the wrapped headband.
Use the remaining long yarn tail from the star to sew it firmly onto the wire. Pass the needle back and forth between the lower points of the star and around the covered wire until the star feels securely attached.
For a cleaner finish, pass the needle through the center of the stuffed star before cutting the yarn flush so the remaining tail disappears inside the star.
Dress the Bear
Slip the finished dress onto the miniature bear and bring the two 23-chain straps around the back. Tie them into a neat bow, adjusting the tension so the dress sits securely without pulling the body section out of shape.
Place the matching star headband around the bear’s head and check that the star sits centrally.
The completed outfit should show three snowy green ruffle layers, a softly stuffed green star above the head, and adjustable ties at the back. If the dress feels loose or tight, the easiest adjustment is to change the strap length rather than altering the ruffle rounds.
Your miniature crochet Christmas outfit is ready for its festive finishing touch: a tiny bear dressed in layered snowy ruffles with a matching puffy star headband.